
Related Manuals for EMPHASER EA1800D


Summary of Contents for EMPHASER EA1800D
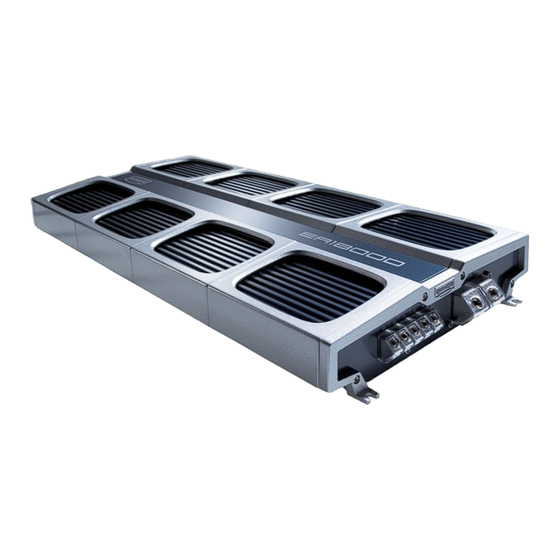
- Page 1 EA1350D EA1350D EA1 1 3 0D D EA1800D EA1800D EA1 1 800D D CLASS-D MONO AMPLIFIERS InstallatIon & operatIng Manual eInbau- & bedIenungsanleItung...
-
Page 2: Table Of Contents
Contents Page desIgn Features ConneCtIons & Controls Front panel ConneCtIons & Controls rear panel ConneCtIons speaKer IMpedanCe & poWer WIre InFo aMplIFIer MountIng WIre routIng MaIn poWer WIres rCa & reMote WIres loudspeaKer WIres Master/slaVe ConneCtIon sCHeMatIC general ConneCtIon sCHeMatIC CrossoVer adJustMents loWpass CrossoVer FreQuenCY adJustMent subsonIC HIgHpass CrossoVer adJustMent... - Page 3 InHalt Seite teCHnIsCHer auFbau / MerKMale ansCHlÜsse & bedIenungseleMente 18-20 2.1. eIngÄnge & FunKtIonen aM Front panel 18-19 eIngÄnge aM rear panel lautspreCHer-IMpedanZ & poWerKabel InFo Montage des VerstÄrKers VerKabelung / eleKtrIsCHer ansCHluss Haupt-stroMKabel CInCH- & reMote Kabel lautspreCHerKabel Master/slaVe ansCHluss-sCHeMa generelles ansCHluss-sCHeMa eInstellung der FreQuenZWeICHe tIeFpass trennFreQuenZ eInstellung...
-
Page 4: Important Notice
To maximize the performance of this amplifier and your car audio system install, we recommend that you acquaint yourself thoroughly with all capabilities and features of this EMPHASER amplifier. Please read this manual carefully, before attempting the installation and retain this manual and your purchasing / installation receipts for future reference. -
Page 5: Design Features
■ 4 / 2 / 1 oHM load stabIlItY: This EMPHASER amplifier works totally stable into impe- dance loads down to 1.0 ohms. The high damping factor guarantees full control over the connected subwoofer system. -
Page 6: Connections & Controls
Phase control potentiometer for the relative phase adjustment of the subwoofer(s) connected to the amplifier output terminals rCa For Master/slaVe operatIon RCA output to connect another class-D amplifier EA1350D/EA1800D sWItCH For Master/slaVe operatIon Telephone jack input socket for connection with the dash-mounted low-pass level remote unit reMote loW pass leVel port... - Page 7 2 3 4 3 5 6 7 8 9 bl rear panel ea1800d 2 3 4 3 5 6 7 8 9 bl...
-
Page 9: Speaker Impedance & Power Wire Info
Before you proceed to install this EMPHASER amplifier, it is recommended to map out the complete audio system and the respective wiring required. Consider all additional electrical requirements and accessories, such as power cables, interconnect cables etc., to complete this install. -
Page 10: Wire Routing
4. WIre routIng 4.1 MAIN POWER WIRES Run the positive main power cable („+12 V“) directly from the positive terminal of the car battery to the amplifier. For protection of your car audio system against electrical fire hazards, resulting from a short-circuit of the main power cable to chassis ground a main fuse holder must be inserted within the first 30 cm of the positive main power cable. -
Page 12: General Connection Schematic
4.5 GENERAL CONNECTION SCHEMATIC... -
Page 13: Crossover Adjustments
Now turn all input gain controls of the installed amplifiers anti-clockwise to their minimum positions and start with the EA1350D/EA1800D, that drives the subwoofer system! The low pass level remote control – if installed in your system configuration - should be set at a low position, so there is enough headroom to turn up the bass volume later on. -
Page 14: Phase-Shift Adjustment
5.4 PHASE-SHIFT ADJuSTMENT The phase shift function of the EA1350D/EA1800D can not be deactivated, as it is permanently in the signal chain. The phase-shift control enables you to match the acoustical phase relations of subwoofer and the speaker system playing in the front doors. The target is, that both speaker systems, normally separated by aprox. - Page 16 Herzlichen Glückwunsch! Wir danken Ihnen, dass Sie sich zum kauf dieses EA1350D/EA1800D Verst�rkers von EMPHASER EA1350D/EA1800D Verst�rkers von EMPHASER Verst�rkers von EMPHASER entschieden haben. Damit Sie die Wiedergabequalit�t und die Leistungsf�higkeit Ihres Verst�rkers voll ausschöpfen kön- nen, möchten wir Sie bitten, sich eingehend mit den Möglichkeiten und technischen Features dieses Verst�rkers vertraut zu machen.
-
Page 17: Technischer Aufbau/Merkmale
■ IntegrIerter pHase-sHIFt: Dieser Verst�rker verfügt über einen elektronischen Phase-Shift, der es ermöglicht die Phase des Ausgangssignals von 0 bis 180° einzustellen. ■ Master – slaVe betrIeb: Zwei EA1350D/EA1800D Verst�rker können mit einem Cinchkabel zu einer Master-Slave Einheit zusammengeschlossen werden. -
Page 18: Anschlüsse & Bedienungselemente
Regelpoti zum Einstellen der Phase des Ausgangs-Signals CInCH-buCHse Master/slaVe Ausgangsbuchse/Eingangsbuchse, zum Verbinden von zwei EA1350D/EA1800D, die im Master/Slave Betrieb konfiguriert und betrieben werden sollen sCHalter FÜr Master / slaVe betrIeb Schiebeschalter für die Festelegung der Arbeitsweise der Endstufe, als Master- oder als Slave Amp. - Page 19 2 3 4 3 5 6 7 8 9 bl rear panel ea1800d 2 3 4 3 5 6 7 8 9 bl...
-
Page 21: Lautsprecher-Impedanz & Powerkabel Info
2.3 LAuTSPRECHER IMPEDANZ �� POWERkABEL INFO Die W�rmekapazit�t der kühlrippen dieser Endstufe wurde bei dieser Verst�rker-Serie für niederohmige Lasten ausgelegt. Die minimale Abschlussimpedanz der EA1350D/EA1800D steht unten und darf nicht unterschritten werden! Beachten Sie nachfolgende Empfehlungen: EA1350D/EA1800D 1 Ohm mono ➡... -
Page 22: Verkabelung/Elektrischer Anschluss
4. VerKabelung/eleKtrIsCHer ansCHluss Halten Sie den Verst�rker an den gewünschten Ort und markieren Sie mit einem geeigneten Filzstift die Bohrposition der Befestigungslöcher. Mit der gebotenen Vorsicht bohren Sie nun die angezeichneten Löcher mit einem 2,5 oder 3 mm Bohrer. aCHtung: Die Endstufe darf niemals direkt auf die Fahrzeugmasse des kfz’s geschraubt werden! Verwenden Sie die beigelegten Gummi-Isolatoren um die Endstufe(n) von der Fahrzeugmasse isoliert zu montieren. -
Page 24: Generelles Anschluss-Schema
4.5 GENERELLES ANSCHLuSS-SCHEMA... -
Page 25: Einstellung Der Frequenzweiche
Fader/Balance in die Mittel (Neutral) Position gebracht werden. Die Loudnessfunktion ist auch zu deaktivieren. Drehen Sie den Input GAIN Regler an der EA1350D/EA1800D im Gegenuhrzeigersinn auf die Minimumposition. Zuerst wird immer der Pegelabgleich des kanalpaares am Verst�rker vorgenom- men, welches das Subwoofersystem antreibt! Stellen Sie den Lautst�rkeregler Ihres Steuerger�tes auf ca. -
Page 26: Phase-Shift Einstellung
Wenn zwei oder mehrere EA1350D/EA1800D Endstufen in einem Systemkonzept zum Einsatz kommen – diese aber NICHT im Master-Slave Betrieb verwendet werden – müssen die Phase-Shift Regler von ALLEN EA1350D/EA1800D’s entweder auf links oder rechtsanschlag stehen. Ansonsten ergibt sich durch einen Phasenversatz eventuell eine Auslöschung der Basssignale!!!! -
Page 27: Technical Specifications
6. teCHnIsCHe speZIFIKatIonen ea1350d Class-d Mono VerstÄrKer 520W x 1 @ 4 Ohm (< 1.0% THD / 14.4V) 850W x 1 @ 2 Ohm (< 1.0% THD / 14.4V) 1200W x 1 @ 1 Ohm (< 1.0% THD / 14.4V) 1 Ohm stabil Full-MOS-FET Class-D Verst�rker Master / Slave Betrieb möglich... - Page 28 6. teCHnIsCHe speZIFIKatIonen ea1800d Class-d Mono VerstÄrKer 870W x 1 @ 4 Ohm (< 1.0% THD / 14.4V) 1600W x 1 @ 2 Ohm (< 1.0% THD / 14.4V) 2200W x 1 @ 1 Ohm (< 1.0% THD / 14.4V) 1 Ohm stabil Full-MOS-FET Class-D Verst�rker...
-
Page 30: Limited Warranty
Should your EMPHASER product require warranty service, please return it to the retailer from whom it was purchased or the distributor in your country. Please do not send any product to EMPHASER Inc. u.S.A. Should you have difficulty in finding an authorized EMPHASER service center, details are available from your local distributor. -
Page 31: Warranty Card
Installation date: Inspected and approved by: eMpHaser Inc., Wyoming, Michigan, u.s.a. Exclusive distributor for Europe �� Asia ACR, Br�ndli �� Vögeli AG, Bohrturmweg 1, CH-5330 Zurzach, Switzerland Phone: (+41) (0)56 269 64 64, Fax: (+41) (0)56 269 64 65, mail@acr.ch, www.acr.ch... - Page 32 EA1350D EA1350D EA1 1 3 0D D EA1800D EA1800D EA1 1 800D D Emphaser Inc., Wyoming, Michigan, U.S.A.
Need help?
Do you have a question about the EA1800D and is the answer not in the manual?
Questions and answers