Table of Contents
Advertisement
Advertisement
Table of Contents

Related Manuals for Dynex DX-DPF7-10


Summary of Contents for Dynex DX-DPF7-10
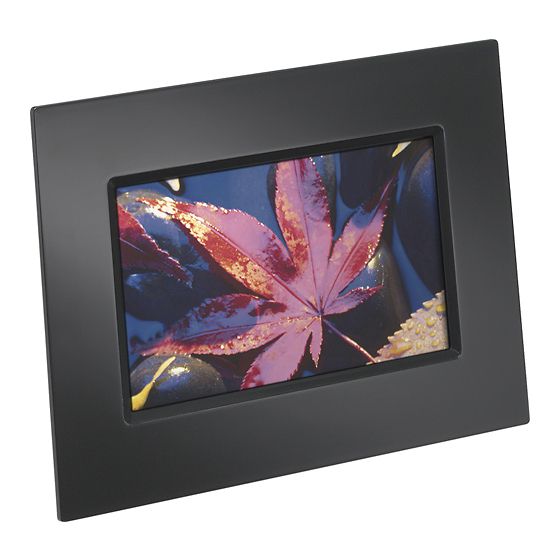
- Page 1 7” Digital Picture Frame DX-DPF7-10 U S E R G U I D E...
-
Page 2: Table Of Contents
Troubleshooting .............17 Specifications ............19 Legal notices ............19 90-day limited warranty .........21 Introduction Congratulations on your purchase of this Dynex 7” Digital Picture Frame. Your DX-DPF7-10 is designed for reliable and trouble-free performance. Important safety instructions 1 Read these instructions. 2 Keep these instructions. - Page 3 Important safety instructions 6 Clean only with a dry cloth. 7 Do not block any ventilation openings. Install in accordance with the manufacturer's instructions. 8 Do not install near any heat sources such as radiators, heat registers, stoves, or other devices (including amplifiers) that produce heat.
-
Page 4: Features
Features 15 Batteries should not be exposed to excessive heat such as sunshine, fire, or the like. Caution: Danger of explosion if the battery is incorrectly replaced. Replace only with the same or equivalent type. Features Package contents: • Digital picture frame •... - Page 5 Features Button Description MODE/ENTER In picture mode, press to toggle between slideshow, browse, and thumbnail views. In menu mode, press to confirm a selection. EXIT Press to enter the Main menu. On the Main menu, press to enter the Card Selection screen. COPY/DELETE/ Press to copy a picture from an inserted memory (up)
- Page 6 Features Side views Slot/Port/Jack Description Memory card slot Insert an SD, SDHC, MMC, MS, or xD memory card (not provided) into this slot to view pictures. USB port Insert a USB flash drive (not provided) into this port. DC 5 V jack Plug the AC adapter (provided) into this jack to provide power to your digital picture frame.
-
Page 7: Remote Control
Features Remote control Button Description MENU Press to enter the Setup Menu screen. EXIT Press to return to the Main menu. On the Main menu, press to enter the Card Selection screen. -
Page 8: Setting Up Your Digital Picture Frame
Setting up your digital picture frame Button Description (prev), (next), Press (prev) to navigate left in the on-screen (up), (down)/ menus or to go to the previous picture. ROTATE Press (next) to navigate right in the on-screen menus or to go to the next picture. Press (up) to navigate up in the on-screen menus. -
Page 9: Setting Up Your Digital Picture Frame
Setting up your digital picture frame Warning: There is a danger of explosion if the battery is not replaced correctly. Replace with the same or equivalent type battery. To install a remote control battery: 1 Turn the remote control over to the back side. 2 Push the release tab to the right and pull the battery tray out of the remote control. - Page 10 Setting up your digital picture frame 4 Slide the battery tray back into the remote control until it clicks into place. Warnings: • Store the battery in a place where children cannot reach it. If a child accidently swallows the battery, consult a doctor immediately.
- Page 11 Setting up your digital picture frame Making connections Connecting the AC adapter Make sure that the AC power outlet matches the AC adapter’s power specifications (100-240 V ~, 50/60 Hz) prior to plugging in the adapter. To connect the AC adapter: 1 Complete all other connections.
- Page 12 Setting up your digital picture frame Positioning your digital picture frame Your digital picture frame has a built-in stand. The stand can be rotated to support the frame in either a horizontal or a vertical position. Make sure that the stand is rotated to a position indicated on the back of the frame in order to ensure stability.
- Page 13 Setting up your digital picture frame Configuring your digital picture frame To configure your digital picture frame: 1 Press EXIT. The Main menu opens. 2 Press to highlight the SETTING icon, then press MODE/ENTER. The Setup menu opens. 3 Press to highlight an option, then press , or MODE/ENTER to confirm.
- Page 14 Setting up your digital picture frame • Brightness–Adjust Brightness from -3 to +3. • Sleep Time–Set your digital picture frame to turn off automatically after a set period of time. • Slide Show Time–Adjusts the interval between pictures changing in a slideshow. Options are 5 Seconds, 10 Seconds, 30 Seconds, 60 Seconds, 60 Minutes, 24 Hours, and Off.
-
Page 15: Using Your Digital Picture Frame
Using your digital picture frame Using your digital picture frame Starting a picture slideshow To start a picture slide show: 1 Power on the frame. A slideshow of pictures will immediately begin. If no memory card or USB device has been inserted, the slideshow will be of pictures stored in the frame's internal memory. - Page 16 Using your digital picture frame 5 Press MODE/ENTER again in BROWSE mode to display THUMBNAIL mode. Thumbnail-sized pictures appear on the screen in a table. 6 Press to highlight a thumbnail. , or 7 Press MODE/ENTER to display the picture. 8 To switch to a different memory device, press EXIT twice from SLIDESHOW, BROWSE or THUMBNAIL modes.
-
Page 17: Troubleshooting
Troubleshooting To delete pictures from internal memory: 1 Remove any card or USB memory device you have inserted in the frame. 2 Locate the picture you wish to delete in SLIDESHOW or BROWSE mode, then press COPY/DEL. A message asks if you want to delete the picture. - Page 18 Troubleshooting Problem Solution The frame displays some Higher resolution pictures load more slowly. Try pictures slower and some reducing the size of your images using picture editing pictures faster. software (not included) or setting your camera to take pictures at a lower resolution. See your camera's operating manual for details on how to reduce the resolution of images taken.
-
Page 19: Specifications
Specifications Specifications Picture format JPEG Panel size 7 inch Memory card formats SD, SDHC, xD, Memory Stick™, and USB flash drives Power source AC adapter (5V DC) Power consumption < 5 W Operating temperature 41~95°F (5~35°C) Weight 1.0 lb. (0.45 kg) Dimensions (W ×... -
Page 20: Specifications
Legal notices which can be determined by turning the equipment off and on, the user is encouraged to try to correct the interference by one or more of the following measures: • Reorient or relocate the receiving antenna. • Increase the separation between the equipment and receiver. •... -
Page 21: 90-Day Limited Warranty
Products and parts replaced under this warranty become the property of Dynex and are not returned to you. If service of Products and parts are required after the Warranty Period expires, you must pay all labor and parts charges. - Page 22 • Damage due to incorrect operation or maintenance • Connection to an incorrect voltage supply • Attempted repair by anyone other than a facility authorized by Dynex to service the Product • Products sold as is or with all faults •...
- Page 23 7601 Penn Avenue South, Richfield, Minnesota, U.S.A. 55423-3645 © 2009 Best Buy Enterprise Services, Inc. All rights reserved. DYNEX is a trademark of Best Buy Enterprise Services, Inc. Registered in some countries. All other products and brand names are trademarks...
- Page 24 7601 Penn Ave. South, Richfield, MN 55423 U.S.A. © 2009 Best Buy Enterprise Services, Inc. All rights reserved. DYNEX is a trademark of Best Buy Enterprise Services, Inc. Registered in ENGLISH some countries. All other products and brand names are trademarks of their 09-0442 respective owners.
Need help?
Do you have a question about the DX-DPF7-10 and is the answer not in the manual?
Questions and answers