
Related Manuals for GMC DP250LS


Summary of Contents for GMC DP250LS
- Page 1 1/3 HP 5 SPEED DRILL PRESS WITH REDEYE ® DP250LS INSTRUCTION MANUAL Black Magenta Cyan Yellow Code: DP250LS Date: 071120 Edition: 05 Op: DCR...
-
Page 2: Table Of Contents
Contents Warranty Introduction Environmental protection Description of symbols Specifications Safety rules for laser lights General safety instructions Additional safety rules for drill presses Unpacking Required tools Assembly time Components Know your product Assembly Adjusting the table height Adjusting the table angle Installing and removing drill bits Setting the drilling depth Changing the speed of the drill press... -
Page 3: Introduction
is a Warranty claim, spare part or user information, please phone our Help Line for an immediate response. Phone 1300 880 001 in Australia or 0800 445 721 in New Zealand. Introduction Your new GMC power tool will more than satisfy your expectations. -
Page 4: Safety Rules For Laser Lights
Safety rules for laser lights The laser light/laser radiation used in the GMC REDEYE system is Class 2 with maximum 1mW power and 650nm wavelengths. These lasers do not normally present an optical hazard, although staring at the beam may cause flash blindness. -
Page 5: Additional Safety Rules For Drill Presses
7. Dress correctly. Do not wear loose clothing or jewellery. They can be caught in moving parts. Rubber gloves and non-slip footwear are recommended when working outdoors. If you have long hair, wear a protective hair covering. 8. Use safety accessories. Safety glasses and earmuffs should always be worn. - Page 6 5. Always keep hands out of the path of the drill bit. Avoid awkward hand positions where a sudden slip could cause your hand to move into the drill bit. 6. Do not install or use any drill bit that exceeds 175mm (7 inches) in length or extends more than 150mm (6 inches) below the chuck jaws.
-
Page 7: Unpacking
3mm, 4mm, 5mm Hex Keys (Supplied) • Wrench (Not Supplied) • Phillips Head Screwdriver (Not Supplied) Assembly time The DP250LS drill press will take approximately 10-15 minutes to assemble. Components The DP250LS drill press is supplied with the following components: 1. Motor Head 2. -
Page 8: Know Your Product
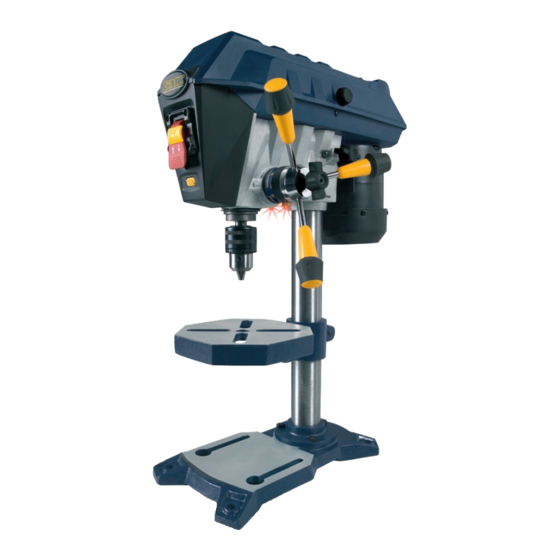
Know your product 1. Laser light on/off switch 2. Laser aperture (x2) 3. On/off switch 4. Pulley cover 5. Pulley cover knob 6. Base 7. Column 8. Table/Support Assembly 9. Table Lock 10. Belt (x1) 11. Belt Tension Knob 12. Keyed Chuck 13. -
Page 9: Assembly
Assembly 1. Place base (6) on floor. 2. Place column assembly (7) on base and align the 3 holes in the column assembly with the holes in the base. 3. Using the 3 bolts secure the column support to the base and tighten with a 13mm wrench. -
Page 10: Installing And Removing Drill Bits
2. Tilt the table to the desired angle as indicated on the bevel scale. 3. Tighten the screw under the table by rotating it in a clockwise direction. Note. When the table is tilted the workpiece should be clamped to the table. -
Page 11: Changing The Speed Of The Drill Press
Changing the speed of the drill press The speed of the drill press is determined by the size of the pulley steps that the belt is attached to. Using a smaller pulley step on the front pulley means a faster drill speed; using a larger pulley step on the front pulley means a slower drill speed. -
Page 12: Turning On The Redeye ® Laser Line Generator
Turning on the REDEYE ® laser line generator 1. The REDEYE laser line ® generator emits two intense narrow beams of pure red light that intersect at the drilling point. 2. The intersection is clearly visible and will not be obscured by dust. -
Page 13: Wood Drilling
Wood drilling • For maximum performance, use high speed steel bits for wood drilling. • Secure the workpiece to prevent it from turning when drilling. • When drilling through holes, place a block of wood behind the workpiece to prevent ragged or splintered edges on the back side of the hole. -
Page 14: Trouble Shooting
Trouble shooting WARNING. Turn the on/off switch to the off position and unplug the tool from the power supply before performing trouble shooting procedures. Trouble shooting Problem Drill press will not start Noisy operation Drill bit burns Excessive drill bit wobble Wood splinters under workpiece Workpiece torn from hand Drill bit binds in workpiece... - Page 16 GMC customer assist If your product needs repairing, replacing, technical service or you simply need help or advice, please contact us on our Customer Assist Line 1300 880 001 (Australia) or 0800 445 721 (New Zealand). For prompt service we suggest you log your service request online at www.gmcservice.com.au.
Need help?
Do you have a question about the DP250LS and is the answer not in the manual?
Questions and answers