Table of Contents
Advertisement
•
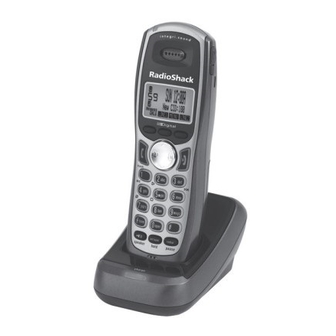
Corded Handset (1)
Corded Handset (1)
•
Cordless Handset (1)
•
Base (1)
•
Charger (1)
•
Quick Start Guide (1)
•
Owner's Manual (1)
Please read this Owner's Manual before installing,
setting up, and using your new phone.
www.radioshack.com
UP841BH_43-143_OM3.indd 1
2-Line Corded/Cordless Telephone
with Answering System & Caller ID
In this Package
•
•
•
•
•
5.8 GHz Expandable
Ni-MH Battery Pack (1)
Ni-MH Battery Pack (1)
(inside handset)
Handset Cord (1)
Modular Cord (1)
AC Adapters (2)
Belt Clip (1)
43-143
12/19/2006 6:55:02 PM
Advertisement
Table of Contents

Related Manuals for Radio Shack 43-143


Summary of Contents for Radio Shack 43-143
- Page 1 43-143 5.8 GHz Expandable 2-Line Corded/Cordless Telephone with Answering System & Caller ID In this Package • Corded Handset (1) Corded Handset (1) • Ni-MH Battery Pack (1) Ni-MH Battery Pack (1) • Cordless Handset (1) (inside handset) • Base (1) •...
-
Page 2: Table Of Contents
Contents Features Introduction Important Information FCC Statement Surge Protection Important Safety Instructions Important Caller ID Information Read This Before Installation Controls & Functions Installation Selecting a Location Connecting the Phone Base Installing the Charger Connecting/Charging the Battery Pack Notes on Recharging Installing a Belt Clip Using the Interface Reading the Cordless Handset Display Reading the Base Display The Standby Screen Soft Key Function... - Page 3 Contents Activating the Key Touch Tone Adjusting the LCD contrast Adjusting the Ringer, Earpiece and Speaker Volume T-coil (Cordless Handset Only) Adding Optional Accessory Handsets Ten Multi-Handset Expandability Registering Accessory Handsets Resetting the Handsets Setting up the Phonebook Creating Phonebook Entries Finding a Phonebook Entry Editing Phonebook Entries Storing Caller ID or Redial Numbers in the Phonebook Erasing Phonebook Entries Deleting All Phonebook Entries...
- Page 4 Contents Switching to the Speakerphone during a Call using the Cordless Handset Switching between the Base Speakerphone and Corded Handset During a Call Using Caller ID and Call Waiting Using the Caller ID List Making a Call from a Caller ID Record Deleting Caller ID Records Using Call Waiting Using Call Waiting Deluxe Redialing a Number...
- Page 5 Contents Setting Up the Answering Machine Features Using the Answering Machine Interface Selecting a Language for Announcements Your Greeting Recording a Personal Greeting Selecting a Greeting Deleting Your Personal Greeting (Base Only) Setting the Number of Rings Setting the Record Time (or Announce Only) Activating the Message Alert Activating Call Screening Setting a Security Code or Personal Identification Number (PIN) 76...
-
Page 6: Features
The Basics Features • Two-line operation — lets you have one handset talking on Line 1 while corded handset on the base talks on Line 2 (you must have a two-line subscription from your phone company). • Corded Handset — lets you make/receive calls even if there is a power failure. -
Page 7: Introduction
The Basics Introduction Thank you for purchasing your RadioShack 5.8 GHz Multi- Handset Expandable 2-Line Corded/Cordless Telephone. Unlike other conventional cordless telephones, your telephone supports up to ten handsets on a single telephone line. You can add a handset to any room in your home or office that has an AC outlet. -
Page 8: Important Information
The Basics Important Information This telephone has been tested and found to comply with all applicable UL and FCC standards. FCC Statement This equipment complies with Part 68 of the FCC rules and the requirements adopted by the ACTA. On the base of this equipment is a label that contains, among other information, a product identifier in the format US:AAAEQ##TXXXX. - Page 9 The Basics In the unlikely event that your phone causes problems on the phone line, the phone company can temporarily discontinue your service. If this happens, the phone company attempts to notify you in advance. If advance notice is not practical, the phone company notifies you as soon as possible and advises you of your right to file a complaint with the FCC.
-
Page 10: Surge Protection
The Basics Surge Protection Your telephone has built-in protection circuits to reduce the risk of damage from surges in telephone line and power line current. These protection circuits meet or exceed the FCC requirements. However, lightning striking the telephone or power lines can damage your telephone. -
Page 11: Important Caller Id Information
The Basics Important Caller ID Information To use Caller ID and Call Waiting, you must be in an area where those services are available and you must subscribe to those services through your local phone company. Where Caller ID is offered, one or more options are generally available: •... -
Page 12: Controls & Functions
The Basics Controls & Functions Handset Handset Antenna SPEAKER key Headset Jack Cover key (up) key (end call) Belt Clip Hole key (caller ID) Speakerphone Speaker and Ringer key (down) Handset Battery # key (pound) Compartment REDIAL/PAUSE key New Message indicator INT’COM/HOLD key Handset Earpiece (intercom/hold) Handset Display... - Page 13 The Basics Base 15 14 Answering Machine Keys REPEAT SKIP DELETE EXIT/PLAY STOP ANSWER ON/OFF Base Corded Handset key (speaker) and indicator Base Speaker 14. Base Microphone Corded Handset Cord 15. # key (pound) Base Display /TONE key Soft keys 17. FLASH/FIND HANDSET key (phonebook) key (up) 18.
-
Page 14: Installation
The Basics Installation Before using your phone, carefully peel the protective film off the display. The film protects the base and cordless handset window during shipment and is not necessary for use. Selecting a Location You can place the phone’s base on a desk or table. Select a location that is: •... -
Page 15: Connecting The Phone Base
The Basics The cordless handset antenna is located on the back, above the ringer speaker. For maximum communication range, do not hold the handset in such a way as to cover the antenna by your hand. Also, place the handset in the upright Correct position while not in use so the antenna can pick up the signals from the base. - Page 16 The Basics Plug one end of the supplied long modular cord into the TEL LINE jack on the bottom of the base. Insert the supplied AC adapter’s barrel plug into the DC IN 9V jack on the bottom of the base. Route the adapter’s cord and modular...
-
Page 17: Installing The Charger
The Basics Installing the Charger You can power the charger using the supplied 9V, 210mA AC adapter. Insert the supplied AC adapter’s barrel plug into the DC IN 9V jack on the bottom of the charger. Route the cord through the strain relief slot and plug the adapter into a standard AC outlet. -
Page 18: Notes On Recharging
The Basics Notes on Recharging • If the battery pack becomes weak during a call, LOW BATTERY flashes. When this happens, you cannot make a call until you recharge the battery pack. IMPORTANT: Be sure the battery pack is properly connected before charging. The CHARGE indicator lights when the handset is on the charger. -
Page 19: Installing A Belt Clip
The Basics Installing a Belt Clip To Attach the Belt Clip Insert the belt clip into the holes on each side of the cordless handset. Press down until it clicks. To Remove the Belt Clip Pull either side of the belt clip to release the tabs from the holes. Using an Optional Headset You can make or answer calls handsfree using an optional headset that has a 3/32-inch (2.5-mm) plug. -
Page 20: Using The Interface
The Basics Using the Interface Reading the Cordless Handset Display The cordless handset display uses icons to tell you the status of your phone. Icon Status Description The privacy icon appears when Talk privacy mode is turned on. The call record icon appears Talk while recording a conversation. に... -
Page 21: Reading The Base Display
The Basics Reading the Base Display The base display uses icons to tell you the status of your phone. The table below lists the icons and what they mean. Icon Status Description The privacy icon appears when Talk privacy mode is turned on. The call record icon appears Talk while recording a conversation. -
Page 22: The Standby Screen
The Basics The Standby Screen When the phone is in standby, the cordless handset and base display shows the following items: • Cordless Handset Ringer off icon (when the ringer is off)/ day of the week and time / battery icon S U N 1 2 : 0 0 A H a n d s e t # 1 Handset ID and Banner N e w C I D :... -
Page 23: Soft Key Function
The Basics Soft Key Function “Soft” keys are keys that change functions while you operate your phone. There are three on the base and each cordless handset. Soft keys allow you to: • Access the main menu • Set up CIDCW options • Store or edit phone numbers •... -
Page 24: Using The Four-Way Function Key
The Basics Using the Four-Way Function Key View View View the View the phonebook phonebook Caller ID Caller ID Four-way Four-way Function Key Function Key Down Down Your cordless handset and base have a four-way function key that allows you to move the cursor (or highlighted area) on the display and access the most commonly used features at the touch of a button. -
Page 25: Using The Handset And Base Menus
The Basics Using the Handset and Base Menus To open the menu, press the MENU soft key. Highlight the option you want by pressing on the four-way function key. This will move the cursor; the option currently highlighted appears in reversed out text. Select the highlighted option by pressing the OK soft key. To exit the menu and return to standby, press on the handset or... -
Page 26: Entering Text From Your Phone
The Basics Entering Text from Your Phone You can use the number keypad on your cordless handset or base to enter text by referring to the letters printed on each number key. When you press the number key in a text entry field, the phone displays the first letter printed on the number key. Press the number key twice to display the second letter and three times to display the third. -
Page 27: Basic Setup
The Basics Basic Setup Selecting a Telephone Line TEL-LINE allows you to set default telephone line. The line you select will be used when you make a call. If you select AUTO, the phone will default to whichever line is currently free. Press the MENU soft key. Select the HANDSET SETUP or BASE SETUP menu, and then the Set TEL LINE submenu. -
Page 28: Selecting A Language For The Display
The Basics Selecting a Language for the Display Your cordless handset and base display support three languages: English, French and Spanish. The language selection must be set separately for each station. The default language is English. Press the MENU soft key. Select the HANDSET SETUP or BASE SETUP menu, and then the HANDSET LANGUAGE or BASE LANGUAGE submenu. -
Page 29: Activating Caller Id On Call Waiting And Call Waiting Deluxe
The Basics Activating Caller ID on Call Waiting and Call Waiting Deluxe Your phone supports Caller ID on Call Waiting (CIDCW), so you can see the name and number of someone who calls when you’re already on the line. Your phone also supports Call Waiting Deluxe (CWDX), which gives you a choice of how you want to handle a waiting call. -
Page 30: Adjusting The Lcd Contrast
The Basics Adjusting the LCD contrast Contrast adjusts the cordless handset and the base display brightness. Choose from ten levels available for optimum viewing. Press the MENU soft key. Select the HANDSET SETUP or BASE SETUP menu, and then the LCD CONTRAST submenu. Press on the four-way function key to adjust the contrast of the LCD. -
Page 31: T-Coil (Cordless Handset Only)
The Basics Adjusting the Speaker Volume You can choose from six volume levels for the cordless handset speakerphone and ten volume levels for the base speakerphone. To adjust the volume while on a call, press (louder) or (softer). T-coil (Cordless Handset Only) Digital spread spectrum cordless phones generate magnetic signals that could cause noise to be heard by users wearing hearing aids set to “T”... -
Page 32: Adding Optional Accessory Handsets
Beyond the Basics Adding Optional Accessory Handsets Ten Multi-Handset Expandability Your phone supports up to ten cordless handsets, including any handsets supplied with your phone. You can now place a fully- featured cordless handset anywhere AC power is available to connect the handset charger. Up to four handsets can be used for outside and/or intercom calls. -
Page 33: Resetting The Handsets
Beyond the Basics While the handset is registering, HANDSET REGISTERING will appear in the handset display. When REGISTRATION COMPLETE is displayed, the handset has been registered to the base. If REGISTRATION FAILED appears, remove the handset from the base and try again. Resetting the Handsets If you want to register a handset to a different base or replace a handset with another one, you must first de-register the handset... -
Page 34: Setting Up The Phonebook
Beyond the Basics Setting up the Phonebook Your phone allows you to store up to two numbers per name and up to 100 names in your cordless handset and base phonebook. Your phone shares memory between your phonebook and CID with a total of 100 entries which are not used up by the two phone numbers that can be stored per one name entry. - Page 35 Beyond the Basics Enter the number for this entry (Edit Number 1). Once you have stored a name, EDIT NUMBER1 appears next. Use the number keypad, right or left on the four-way function key, or the DELETE soft key to enter the phone number 1; the phone number can contain up to 32 digits.
-
Page 36: Finding A Phonebook Entry
Beyond the Basics You will hear a tone confirming that the new phonebook entry has been stored, and DONE! appears in the display. When the shared memory is full, the oldest Caller NOTE ID message is overwritten. Finding a Phonebook Entry Phonebook entries are stored in alphabetical order. You can scroll through the phonebook, or you can also use the letters on the number keys to jump to a name starts with that letter. -
Page 37: Editing Phonebook Entries
Beyond the Basics Editing Phonebook Entries When the phone is in standby, press on the four-way function key to scroll through the phonebook entries. When you come to the entry you want to edit, press the OPTIONS soft key. Move the cursor to select EDIT SELECTION submenu. Press the OK soft key. -
Page 38: Erasing Phonebook Entries
Beyond the Basics Follow the steps for Creating Phonebook Entries on page 34. • If the Caller ID message was received as a private NOTES or unknown number, or the message does not have the number, you cannot store the message in the phonebook. If it was received as private or unknown name, the message will be stored as <NO NAME>. -
Page 39: Copying Phonebook Entries To Another Station
Beyond the Basics Copying Phonebook Entries to another Station You can transfer stored phonebook entries from one station to another without having to re-enter names and numbers. You can transfer one phonebook entry at a time or all phonebook entries at once. When the phone is in standby, press on four-way function key or the number keypad to select desired phonebook entry, then press the OPTIONS soft key. -
Page 40: Customizing Your Phone
Beyond the Basics • If your phonebook contains 100 entries, you NOTES cannot store any new phonebook entries. You will hear a beep, and NOT ENOUGH MEMORY IN RECEIVING UNIT appears on the display. • If the selected handset is out of range or data transfer is canceled, UNAVAILABLE appears in the display. -
Page 41: Selecting A Ring Tone
Beyond the Basics Selecting a Ring Tone You can set a different ringer for each station. Your phone comes with ten prerecorded songs and ten different ringer tones. Melodies • Beethoven’s Symphony #9 [Beethoven9] • Fur Elise [Elise] • We Wish You A Merry Christmas [Merry-Xmas] •... -
Page 42: Activating Personal Ring (Cordless Handset Only)
Beyond the Basics Activating Personal Ring (Cordless Handset Only) You can assign special ring tones to anyone in your phonebook. When your phone gets a call, it looks up the Caller ID information in your phonebook. If you’ve assigned a personal ring to that number, the phone uses it so you know who is calling. To turn on personal ring, follow these steps: Press the MENU soft key. -
Page 43: Using Your Phone
Beyond the Basics Using Your Phone Power Failure Operation (Line 1 Only) Because the phone is a corded/cordless combination phone, it can still perform several of its functions during a power failure. The following features will function even during a power failure; • Making and receiving calls with the base corded handset •... -
Page 44: Making A Call
Beyond the Basics Making a Call Press The phone will automatically select a free line. Listen for the dial tone. From Dial the number. the base speaker- Dial the number. * phone The phone will automatically select a free line. Press To select a particular line, press LINE 1 or LINE 2. Pick up the base corded handset from the base. - Page 45 Beyond the Basics Pick up the handset from the charger. Press /FLASH. Listen for the dial tone. Dial the number. From the cordless Pick up the handset from the charger. handset Dial the number. * Press /FLASH. To select a particular line, press the LINE 1 or LINE 2 soft key.
-
Page 46: Answering A Call
Beyond the Basics Answering a Call From the base Press or the corresponding line key (LINE speakerphone 1 or LINE 2). From the Pick up the base corded handset from the base corded base. handset Pick up the handset. (If Auto Talk is on, the phone will answer when you pick up the handset from the charger.) From the... -
Page 47: Making A Call From The Phonebook
Beyond the Basics • If the line(s) is already in use, the base and all NOTES registered handsets that are not currently in use will display IN USE with the corresponding line icon. • To have the phone select Line 1 or Line 2 instead of a free line, set the default telephone line (see page 27). -
Page 48: Chain Dialing From The Phonebook
Beyond the Basics To dial the number selecting a particular line: HANDSET: Press the LINE1 or LINE2 soft key. BASE: Press LINE1 or LINE2. Press to open the phonebook. Scroll through the list with the , or use a number key (0, 2 – 9) to find the phonebook entry you want to call. (See “Finding and Viewing a Phonebook Entry”... -
Page 49: Testing Stored Emergency Numbers
Beyond the Basics To dial the number: HANDSET: Press /FLASH or SPEAKER. BASE: Press or pick up the base corded handset. The phone will automatically select a free line. To dial the number selecting a particular line: HANDSET: Press the OPTIONS soft key, select LINE1 or LINE2 and then press the OK soft key. -
Page 50: Using Caller Id And Call Waiting
Beyond the Basics Using Caller ID and Call Waiting If you subscribe to Caller ID from your phone company, your phone will show you the caller’s phone number and name (if available) whenever a call comes in. If you subscribe to both Call Waiting and Caller ID, the phone also shows you the name and the number of any call that comes in while you are on the line. -
Page 51: Making A Call From A Caller Id Record
Beyond the Basics To scroll quickly through the list, press and hold To exit the Caller ID list while the phone is in standby: HANDSET: Press . BASE: Press /EXIT. If you are looking up an entry during a call: HANDSET: Press /FLASH. BASE: Press /EXIT. -
Page 52: Deleting Caller Id Records
Beyond the Basics HANDSET: Press /FLASH or SPEAKER. BASE: Press or pick up the base corded handset. The phone will automatically select a free line. To dial the number selecting a particular line: HANDSET: Press the LINE1 or LINE2 soft key. BASE: Press LINE1 or LINE2. -
Page 53: Using Call Waiting
Beyond the Basics Deleting All Caller ID Records When the phone is in standby, press Press the DELETE soft key. ARE YOU SURE? appears in the display. Select YES. You will hear a confirmation tone, and DELETED! appears in the display. When you delete a Caller ID number, you delete it NOTE permanently. -
Page 54: Using Call Waiting Deluxe
Beyond the Basics Using Call Waiting Deluxe Your phone gives you new options for Call Waiting Deluxe. At the touch of a button, you can place the caller on hold, send them to your voice mail service, or conference them into your current call. You must subscribe to Call Waiting and Call Waiting Deluxe to use these features. -
Page 55: Redialing A Number
Beyond the Basics Redialing a Number You can quickly redial the last three numbers dialed on each cordless handset and the base. Using the Redial List To open the redial list: HANDSET: Press REDIAL/PAUSE. BASE: Press the REDIAL soft key. on the four-way function key to scroll through the list. -
Page 56: Deleting A Redial Record
Beyond the Basics To dial the number selecting a particular line: HANDSET: Press the LINE1 or LINE2 soft key. BASE: Press LINE1 or LINE2. HANDSET: Press /FLASH or SPEAKER. BASE: Press or pick up the base corded handset. The phone will automatically select a free line. To dial the number selecting a particular line: HANDSET: Press the LINE1 or LINE2 soft key. -
Page 57: Finding A Lost Handset
Beyond the Basics Finding a Lost Handset To locate a misplaced cordless handset, press FLASH/FIND HANDSET on the base when the phone is in standby. All registered handsets will beep for 60 seconds, and PAGING appears on the handset display. To cancel paging, press any key on the found handset or press FLASH/FIND HANDSET on the base. -
Page 58: Conferencing
Beyond the Basics Conferencing If you have multiple cordless handsets, up to seven people can participate in a conference call. A seven-way conference call consists of an outside line 1 + outside line 2 + base + four handsets. Up to four handsets can participate in any conference call. -
Page 59: Transferring A Call
Beyond the Basics For example, to hang up Line 2 but leave Line 1 connected: • Press the line 2 key (LINE2 soft key on the handset, or LINE2 on the base) to put Line 1 on hold. • Press on the handset or on the base to hang up Line 2. -
Page 60: Using Special Features
Beyond the Basics Answering a Transferred Call When a station receives a call transfer, it sounds a paging tone and shows the ID of the station that is paging. To accept the call transfer: HANDSET: Press /FLASH, INT’COM/HOLD, or the ANSWER soft key. If Auto Talk is on, the handset will answer when you pick up the handset from the charger. -
Page 61: Muting The Ringer (One Call Only)
Beyond the Basics • If you activate DND while the answering NOTES machine is off, the answering machine will be automatically turned on. • If you deactivate the answering machine while DND is on, DND will be automatically turned off. Muting the Ringer (One Call Only) To mute the station’s ringer for this call, while the phone is ringing: HANDSET: Press or the MUTE soft key. -
Page 62: Directlink Tm Communication Feature
Beyond the Basics PRIVACY MODE ON will appear in the display for 2 seconds, but the icon will appear and remain in the display until the feature is turned off. Other stations will not be able to make a call and their display will list UNAVAILABLE. To turn privacy mode off, repeat the procedures listed above. -
Page 63: Intercom
Beyond the Basics Exiting a DirectLink Communication While the handset is using DirectLink communication, the display shows DIRECTLINK MODE; this means the handset cannot make or receive normal phone calls. To exit the DirectLink feature and return to standby, press the CANCEL soft key and then press the OK soft key, or return the handset to the cradle. -
Page 64: Room Monitor
Beyond the Basics Answering an Intercom Page When the intercom page tone sounds, the display will show the ID of the station that is paging. To answer an intercom page: HANDSET: Press /FLASH, INT’COM/HOLD, or the ANSWER soft key. If Auto Talk is on, the handset will answer when you pick up the handset from the charger. -
Page 65: Tone Dialing Switch Over
Beyond the Basics You can turn off the room monitor from either station. Press the END soft key on the station (or on the handset or return the handset to the charger.) • For added mobility and convenience, you can use a handset placed in another room/location NOTES (where no station was installed) to function as a microphone to pick up sounds. -
Page 66: Seven-Digit Dialing
Beyond the Basics Any digits you enter from then on will be sent as tone dialing. When this call ends, the phone automatically returns to pulse dialing. See “Changing the Dial Mode” on page 27 for instructions on setting your phone for pulse or tone dialing. Seven-Digit Dialing If you can make a local call by dialing only seven digits (instead of ten), you can program your local area code into your phone. -
Page 67: Inuse Line Setup (Base Only)
Beyond the Basics Inuse Line Setup (Base only) The Inuse Line Setup feature is only used in instances where you have multiple phones where users may pick up an extension while someone else is on the phone. Only in very rare instances where your phone system is not detecting that an extension phone is picked up will you ever need to change this feature. - Page 68 Beyond the Basics If you set the Inuse Line Setup to OFF, your phone NOTE cannot detect the status of an extension phone while in use and will not operate correctly. To change the settings do the following steps: Press the MENU soft key on the base. Select the GLOBAL SETUP menu, and then the INUSE LINE SETUP submenu.
-
Page 69: Setting Up The Answering Machine
Beyond the Basics Setting Up the Answering Machine Your phone has a built-in answering machine that answers and records incoming calls. You can also use your answering machine to record a conversation or leave a voice memo. Features • Digital Tapeless Recording • Day and Time Announcement •... - Page 70 Beyond the Basics To exit the menu and return to standby, press on the cordless handset or /EXIT on the base. • If you do not press a key within 30 seconds, the NOTES phone will time out and exit the menu. When setting Date and Time, the time-out period is extended to two minutes.
-
Page 71: Selecting A Language For Announcements
Beyond the Basics Selecting a Language for Announcements You can select the language (English, French, and Spanish) of your answering machine announcements. The default system language is English. Press the MENU soft key. Select ANSW. SETUP menu, and then the ANSW LANGUAGE submenu. Move the cursor to select , and then press the OK soft key. -
Page 72: Selecting A Greeting
Beyond the Basics The answering machine announces, “Record greeting.” Begin recording after the announcement. The message counter on the base displays “30”, and then begins to count down. When you finish recording, press the STOP soft key. You will hear a beep and then playback of your recorded greeting. From the Handset While the phone is in standby, press the MENU soft key. -
Page 73: Deleting Your Personal Greeting (Base Only)
Beyond the Basics To keep this greeting, do nothing. To switch to the other greeting, press the CHANGE soft key while the answering machine is playing the current greeting. Each time you press the CHANGE soft key, the answering machine switches between the pre-recorded and the personal greeting. -
Page 74: Setting The Number Of Rings
Beyond the Basics Setting the Number of Rings The ring time setting allows you to set the number of rings the caller hears before your answering machine plays the outgoing message. You can set the ring time to answer after two, four, or six rings. If you enable the Toll Saver (TS) setting, the answering machine picks up after two rings if you have new messages, and after four rings if there are none. -
Page 75: Activating The Message Alert
Beyond the Basics While your answering machine is set to Announce Only, the base will display ANNOUNCE ONLY. If you are using the prerecorded greeting, the answering machine automatically switches to the following message: “Hello, no one is available to take your call. Please call again.” If you are using a personal greeting, the answering machine continues to use that greeting. -
Page 76: Setting A Security Code Or Personal Identification Number (Pin)
Beyond the Basics Setting a Security Code or Personal Identification Number (PIN) To play your messages from a remote location, you will need to enter a two-digit security code or Personal Identification Number (PIN). The default security code is 80. Press the MENU soft key. Select the ANSW. SETUP menu, and then the SECURITY CODE submenu. - Page 77 Beyond the Basics Turning Off With the phone in standby, press Press the LINE1 or LINE2 soft key. The answering machine announces “Answering System is off.” appears on the base display. From the Handset Turning On With the phone in standby, press the MENU soft key. Select RETRIEVE MSG to access the answering machine.
-
Page 78: Reviewing Messages
Beyond the Basics Reviewing Messages When you have new messages, • The message counter on the base display shows the number of messages stored in memory and blinks. • On the handset, the new message indicator blinks. The answering machine plays your new messages first. After you listen to all of your new messages, you can then play your old messages. - Page 79 Beyond the Basics You can review your messages from the base or from the handset: From the base From the handset 1. Press the MENU soft 1. Press /EXIT. key. 2. Press the LINE1 2. Select RETRIEVE or LINE2 soft key. MSG. The answering machine announces 3.
- Page 80 Beyond the Basics From the base From the handset Press or the > > | Press /3 to go to the soft key to go to the beginning of the next Skipping beginning of the next message. message. Press and message hold to fast forward through the current message.
-
Page 81: Screening Calls
Beyond the Basics Screening Calls Your phone allows you to listen to callers leaving a message without answering the phone. You can always hear callers from the base speaker. To screen an incoming call from the handset and base: From the Base Press the SCREEN soft key or the MUTE soft key when the answering machine is answering. - Page 82 Beyond the Basics From the Base Starting a recording During a conversation, press the MENU soft key. Select CALL RECORD. The base display shows RECORDING CALL. A confirmation tone that can be heard by both parties sounds during recording. Stopping a recording During a conversation, press the MENU soft key. Select CALL RECORD.
-
Page 83: Recording A Voice Memo
Beyond the Basics Recording a Voice Memo The voice memo feature allows you to record messages that are between two seconds and four minutes long. You might want to use this feature to leave messages for other members of your household instead of written notes. From the Base Starting a memo With the phone in standby, press the RECORD soft key. -
Page 84: Message Alert
Beyond the Basics Message Alert The message alert feature sounds a short alert tone whenever you have a new message. When a new message is received and message alert is on, the alert tone will sound every 15 seconds. To activate or deactivate the message alert, see page 75. When all new messages are played back, the message alert tone will automatically deactivate. - Page 85 Beyond the Basics The answering machine announces the current time and the number of messages stored in memory. You hear “To play incoming messages, press zero-two. For help, press one- zero” followed by a beep. Start to enter a remote command sequence from the chart below within 15 seconds.
-
Page 86: Troubleshooting
Beyond the Basics Troubleshooting If your phone is not performing to your expectations, please try these simple steps first. Symptom Suggestion • Make sure the AC adapter is plugged The CHARGE indicator into the charger and wall outlet. won’t illuminate when • Make sure the handset is properly the handset is placed seated in the charger. - Page 87 Beyond the Basics Symptom Suggestion • Make sure that you are not too far from the base. • Charge the battery in the handset for at least 15-20 hours by placing the The handset doesn’t handset on the charger. ring or receive a page. •...
- Page 88 Beyond the Basics Symptom Suggestion • Charge the battery pack in the handset for 15-20 hours. • Make sure you have not stored ten handsets already. You cannot register • De-register the handset (see the handset at the “Resetting Handsets” on page base.
- Page 89 Beyond the Basics Symptom Suggestion There is no sound on • Adjust the speaker volume on the the base or handset base or handset. speaker during • Make sure the call screen feature is call monitoring or set to on. message playback. •...
-
Page 90: Care
Beyond the Basics Care Keep the phone dry; if it gets wet, wipe it dry immediately. Use and store the phone only in “room” temperature environments. Handle the phone carefully; do not drop it. Keep the phone away from dust and dirt, and wipe it with a damp cloth occasionally to keep it looking new. - Page 91 Beyond the Basics Move the cursor to select BASE UNAVAILABLE and then press the OK soft key. Move the cursor to select YES, and then press the OK soft key. ARE YOU SURE? appears on the display. Move the cursor to select YES, and then press the OK soft key. You will hear a confirmation tone, and the handset deletes its own base information without contacting the base.
-
Page 92: Glossary
Beyond the Basics Glossary Accessory Handset — This phone system is expandable: one base supports a total of ten handsets. The accessory handset is a handset that is compatible with this model. Base — The main part of the phone that connects to your phone line and lets you make and receive calls. -
Page 93: Index
Index Index Controls & Functions 12, 13 Date and time Accessory handsets Dial mode Answering a call DirectLink Answering machine Displays and icons Message alert 75, 84 Do Not Disturb Reviewing messages Screening calls 75, 81 Setting up Earpiece volume Turning on and off Entering text When away from home 84... - Page 94 Index Key touch tone Recording a call Recording a voice memo Redial Deleting a record Language Making a call For answering machine 71 from a record For display Storing a record in LCD contrast the phonebook Low battery alert Using the list Registering handsets 32, 90 Remote operation...
-
Page 95: Memo
Memo Memo UP841BH_43-143_OM3.indd 95 12/19/2006 6:55:33 PM... -
Page 96: Limited One-Year Warranty
This warranty gives you specifi c legal rights, and you may also have other rights which vary from state to state. RadioShack Customer Relations, 300 RadioShack Circle, Fort Worth, TX 76102-1964 UPZZ01841BZ(0) 43-143 01A07 Printed in China ©2007. RadioShack Corporation.
Need help?
Do you have a question about the 43-143 and is the answer not in the manual?
Questions and answers