Table of Contents
Advertisement
Quick Links
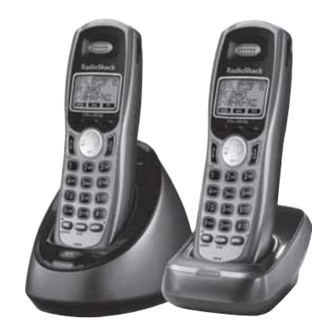
5.8GHz Digital Cordless Phone
•
Handsets (2)
•
Base (1)
•
Charger (1)
•
Quick Start Guide (1)
•
User's Guide (1)
Please read this User's Guide before installing,
setting up and using your new phone.
www.radioshack.com
Expandable • Caller ID
•
Ni-MH Battery Packs (2)
(inside handset)
•
Modular Cord (1)
•
AC Adapters (2)
•
Belt Clips (2)
43-141
Advertisement
Table of Contents

Related Manuals for Radio Shack 43-141


Summary of Contents for Radio Shack 43-141
- Page 1 43-141 Expandable • Caller ID 5.8GHz Digital Cordless Phone • Handsets (2) • Ni-MH Battery Packs (2) • Base (1) (inside handset) • Charger (1) • Modular Cord (1) • Quick Start Guide (1) • AC Adapters (2) • User’s Guide (1) •...
-
Page 2: Table Of Contents
Contents Features Introduction Important Information FCC Statement Surge Protection Important Safety Instructions Important Caller ID Information Controls & Functions Installation Selecting a Location Connecting the Phone Base Installing the Charger Connecting/Charging the Battery Pack Notes on Recharging Installing a Belt Clip Using the Interface Reading the Handset Display The Standby Screen... - Page 3 Contents Basic Setup Changing the Dial Mode Selecting a Language for the Display Setting the Day and Time Activating Caller ID on Call Waiting and Call Waiting Deluxe Activating the Key Touch Tone Adjusting the LCD contrast Setting the Animation Screen Adjusting the Ringer, Earpiece and Speaker Volume T-coil (Handset only)
- Page 4 Contents Copying Phonebook Entries to another Station Customizing Your Phone Changing the Handset Banner Selecting a Ring Tone Activating Distinctive Ring Activating Auto Talk Activating Any Key Answer Using Your Phone Making a Call Answering a Call Hanging Up Making a Call from the Phonebook Making a Call with Speed Dial Testing Stored Emergency Numbers Switching to the Speakerphone during a...
- Page 5 Contents Finding a Lost Handset Using Hold, Conference and Transfer Placing a Call on Hold Conferencing Transferring a Call Using Special Features Muting the Ringer (One call only) Muting the Microphone Privacy Mode DirectLink Communication Feature Intercom Room Monitor Tone Dialing Switch Over Seven-Digit Dialing Traveling Out of Range Troubleshooting...
-
Page 6: Features
The Basics Features Convenient Extension Placement — Lets you add up to eight additional accessory handsets (RadioShack 43-144) anywhere you have an AC outlet, regardless of phone jack location. Call Waiting/Caller ID — Lets you answer a call even when you are on the phone;... -
Page 7: Introduction
The Basics Introduction Thank you for purchasing your RadioShack 5.8 GHz Digital Multi-Handset Expandable Cordless Telephone. Unlike other conventional cordless telephones, your telephone supports up to ten handsets on a single telephone line. You can add a handset to transfer outside calls to other handsets. If you subscribe to Call Cordless phones require AC power to operate. -
Page 8: Important Information
The Basics Important Information applicable UL and FCC standards. FCC Statement You must not connect your phone to… • coin-operated systems • most electronic key telephone systems connected to a telephone line. Excessive RENs on a telephone on the label. -
Page 9: The Basics
The Basics you in advance. If advance notice is not practical, the phone these changes in advance, so you can take the necessary steps to prevent interruption of your telephone service. ensured when using this phone. To ensure the safety of users, the FCC has established criteria used with the RadioShack accessories supplied or designed avoided. -
Page 10: Surge Protection
The Basics Surge Protection Your telephone has built-in protection circuits to reduce the risk However, lightning striking the telephone or power lines can Important Safety Instructions bathtub, wash bowl, kitchen sink, or laundry tub, in a wet Avoid using a telephone (other than a cordless type) during Do not use the telephone to report a gas leak in the vicinity of the leak. -
Page 11: Important Caller Id Information
The Basics Important Caller ID Information • • • already talking on the phone. Read This Before Installation device that you connect to the telephone line draws power phone. -
Page 12: Controls & Functions
The Basics Controls & Functions Handset Handset Antenna Soft keys Headset Jack Cover /FLASH Belt Clip Hole key (phonebook) /TONE key Speakerphone Speaker and Ringer /SPEAKER key Handset Battery key (up) key (end call) New Message indicator key (caller ID) Handset Earpiece key (down) Handset Display... - Page 13 The Basics # key (pound) MUTE key INT’COM/HOLD Handset Microphone Handset Charging Contacts Base Base Charging Contacts FIND HS CHARGE indicator DC IN 9V power jack TEL LINE phone jack...
-
Page 14: Installation
The Basics Installation and is not necessary for use. Selecting a Location You can place the phone’s base on a desk or table. Select a • near an accessible AC outlet • near a telephone line jack • • • If your home has specially wired alarm equipment connected to the telephone line, be sure that installing the system does not disable... -
Page 15: Connecting The Phone Base
The Basics The handset antenna is located on the back, in such a way as to cover the antenna by your hand. Also, place the handset in the upright Correct position while not in use so the antenna can pick concrete wall between the handset and the base, Incorrect telephone line jack. -
Page 16: Installing The Charger
The Basics Insert the supplied AC adapter’s barrel plug into the DC IN 9V jack on the Route the adapter’s cord through the strain relief slot on the base of the phone. Then plug the adapter into a standard AC outlet. CAUTION: You must use a Class 2 power source that supplies 9V DC and delivers at least 350 mA (for the base)/210 mA (for the charger). -
Page 17: Connecting/Charging The Battery Pack
The Basics Connecting/Charging the Battery Pack MH) battery pack in the handset. Before using your phone, you hours. Press down and slide off the Lift the battery pack out of Plug the battery pack’s connector into the socket Then place the battery pack Replace the cover. - Page 18 The Basics • If the display is blank and the phone does not work, recharge the display.) • • • If you are not going to use your phone for an extended period, disconnect the battery pack. This increases the battery pack’s usable life.
-
Page 19: Installing A Belt Clip
The Basics Installing a Belt Clip To Attach the Belt Clip, insert the belt clip into the holes on each side of the handset. Press down until it clicks. Using an optional Headset RadioShack store has a variety of headsets available. the rubber headset jack cover on the side of the handset. -
Page 20: Using The Interface Reading The Handset Display
The Basics Using the Interface Reading the Handset Display The handset display uses icons to tell you the status of your phone. Icon Status Description The privacy icon appears when Talk Talk The speaker icon appears when Talk the handset speakerphone is in use. -
Page 21: Soft Key Function
The Basics Soft Key Function “Soft” keys are keys that change functions while you operate your phone. There are three soft keys on each handset. Soft keys • • • • • the function shown. In standby During a call... -
Page 22: Using The Four-Way Function Key
The Basics Using the Four-Way Function Key Your handset has a four-way function key that allows you to highlighted area) on the display and access the View View View the View the phonebook phonebook Caller ID Caller ID features at the touch of a button. - Page 23 The Basics • If you do not press a key within 30 seconds, the phone will time out and exit the menu. When setting Day and Time, the time-out period is extended to two minutes. • For GLOBAL SETUP , and DEREGISTER HS menu options on the handset, make sure the line is not in use, and if you access from a handset, the handset is within range of the base.
-
Page 24: Entering Text From Your Handset
The Basics Entering Text from Your Handset letter. Then use # or /TONE position to enter the second letter. Press 6 once to enter M. Use # cursor to the right. Press 6 enter o. Press 8 enter v. Press 4 enter i. -
Page 25: Basic Setup
The Basics Basic Setup Changing the Dial Mode uses pulse dialing, you will need to change your phone’s dial Press the MENU soft key. Move the cursor to select PULSE. (The default setting is Press the OK If you ever need to change the dial mode back to tone dialing, follow the same procedure, but select TONE after you enter the DIAL MODE submenu. -
Page 26: Setting The Day And Time
The Basics Setting the Day and Time listed below. If you don’t press any keys for two minutes when setting the day and time, the phone will exit the menu. Press the MENU soft key. Press to select the day of the week, and then the soft key. -
Page 27: Activating The Key Touch Tone
The Basics See “Using Call Waiting Deluxe” on page 48 for instructions on Activating the Key Touch Tone pressed. You can turn this tone on or off. Press the MENU soft key. Press the OK Adjusting the LCD contrast Press the MENU soft key. Press on the four-way function key to adjust the contrast of the LCD. -
Page 28: Adjusting The Ringer, Earpiece And Speaker Volume
The Basics Adjusting the Ringer, Earpiece and Speaker Volume Adjusting the Ringer Volume (off, low, and high). (louder) or (softer). Adjusting the Earpiece Volume (louder) or Adjusting the Speaker Volume speakerphone. (louder) or (softer). T-coil (Handset only) signals that could cause noise to be heard by users wearing hearing aids equipped with a telecoil (“T”... - Page 29 The Basics will appear on the handset LCD display. The handset will remain in “T-coil” mode for all future calls or until the “T-coil” mode is turned off. Press and hold MUTE for at least 5 seconds or until a beep tone is heard.
-
Page 30: Adding Optional Accessory Handsets
Beyond the Basics Adding Optional Accessory Handsets Ten Multi-Handset Expandability Your phone supports up to ten handsets, including any handsets supplied with your phone. You can now place a fully-featured cordless handset anywhere AC power is available to connect the handset charger. -
Page 31: Resetting Handsets
Beyond the Basics Resetting Handsets If you want to register a handset to a different base or replace Press the MENU soft key. Select the DEREGISTER HS DEREGISTER HS? appears. Move the cursor to select YES. Press the OK soft key. /FLASH and # After resetting the handset, place the handset to the base to If the handset cannot contact the base, it will... -
Page 32: Setting The Voice Mail Signaling Tone
Beyond the Basics Setting the Voice Mail Signaling Tone Your telephone service provider should provide you with the will need to contact your service provider and inquire as to which (FSK) or Stutter Dial Tone (SDT)--their service uses. Mail Tone on. Follow the instructions below to set up your cordless phone Press the MENU Press the OK... -
Page 33: Resetting The Voice Message Waiting Indicator
Beyond the Basics If you need to have the phone wait before sending the next digits, press the PAUSE soft key to insert a two-second pause in the dialing sequence. For a longer pause, press the you press the key and each pause counts as one digit. Press the OK Resetting the Voice Message Waiting Indicator... -
Page 34: Setting Up The Phonebook
Beyond the Basics Setting up the Phonebook You can also use the Phonebook or speed dial locations to store after your call connects. This is referred to as Chain Dialing. Creating Phonebook Entries (on the left side of the four-way key). To create a new phonebook entry, press the STORE soft key. -
Page 35: Chain Dialing
Beyond the Basics seconds is not long enough. Each pause counts as one digit. Press the OK Assign a distinctive ring tone for this entry (Distinctive Ring). You can attach a personalized ring tone to each phonebook entry; the phone will use this ring tone when this person ring tone options. -
Page 36: Finding A Phonebook Entry
Beyond the Basics prescription line, DIAL soft key. Press on the four-way function key to select the desired entry. Press /FLASH. After the call has connected you will then do the following. Press on the four-way function key to select the desired entry. -
Page 37: Editing Phonebook Entries
Beyond the Basics Editing Phonebook Entries Press to open. on the four-way function key to scroll through want to edit, press the EDIT soft key. Follow the steps for Creating Phonebook Entries on page OK soft key to go to the next step. Storing Caller ID or Redial Numbers in the Phonebook able to store it.) -
Page 38: Erasing Phonebook Entries
Beyond the Basics Erasing Phonebook Entries You can erase individual phonebook entries or erase all the phonebook entries at once. keypad to select desired phonebook entry, then press the DELETE soft key. then press the OK soft key. the display. Copying Phonebook Entries to another Station at once. -
Page 39: Customizing Your Phone
Beyond the Basics The phonebook entries will be transferred to the designated handset. During the copy process, the receiving handset shows • If your Phonebook contains 100 entries, you cannot store any new phonebook entries. You will hear a beep, and NOT ENOUGH MEMORY IN RECEIVING UNIT appears on the display. -
Page 40: Selecting A Ring Tone
Beyond the Basics Selecting a Ring Tone You can set a different ringer for each handset. The handset Melodies • • • • • • • Aura Lee • • • Ringers • Flicker • Bebop (Beep Boop) • Clatter •... -
Page 41: Activating Distinctive Ring
Beyond the Basics Activating Distinctive Ring You can assign special ring tones to anyone in your phonebook. in your phonebook. If you’ve assigned a distinctive ring to that Press the MENU soft key. Press the OK Activating Auto Talk answer the call. Press the MENU soft key. -
Page 42: Using Your Phone
Beyond the Basics Using Your Phone Making a Call Press /FLASH. Listen for the dial tone. From the handset Press /FLASH. Press /SPEAKER. Listen for the dial tone. From the handset speaker- phone Press /SPEAKER. the PAUSE soft key. “P” appears in the display. Answering a Call Pick up the handset. -
Page 43: Hanging Up
Beyond the Basics Hanging Up From the Press or return the handset to the cradle. handset From the handset Press or return the handset to the cradle. speakerphone Making a Call from the Phonebook to open the phonebook. Scroll through the list with (0, 2 –... -
Page 44: Testing Stored Emergency Numbers
Beyond the Basics Testing Stored Emergency Numbers the line to explain the reason for your call. Switching to the Speakerphone during a Call using the Handset /SPEAKER on the handset. /SPEAKER. -
Page 45: Using Caller Id And Call Waiting
Beyond the Basics Using Caller ID and Call Waiting • If you answer a call before the Caller ID message is received (for example, before the second ring), the Caller ID message may not appear. • When the call is received via a Telephone Company that does not offer Caller ID service, the caller’s phone number and name will not appear. -
Page 46: Making A Call From A Caller Id Record
Beyond the Basics To scroll quickly through the list, press and hold To exit the Caller ID list while the phone is in standby, press . To exit the Caller ID list during a call, press the BACK soft key repeatedly until you exit. -
Page 47: Using Call Waiting
Beyond the Basics Deleting Individual Caller ID Record Select the Caller ID record you want to delete. Press the DELETE soft key. DELETE CALLER ID appears in the display. Select YES. the display. Deleting All Caller ID Records Press the DELETE soft key. DELETE ALL? appears in the display. -
Page 48: Using Call Waiting Deluxe
Beyond the Basics Using Call Waiting Deluxe to use these features. Not all features are available in all areas. Check with your telephone provider for details. • To activate features, select the CALL WAITING submenu and the CALL WAIT DELUXE submenu to ON. -
Page 49: Redialing A Number
Beyond the Basics Redialing a Number handset. Using the Redial List To open the redial list, press the REDIAL soft key. on the four-way function key to scroll through the list. You can press and hold to scroll quickly through the list. To exit the redial list, press . -
Page 50: Deleting A Redial Record
Beyond the Basics Deleting a Redial Record to scroll through the redial list. press the DELETE soft key. Select YES, and press the OK soft key. the display. Finding a Lost Handset FIND HS on the base when seconds, and PAGING appears on the handset display. To cancel paging, press any key on the found handset or press FIND HS on the base. -
Page 51: Conferencing
Beyond the Basics • You can only place a caller on hold for 5 minutes. After 5 minutes has passed, that party’s line will be disconnected and the phone will return to standby. • While a call is on hold, Caller ID and Call Waiting cannot be received. -
Page 52: Using Special Features
Beyond the Basics To accept the call transfer, press /FLASH, INT’COM/HOLD, or the ANSWER soft key. If Auto Talk is on, the handset will /TONE, or #. To speak to the caller, press /FLASH on the receiving handset. transfer page will be connected to the call. If the transfer page is Using Special Features Muting the Ringer (One call only) press the MUTE soft key... -
Page 53: Privacy Mode
Beyond the Basics Privacy Mode If you don’t want another handset to interrupt you while on a PRIVACY soft key to turn but the a call and their display will list SYSTEM BUSY PLEASE TRY LATER. DirectLink Communication Feature function as two-way radios. This feature is called DirectLink. To calls until this feature is deactivated;... -
Page 54: Intercom
Beyond the Basics Making a DirectLink Call press the DirectLink soft key. keys (0-9). If the other handset is out of range or not set RANGE. /FLASH or the ANSWER soft key. To end the call, press or the END soft key. Exiting a DirectLink Communication return to standby, press the CANCEL soft key and then press... -
Page 55: Room Monitor
Beyond the Basics Intercom paging will be canceled if any of the following things occur: - You receive an outside call or an intercom page while selecting the other handset. - You do not select a handset within 30 seconds. - Another handset you are trying to page does not answer the page within one minute. -
Page 56: Tone Dialing Switch Over
Beyond the Basics Then, press the OK soft key. Press or the END soft key, or return the handset to the cradle. • For added mobility and convenience, you can use a handset placed in another room/location (where no handset was installed) to function as a microphone to pick up sounds. -
Page 57: Seven-Digit Dialing
Beyond the Basics Seven-Digit Dialing Press the MENU soft key. 0 – 9) to enter a 3-digit area code. If an area code has already been stored, it will appear in the display. Press the DELETE soft key to delete the stored code, and then enter a new one. -
Page 58: Troubleshooting
Beyond the Basics Troubleshooting Symptom Suggestion • Make sure the AC adapter is plugged into the base or the charger (if you The CHARGE indicator wall outlet. the handset is placed • Make sure the handset is properly in the cradle. seated in the cradle. - Page 59 Beyond the Basics Symptom Suggestion • Make sure that you are not too far • Charge the battery in the handset the handset on the base or charging The handset doesn’t cradle. ring or receive a page. • De-register the handset (see “Resetting Handsets”...
- Page 60 Beyond the Basics Symptom Suggestion • Charge the battery pack in the You cannot register • Make sure you have not stored ten the handset at the handsets already. base. • Follow the steps in “Appendix: Handset-Base Registration” on page •...
-
Page 61: Care
Beyond the Basics Care Handle the phone carefully; do not drop it. Keep the phone away keep it looking new. Service and Repair local RadioShack store for assistance. To locate your nearest RadioShack store, use the store locator feature on RadioShack’s website (www.radioshack.com operate it. - Page 62 Beyond the Basics and # FIND HS, connect the AC adapter. Keep pressing FIND HS until the CHARGE indicator starts to blink. Place the handset on the base and wait until the CHARGE This erases all the handset registration data on the base, not de-register the handset as in Step 1 and 2 above, and then place it on the base.
-
Page 63: Glossary
Beyond the Basics Glossary Accessory Handset base supports a total of ten handsets. The accessory handset is a Base line. CIDCW telephone provider and it is offered to users on a subscription while on another call. CW Deluxe or Call Waiting Deluxe caller rings you. -
Page 64: Index
Index Index Distinctive ring Entering text Answering a call Any key answer Auto talk Four way function key Banner Battery Hanging up Belt clip Headset Caller ID Installation Deleting Caller ID Key touch tone Making a call Storing a record in Language the phonebook LCD contrast... - Page 65 Index Phonebook T-Coil Copying entries Creating a new entry Transferring a call Deleting entries Traveling out of range Editing an entry phonebook Storing a Caller ID record Making a call Storing a record in the phonebook Using the list Ringer Distinctive ring Seven-digit dialing Soft key...
-
Page 66: Memo
Memo Memo... - Page 67 Memo Memo...
-
Page 68: Limited One-Year Warranty
RadioShack. New or reconditioned parts and or other incidence of excess voltage or current; (b) any repairs other than those provided by a RadioShack RadioShack 43-141 Printed in China RadioShack Corporation. All rights reserved. RadioShack and RadioShack.com are RadioShack Corporation.
Need help?
Do you have a question about the 43-141 and is the answer not in the manual?
Questions and answers