Table of Contents
Advertisement
Quick Links
Advertisement
Table of Contents

Related Manuals for AIPTEK POCKETCAM 3M


Summary of Contents for AIPTEK POCKETCAM 3M
- Page 1 3Mega Digital Camera English E- Manual...
-
Page 2: Table Of Contents
Contents Getting Started Menu Setting How to Enter Menu Setting Camera Parts Resolution Self Timer Battery Installation & Strap Flash Strobe Tripod & External Memory Date Stamp Exposure EV Compensation Using Your Camera User Setting Powering Your Camera On and Off Installation Taking Still Pictures and Recording AVI Movies... - Page 3 Notice 1. Do not drop, puncture or disassemble the camera. 2. Remove batteries during long periods between use. 3. Avoid all contact with water and dry hands before using. 4. Do not expose the camera to high temperature or leave it in direct sunlight. 5.
- Page 4 Bundled Accessories CD driver User guide TV-out cable Camera USB cable 2 x AA Alkaline Strap Tripod CF Card (Optional) batteries...
-
Page 5: Getting Started
Getting Started Camera Parts Battery Installation & Strap Tripod & External Memory... -
Page 6: Camera Parts
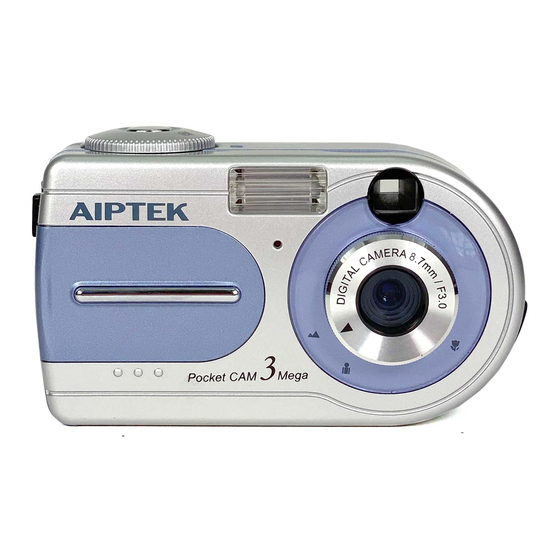
Camera Parts Flash Strobe Zoom Button Mode Dial LCD On/Off Button View Finder Menu Control Focus Lens TFT LCD Display Shutter Button Strap Holder DC Jack (DC 5V, 500mA) TV-out Port CF Card Slot Battery Cover USB Port Tripod Port... -
Page 7: Battery Installation & Strap
Battery Installation & Strap Battery Installation Your camera runs on two AA alkaline batteries. High performance batteries are recommended for this camera for maximum battery life. Strap Attach the carrying strap for convenience and safety. -
Page 8: Tripod & External Memory
Tripod & External Memory Tripod Use a tripod to minimize camera movement and Tight ensure optimal image quality, especially while Loose shooting longer movies, self-portraits or video conferencing. External Memory/ CF Card Your camera needs a CF Card to take pictures. Insert a CF card before starting taking pictures or No Card AVI Movies. -
Page 9: Using Your Camera
Using Your Camera Powering Your Camera On and Off Taking Still Pictures and Recording AVI Movies Playing Back AVI Movies and Still Pictures Deleting Files Focus Zoom In & Zoom Out Taking Nice Pictures Power... -
Page 10: Powering Your Camera On And Off
Powering Your Camera On and Off Rotate <Mode Dial> to (DSC Mode). Mode Dial Turn Off Turn On Auto power-off: your camera will automatically power off after 3 minutes of inactivity. - Page 11 Taking Still Pictures and Recording AVI Movies Taking Still Pictures (1) Rotate <Mode Dial> to (DSC Mode). (2) Center the target in the viewfinder or the LCD display. (3) Press the shutter button. (4) Wait for few seconds and an image is successfully captured.
- Page 12 Playing Back AVI Movies and Still Pictures (1) Rotate <Mode Dial> to (Playback Mode). (2) Press ) to playback the previous file. (3) Press ) to playback the next file. Picture Counter 7/20 Still Picture Battery Status Your camera will automatically playback AVI file when an AVI file is selected.
-
Page 13: Deleting Files
Deleting Files Press Menu Control Delete one file Eins l schen ö 7/20 Delete all files Format CF Card Exit (1) Rotate <Mode Dial> to (Playback Mode). In Delete mode, press ) or (2) Press ) or ) to shift between files. to shift between modes. -
Page 14: Focus
Focus In order to take the best pictures, please switch to proper focus in accordance with the reference ranges as below. 59"~ (150cm~ 31" ~ 59" (80cm~150cm) 16"~31" (40cm~80cm) -
Page 15: Zoom In & Zoom Out
Zoom In & Zoom Out Zoom Press zoom button 7/20 2.0X (1) Rotate <Mode Dial> to (DSC Mode). 1.0X~4.0X (2) Press and hold ) to zoom in preview image. Or press ) to zoom out preview image. (3) Zoom setting ranges from 1.0X to 4.0X. -
Page 16: Taking Nice Pictures
Taking Nice Pictures Keep the focus set to except for extreme close-ups. Make sure your subject is well lit from the front. Keep the camera level and steady when releasing the shutter. Make sure you have adequate light when taking still pictures or movies. -
Page 17: Power
Power When not using your camera for extended Battery Indicators periods, we suggest you remove the batteries. Your camera will automatically turn off when idle over 3 minutes. To wake up your camera, press <Menu Control>. LCD will enter suspend mode when idle over 30 seconds. - Page 18 Memo...
-
Page 19: Menu Setting
Menu Setting How to Enter Menu Setting Resolution Self Timer Flash Strobe Date Stamp Exposure EV Compensation User Setting... -
Page 20: How To Enter Menu Setting
How to Enter Menu Setting Press Menu Control Aufl sung ö 7/20 Use these two buttons to shift between modes. Exposure Resolution EV Compensation Self Timer User Setting Flash Strobe (1) Rotate <Mode Dial> to (DSC Mode). (2) Press <Menu Control> to enter Menu setting. Date Stamp Exit (3) Press... -
Page 21: Resolution
Resolution Press Menu Control Aufl sung ö Highlight resolution Exit Resolution mode 3 Mega resolution (2048x1536 pixels) (1) Highlight " Resolution" mode (2) Press <Menu Control> to enter " Resolution" mode. (3) Press ) or ) to highlight (3Mega), 2 Mega resolution (1600x1200 pixels) (2Mega) or (800,000). - Page 22 Resolution Still Pictures & AVI Storage Capacity 16 MB CF Card 16 MB CF Card as example as example Still Pictures AVI Movies Recording Up to 12 pictures Up to 4 minutes Time Up to 20 pictures Up to 50 pictures...
-
Page 23: Self Timer
Self Timer Press Menu Control Selbstauslöser Ein Selbstauslöser Self Timer mode (1) Press ) or ) to highlight " Self Timer " mode (2) Press <Menu Control> to enter " Self Timer " mode. (3) Highlight (4) Press <Menu Control> to select " Self Timer On" mode (5) Press the shutter button and counter will count ten seconds and automatically take the photo. -
Page 24: Flash Strobe
Flash Strobe Press Menu Control Blitz Auto flash Flash off Flash Strobe Anti red eye Exit (1) Press ) or ) to Auto Use automatic flash mode to determine correct exposure. flash highlight " Flash " mode (2) Press <Menu Control> to enter " Flash " Flash No flash strobe even when in dark or light scenes. -
Page 25: Date Stamp
Date Stamp Press Menu Control Datumaufdruck Ein Datum Einstellung Date Stamp Mode 2002.10.17 Year/Month/Day (1) Press ) or ) to highlight " Date Put date stamp on your image file. Stamp " mode (2) Press <Menu Control> to enter " Date Stamp" mode. No date stamp on your image file. -
Page 26: Exposure
Exposure Press Menu Control Auto Belichtung Exposure This function will automatically select backlight or Auto average metering. (1) Press ) or ) to highlight This function determines the correct exposure for a given photograph which gives more importance Backlight " Exposure " mode to the meter reading at the centre of the frame (2) Press <Menu Control>... -
Page 27: Ev Compensation
EV Compensation EV Compensation allows adding or subtracting evaluation values (EV) for an image. Usually you use this method to bring out details in dark zones or EV Komp. EV Komp. lessen the intensity of bright zones. (In dark zones) Add EV Comp (In bright zones) Subtract EV Comp (1) Press ) or... -
Page 28: User Setting
User Setting Several settings including date setting, buzzer setting, flicker setting and color system can be Datum Einstellung reset in this mode. Benutzereinstellung User Setting Date Setting Datum Einstellung Year 2002 Press <Menu Control> to highlight year, month, date and Month/ Day time. - Page 29 User Setting Flicker Setting Country England Germany Italy Spain France Netherlands Flicker setting is country specific. Improper flicker Setting 50Hz 50Hz 60Hz 50Hz 50Hz 50Hz setting will cause the LCD display or PC screen to flicker. Please refer to the table to adjust flicker Country Portugal Japan...
- Page 30 User Setting Change the language of the interface (1) Rotate <Mode Dial> to (DSC Mode). Englisch? (2) Press <Menu Control> to enter Menu setting. (3) Press ) or ) to select the icon, and then press <Menu Control> to enter the mode. (4) Press ) or ) to select the...
- Page 31 TV out Mode Connect your camera and TV via TV out cable for real time display. In TV out mode you can take still pictures and record AVI Movie, and further on you can share recorded AVI Movies Step1 and pictures with your family and friends. (1) Change the color system of your camera the same Video as the TV color system.
-
Page 32: Installation
Installation Software Installation Hardware Installation Mass Storage (MSDC) Launching the Camera Manager Mode Selecting Troubleshooting... -
Page 33: Software Installation
Software Installation Installing the 3 Mega Digital Camera (1) Insert the CD-ROM in your CD drive. The Installation menu should open automatically. (2) Click to start 3 Mega Digital Camera Installation. (3) Follow the onscreen instructions to complete Installation. (4) Click " Yes" to install Direct X 8.1. This will restart your PC. -
Page 34: Hardware Installation
Hardware Installation Connect the smaller end of the USB cable to the USB port of your camera. Plug the larger end of the USB cable to the USB port of your PC. - Page 35 Hardware Installation MS Windows XP/ME/2000 Users Installing " USB Mass Storage Device " Driver 1. Connect your camera and PC via USB cable. 2. Your PC will automatically install " USB Mass Storage Device" driver and complete " removable disk " installation. Your PC will add a "...
- Page 36 Hardware Installation MS Windows 98 SE Users: Installing " USB Mass Storage Device " Driver 1. Connect your camera and PC via USB cable. 2. Please follow the onscreen instructions to complete " removable disk " installation. Your PC will add a "...
-
Page 37: Mass Storage (Msdc)
Mass Storage (MSDC) While connecting to PC, your camera also serves as a removable disk (Mass storage). Excepting mode, rotate to the other four modes, your camera will serve as a removable disk. Mass Storage Mode (1) Rotate <Mode Dial> to either DSC, AVI or Playback mode. (2) Double-click "My Computer"... -
Page 38: Launching The Camera Manager
Launching the Camera Manager Follow the following two ways to launch your camera Manager, 3 Mega Digital Camera (If the program doesn't automatically launch). Click the " " icon on the Desktop to execute the program where you can begin to use your camera. Click on the "Start"... -
Page 39: Mode Selecting
Mode Selecting Rotate <Mode Dial> to to change the camera Album Mode to PC Camera mode. PC Camera Mode Rotate <Mode Dial> to mode to change the camera to Album mode. Album Mode PC Camera Mode This message will appear when you rotate <Mode Dial>... - Page 40 Album Mode Downloading pictures and movies Album Mode 1. Make sure your camera is connected to your PC via the USB cable. Click this button to launch the dialogue box 2. Set the 3 Mega Digital Camera to Ablum mode. 3.
- Page 41 Album Mode (10) (11) (12) (13) (14) (15) (1) Album Mode (2) Transfer images to the work area (3) Transfer images to the album (4) Create AVI file (5) Send Mail (6) Select All (7) Delete (8) Album Manager (9) Album (10) Delete (11) Select All (12) Image...
- Page 42 Album Mode Viewing pictures Double-click any picture or movie to launch the Next picture viewer. Previous picture Slide Show Exit Viewing movies Double-click any AVI movie to automatically launch the movie in your default media player.
- Page 43 Album Mode Album Manager 1. Highlight a picture on the work area and Album Manager click to transfer to the Photo Album. 2. Click the Album Manager to create a new Photo Album. 3. Key in a new album name. Then click the function "new". 4.
- Page 44 Album Mode Creating AVI files 1. Select jpg / bmp images from the work area. 2. Click to load the images to the AVI File Manager. 3. Order the image sequence, and adust the frame rate.
- Page 45 PC Camera Mode Rotate <Mode Dial> to to change the camera to PC Camera mode. Preview Window Record live video Capture live still image Set image size Steps 1. Press Advanced settings (default settings recommended) 2. Adjust recording speed and time. Select video source (if you have more 3.
- Page 46 PC Camera Mode Set Image Size Color Space Select one of the following functions when you have different needs. - RGB 24: better image quality - I420: faster speed Output Size Setting output size can change the size of the preview window.
-
Page 47: Advanced Settings
PC Camera Mode Advanced settings Video Setting - Banding Filter: When your PC screen flickers, please change the banding filter in Video Setting. The refresh rate (the number of times the screen is redrawn per second) is the most likely cause of flicker. Select 50Hz or 60Hz until your PC screen stops flickering.
Need help?
Do you have a question about the POCKETCAM 3M and is the answer not in the manual?
Questions and answers