Table of Contents
Advertisement
Quick Links
Advertisement
Table of Contents

Related Manuals for Planet Audio PI9758B


Summary of Contents for Planet Audio PI9758B
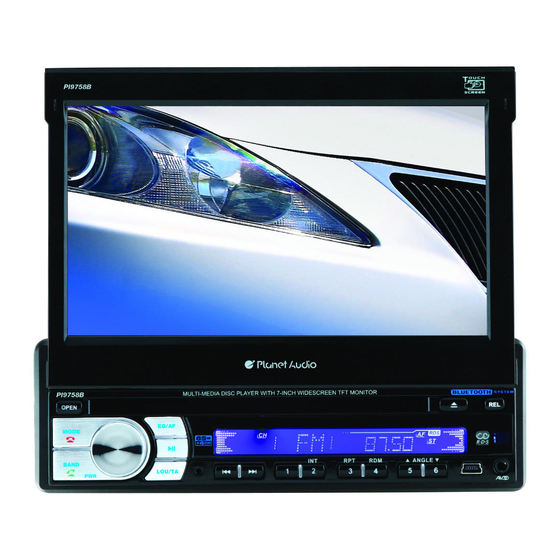
- Page 1 PI9758B PI9758B 02.2011...
-
Page 2: Table Of Contents
Contents Before You Start Main Menu Important Safeguards Main Menu Setup Video Adjust About this manual Precautions Audio Adjust Maintenance Source Setup System Adjust Location & function of the controls 7 Remote control Specifications DVD/VCD/MP4 DVD/VCD/MP4 Setup Installation DVD/VCD/MP4 Play Selecting Tracks Fast Wiring Connections 12 Number Buttons... -
Page 3: Additional Information
Contents Additional Information Common Symptoms Cause Solution If the power supply is properly connected to The car ignition is the car accessory, switch the ignition key to switched off ON or ACC. There is no power. Replace with same amperatge fuse rate. The fuse has blown. -
Page 4: Before You Start
Before You Start IPOD IMPORTANT SAFEGUARDS About this manual File Selector Eject IPOD During IPOD mode, to take IPOD out, the During IPOD mode, press ROOT on the remote control to go back to the previous main unit will switch to radio mode. catalog. -
Page 5: Precautions
Before You Start IPOD PRECAUTIONS IPOD play Note: * Pressing and holding in the monitor This unit can play the following discs only: to perform the same function During IPOD playback, connect the IPOD wire (5V) to the one in backside of main Switch Type of disc Recorded material... -
Page 6: Maintenance
Before You Start Bluetooth Maintenance To Dial by the Unit Audio Transfer between the Unit and Phone when cellphone is connected, press input the call number, then press Press to change the conversation from to dial, DIAL OK appears, when the call is the unit to the cellphone. -
Page 7: Location & Function Of The Controls
Bluetooth Before You Start Location of the Controls Cellphone Pairing Mode * Pressing PAIR on the head unit or in the monitor also performs the same function. 1. Browse your cellphone menu and find * Pressing in the monitor to turn off the bluetooth function. - Page 8 Before You Start Bluetooth The Base Bluetooth Operational Interface Using a Bluetooth Wireless Connection Press BT on the remote control or BT in the monitor to open the bluetooth operational The device can be dialed wirelessly in bluetoo- interface: th status. Before using the bluetooth function, please turn on your cellphone bluetooth func- BLUETOOTH tion.
-
Page 9: Remote Control
Before You Start AUX Touch Screen Menu In AUX mode, select A V SET: Remote Control Press SRC to turn to AUXF SET: AUDIO ADJUST AUXF VIDEO ADJUST VOL+ VOL- AV SET BACK AV SET For more details to adjust AUDIO, VIDEO and SYSTEM (Auto 1: PAL, NTSC, SECAM), Press SRC again to turn to AUXR SET: (Auto 2: P-M, P-N). - Page 10 Tuner Before You Start RDS Setup SOURCE/PWR (Pause/Play) Alternative Frequencies (Stop Playing) GOTO (playing time/track) Briefly pressing AF to activate the auto searching station function. When AF is on, 87.50MHz 87.50MHz SETUP the RDS signal is week or there is not, it BAND/TITLE will be found in the preseted frequencies NONE...
-
Page 11: Specifications
Tuner Before You Start Specifications MO/ST Selector On Screen Display During radio status, press OSD to display During radio status, you can press the edition information. General AM Tuner Section button on the remote control to select MONO mode or mode. -
Page 12: Installation
Tuner Installation Wiring Connection Band Selector Listening to the radio During radio status, repeatedly press BAND button to select bands in (Black line with red (Black line with AUX Audio input AUX Video input & white head) yellow head) lowing order: (Light Grey line with CH:1 87.50MHz... -
Page 13: Install The Unit
CD/MP3/SD/USB Installation ¼ ò µ ¥ ¹ Ê Õ Ï Å Å ³ ý Ö ¸ Ä Ï On Screen Display Install the Unit Eject SD Card During CD status, press OSD button the Push SD card to exit it. display shows: During SD playing mode, to exit SD card to switch to Disc mode;... - Page 14 Installation CD/MP3/SD/USB ¼ ò µ ¥ ¹ Ê Õ Ï Å Å ³ ý Ö ¸ Ä Install the Unit Repeat Playing Stop Play During CD/MP3/SD/USB playback , press During CD/MP3/SD/USB playback, Press to stop the playback. RPT to replay the current track, press Installation Method it again to cancel this function.
-
Page 15: Detach The Unit
CD/MP3/SD/USB Installation CD/MP3/SD/USB Setup Detach the Unit 00:00 00:00 001/105 During CD playback, touch the screen shows Detach the front panel at first. For more de- the following menu: Demo Track region tails, please refer to detach the front panel. amour 2. -
Page 16: Install The Front Panel
Installation DVD/VCD/MP4 ---Preferences page-- Install the Front Panel Detach the Front Panel Put notch (shown as picture) onto shaft Press REL button in the upper rightcorner, .And then slightly press into the right side. and then the front panel will be folded down. Default Example showing how to set load factory setting: (Press... -
Page 17: Clean The Connector
DVD/VCD/MP4 Installation ---Preferences page-- Clean the connector If the connector of the unit and the front panel is dirty, the unit may does not work normally. DVD Menu Example showing how to set Disc Menu Language: To avoid this situation, detach the front panel and clean it with a cotton swab dipped in (Press (Press... -
Page 18: Common Operations
Common Operations DVD/VCD/MP4 To Select Source by Menu Turning the Unit On/Off ---Preference page--- PWR button to turn on the Briefly press In any mode(except for DVD, SD, USB unit, press it again, the unit is still in mode), press SRC, BACK/ in the TV Type waiting status. -
Page 19: Eq Setting
Common Operations DVD/VCD/MP4 ¼ ò µ ¥ ¹ Ê Õ Ï Å Å ³ ý Ö ¸ Ä Ï EQ Setting Eject a Disc --Dual mono/DRC Setup-- While listening to the popular music, classic Press button to eject or insert a disc. music or rock music, you select the co- Note:... -
Page 20: Main Menu
Main Menu Main Menu DVD/VCD/MP4 Set up Main Menu --General Setup Page-- In this menu you can adjust CONTRAST, COLOR, TINT, PICTURE, BRIGHT, EXIT. Picture Adjust Captions Example showing how to set captions on/off: Press PICTURE in this menu, it will appear as follows: IPOD (Press... -
Page 21: Source Setup
DVD/VCD/MP4 Main Menu 4.System Adjust --General Setup Page-- After selecting SYSTEM, the sub menu will appear as follows: VOLUME TV Display Example showing how to set TV Display mode: (Press , then press ENTER) (Press CLOCK SYS --General Setup Page-- --General Setup Page-- KEY BEEP TV shape... - Page 22 Main Menu DVD/VCD/MP4 Monitor Flex Subwoofer DVD SETUP MENU Selecting MENU Press SETUP on remote control or MENU Selecting Menu: During DVD status, on the main unit or in the monitor, main press MENU to return to the root menu and sub-menu will appear on TFT, menu, all of the chapters will appear CLOCK SYS pressing...
- Page 23 DVD/VCD/MP4 Main Menu Local Area RT Scroll Changing the viewing angle Program Playing (Multi-angle) During VCD mode, press PROG, the With DVDs featuring multi-angle (scenes TFT displays the program menu. Press shot from multiple angles) recordings, you NUMBER BUTTONS to select the track Number and then press to move the cursor can press...
- Page 24 Main Menu DVD/VCD/MP4 During VCD status, press OSD button the Changing audio language Press NEXT to display the menu follows, display shows: (Multi-audio) press PREV to display the previous one. Single elapsed Single remain DVDs can provide audio playback with different language.
-
Page 25: Dvd/Vcd/Mp4 Setup
DVD/VCD/MP4 DVD/VCD/MP4 Playing Tracks at Random Number Buttons DVD/VCD/MP4 Setup Note: Press one of The function can be operated by selecting the Number Buttons(0~9) During DVD/VCD/MP4 playback, touch During DVD/VCD/MP4 playback, press to select a track, it will be played auto- DVD MENU SETUP.
Need help?
Do you have a question about the PI9758B and is the answer not in the manual?
Questions and answers