
Related Manuals for GreenWorks 20062


Summary of Contents for GreenWorks 20062
- Page 1 10" 7A ELECTRIC POLE SAW 20062 Owner’s Manual TOLL-FREE HELPLINE: 1-888-90WORKS (888.909.6757) Read all safety rules and instructions carefully before operating this tool.
-
Page 2: Table Of Contents
CONTENTS Contents ..........................2 Specifications ........................2 Important Safety Instructions ....................3 - 4 General Safety Rules ......................5 - 6 Symbols ..........................7- 8 Electrical ......................... 9 -10 Know Your Pole Saw ......................11-12 Assembly ........................13-15 Operation ........................16 -22 Maintenance ......................... 23-29 Troubleshooting ......................... -
Page 3: Important Safety Instructions
IMPORTANT SAFETY INSTRUCTIONS W A R N I N G Do not attempt to operate this tool until you have read all of the instructions, safety information, etc. contained in this manual thoroughly and understand them completely. Failure to comply may result in accidents involving fire, electric shock, or serious personal injury. -
Page 4: Important Safety Instructions
IMPORTANT SAFETY INSTRUCTIONS • Do not expose the chainsaw to rain. • Do not use the chainsaw in damp or wet locations. • To reduce the risk of electric shock, this product has a polarized plug (one blade is wider than the other) and will require the use of a polarized extension cord. -
Page 5: General Safety Rules
GENERAL SAFETY RULES • Kickback is a dangerous reaction that can lead to serious injury. Kickback may occur when the moving chain contacts an object at the upper portion of the tip of the guide bar, or when the wood closes in and pinches the chain in the cut. Contact at the upper portion of the tip of the guide bar can cause the chain to dig into the object and stop the chain for an instant. - Page 6 GENERAL SAFETY RULES • Check damaged parts. Before further use of the product, a guard or other part that is damaged should be carefully checked to determine whether it will operate properly and perform its intended function. Check for misalignment or binding of moving parts, broken parts and mountings, and any other condition that may affect the operation of the tool.
-
Page 7: Symbols
SYMBOLS Some of the following symbols may be used on this product. Please study them and learn their meaning. Proper interpretation of these symbols will allow you to operate the product better and safer. SYMBOL NAME DESIGNATION/EXPLANATION Volts Voltage Amperes Current Hertz Frequency (cycles per second) -
Page 8: Symbols
SYMBOLS The following signal words and meanings are intended to explain the levels of risk associated with this product. SYMBOL SIGNAL MEANING DANGER Indicates an imminently hazardous situation, which, if not avoided, will result in death or serious injury. WARNING Indicates a potentially hazardous situation, which, if not avoided, could result in death or serious injury. -
Page 9: Electrical
ELECTRICAL W A R N I N G TO AVOID ELECTRICAL HAZARDS, FIRE HAZARDS, OR DAMAGE TO THE TOOL, USE PROPER CIRCUIT PROTECTION. THIS CHAINSAW IS WIRED AT THE FACTORYFOR 120 V OPERATION. CONNECT TO A 120 V, 15 A CIRCUIT, AND USE A 15 A TIME-DELAYED FUSE OR CIRCUIT BREAKER. - Page 10 ELECTRICAL Fig. 1 **Ampere rating (on product data plate) MINIMUM GAUGE FOR EXTENSION CORDS (AWG) (WHEN USING 120 V ONLY) Amp Rating Total Length of Cord in Feet (meters) More Than Not More Than 25' (7.6 m) 50' (15 m) 100' (30.4 m) 150' (45.7 m) Not Recommended...
-
Page 11: Know Your Pole Saw
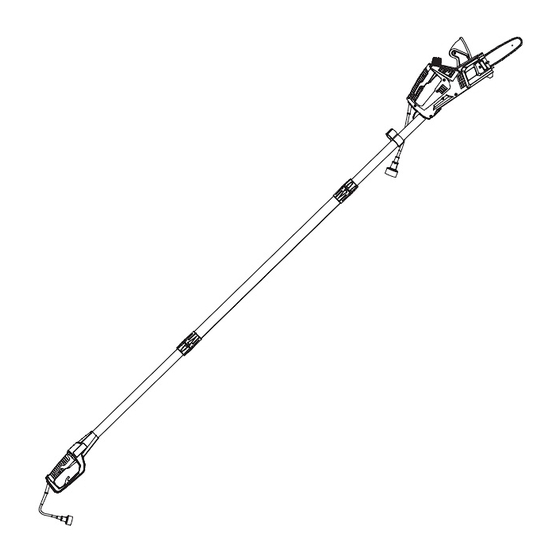
KNOW YOUR POLE SAW OIL CAP CHAINSAW (Detachable) CORD LOCK EXTENSION POLE SCABBARD POLE SAW HANDLE Fig. 2... - Page 12 KNOW YOUR POLE SAW The safe use of this product requires an understanding of the information on the product and in this Owner’s Manual, as well as a knowledge of the project you are attempting. Before using of this product, familiarize yourself with all operating features and safety rules. DETACHABLE SAW (See Fig.
-
Page 13: Assembly
ASSEMBLY UNPACKING This product requires assembly. • Carefully remove the product and any accessories from the box. Make sure that all items listed in the packing list are included. • Inspect the product carefully to make sure no breakage or damage occurred during shipping. •... - Page 14 ASSEMBLY • Lower the collar on the handle pole to the threaded base on the intermediate pole and rotate clockwise to secure. • Repeat this process to attach the powerhead pole. NOTE: Handle pole and chainsaw pole should not be able to separate from intermediate pole once assembled correctly.
- Page 15 ASSEMBLY REMOVING THE POLES FROM CHAINSAW (See Fig. 5) • Pull the chainsaw power cord out of the CORD LOCK (3). • Lift up the CAM LOCK (1). • Pull out the chainsaw pole from the chainsaw. • Press down the CAM LOCK (1). CHAINSAW (Detachable Saw —...
-
Page 16: Operation
OPERATION W A R N I N G Do not allow familiarity with this product to make you careless. Remember that a careless fraction of a second is sufficient to inflict serious injury. W A R N I N G Do not use any attachments or accessories not recommended by the manufacturer of this product. - Page 17 OPERATION Use a lubricant that is designed for chains and chain oilers, and is formulated to perform over a wide temperature range with no dilution required. NOTE: Pole saw comes from the factory with no bar and chain oil added. Level should also be checked after every 20 minutes of use, and refilled as needed.
- Page 18 OPERATION Use as a Pole Saw (See Fig. 8) • Secure the chainsaw power cord with cord lock. • Plug pole saw power cord into extension cord. (USED AS A POLE SAW) CHAINSAW POWER CORD CORD LOCK POLE SAW POWER CORD EXTENSION CORD Fig.
- Page 19 OPERATION STARTING AND STOPPING (See Fig. 9) TO START THE MOTOR: • Connect the saw to power supply. • Place your thumb on the lock-off button, and pull it completely toward you. • Fully depress the trigger switch. TO STOP THE MOTOR: •...
- Page 20 OPERATION ADJUSTING POLE EXTENSION (See Fig. 10.) • Disconnect the pole saw from the power supply. • Rotate the collar clockwise to loosen. • Push poles towards each other to shorten the pole, or pull away from each other to lengthen the pole.
- Page 21 OPERATION SECOND CUT LOAD FIRST CUT 1/4 DIA CUTTING GUIDE FINAL CUT Fig. 11 Fig. 12 BASIC CUTTING PROCEDURE (See Fig. 13-14.) Follow the steps below to prevent damage to tree or shrub bark. Do not use a back-and-forth sawing motion. •...
- Page 22 OPERATION • The most typical cutting application is to position the unit at an angle of 60° or less, depending on the specific situation, as shown. As the angle of the pole saw shaft to ground increases, the difficulty of making the first cut (from the underside of limb) increases. •...
-
Page 23: Maintenance
MAINTENANCE I M P O R T A N T : When servicing, use only identical replacement parts. Use of any other parts may create a hazard or cause product damage. I M P O R T A N T : Always wear safety goggles or safety glasses with side shields during power tool operation or when blowing dust. - Page 24 MAINTENANCE CHAIN TENSION (See Fig. 15 - 16.) W A R N I N G To avoid possible serious injury, never touch or adjust the chain while the motor is running. The saw chain is very sharp. Always wear protective gloves when performing maintenance involving the chain.
- Page 25 MAINTENANCE REPLACING THE BAR AND CHAIN (See Fig. 17 - 20.) W A R N I N G To avoid possible serious injury, stop the motor and disconnect from power supply before replacing the bar, chain, or performing any maintenance operation. •...
- Page 26 MAINTENANCE • Replace the chain cover and install the lock knob. Tighten the lock knob finger tight only. The bar must be free to move for tension adjustment. • Remove all slack from chain by turning the chain tensioning bolt clockwise, assuring that the chain seats into the bar groove during tensioning.
- Page 27 MAINTENANCE CHAIN OILER (See Fig. 21.) W A R N I N G To avoid possible serious injury, stop the motor and remove the battery from the pole saw before replacing the bar, chain, or performing any maintenance operation. • Use a lubricant that is designed for chains and chain oilers and is formulated to perform over a wide temperature range with no dilution required.
- Page 28 MAINTENANCE CHAIN MAINTENANCE (See Fig. 22.) For smooth and fast cutting, the chain needs to be maintained properly. The following conditions indicate that the chain requires sharpening: • Wood chips are small and powdery • Chain must be forced through the wood during cutting •...
- Page 29 MAINTENANCE HOW TO SHARPEN THE CUTTERS (See Fig. 23-26.) Be careful to file all cutters to the specified angles and to the same length, because fast cutting can only be obtained when all cutters are uniform. • Tighten the chain tension enough that the chain does not wobble. Do all of your filing at the midpoint of the bar.
-
Page 30: Troubleshooting
TROUBLESHOOTING PROBLEM CAUSE REMEDY Bar and chain running hot Check chain tension for Tension chain. Refer to and smoking. overtightened condition. Chain Tension earlier in this manual. Bar lube reservoir empty Check bar lube reservoir. Motor runs, but chain is not Chain tension too tight. -
Page 31: Warranty
(4) years against defects in materials, parts or workmanship. GREENWORKS™, at its own discretion will repair or replace any and all parts found to be defective, through normal use, free of charge to the customer. This warranty is valid only for... -
Page 32: Exploded View
EXPLODED VIEW... - Page 33 EXPLODED VIEW...
-
Page 34: Parts List
PARTS LIST... - Page 35 PARTS LIST...
- Page 36 TOLL-FREE HELPLINE: 1-888-90WORKS (888.909.6757) Rev: 01 (01-31-10) Printed in China on 100% Recycled Paper...
Need help?
Do you have a question about the 20062 and is the answer not in the manual?
Questions and answers