Advertisement
IONIZER/CALENDAR with remote control
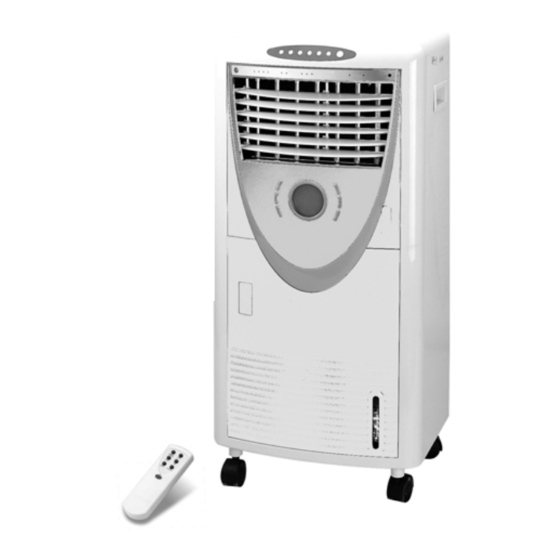
Thank you for purchasing the De'Longhi EV100 Evaporative Cooler.
This is a state of the art air cooler, humidifier and air purifier.
Please read this manual carefully to ensure correct use & long life of your unit.
Keep this manual in a safe place for future reference.
INSTALLATION & OPERATING GUIDE
1.
Open the carton & remove the unit from the packaging.
2.
Locate all accessories.
3.
Open the water tank door, & fill tank with clean water up to the maximum
level but not past it – DO NOT OVERFILL.
If ice blocks are being used do not fill past the minimum level to allow for the
ice blocks to be inserted.
4.
Be careful when filling the water tank to ensure no water is spilt on the
unit as damage may occur - Wipe up any spills immediately.
5.
Keep the water tank door closed when unit is operating.
6.
Always use clean water, purified or distilled water is preferable.
7.
To turn the unit on, press the ON/SPEED button.
8.
The timer can be set to turn the unit off after a pre-set period.
The maximum timer setting is 7 hours 30 minutes.
9.
To oscillate air movement, press the oscillation button to start the
louvres moving from left to right & vise versa. You can also adjust the
vertical air movement manually by adjusting the vertical direction
vanes.
10.
To turn the unit off press the OFF button and unit will go into standby
mode.
EVAPORATIVE COOLER / HUMIDIFIER
EV100
Advertisement
Table of Contents

Summary of Contents for DeLonghi EV100
- Page 1 EVAPORATIVE COOLER / HUMIDIFIER IONIZER/CALENDAR with remote control Thank you for purchasing the De’Longhi EV100 Evaporative Cooler. This is a state of the art air cooler, humidifier and air purifier. Please read this manual carefully to ensure correct use & long life of your unit.
-
Page 2: Remote Control
Remote Control: (i). The unit can also be completely controlled with the remote control. Insert 2 x AA batteries in the remote control – Alkaline batteries are recommended for longer battery life. (ii). Except for the PRESET button, all other functions on the remote are on the control panel of the unit. - Page 3 Description of the Components control panel remote control receiver function indicator front air outlet calendar LCD calendar control button water tank catch water tank door ice blocks handle (one each side) water level indicator battery compartment air filter (removable) power cord & plug castor...
-
Page 4: Control Panel
CONTROL PANEL INDICATOR PANEL Control Panel Operation ON/SPEED There are three speeds – High / Medium / Low. Press this button to start the unit at medium speed, after 3 seconds it changes to low speed, then you can select the desired speed. COOLER/HUMIDIFIER After you have filled the water tank with water, you can start the humidifier by pressing this button, after 20 seconds the humidity... - Page 5 • Sleep Mode In this mode the fan gradually reduces speed. Sleep mode has the following variations: (i). When set at HI position at the start, the fan will operate at high speed for 30 mins, then it will switch to medium fan speed.
- Page 6 To set the time/month/date Press the SET button to select the time/month/date parameters. The display will be blinking for the parameter to be set – use the UP/DOWN buttons to set the desired value. Press the SET button again & repeat the procedure with the UP/DOWN buttons to set all time/month/date parameters.
- Page 7 Prevention of “Air-Con” Symptons for healthier life Extended periods in an air-conditioned room may result in exposure to excessive dust, hazardous gas and positive ions, which induce “Air-con” symptoms (light headedness, insomnia, nervosas, hypo immunity, amnesia…) causing serious health & comfort issues. It is verified through testing that rooms equipped with negative ion fans can have the negative ions increased from 50 to 10,000 within half an hour of operation.
-
Page 8: Cleaning
CLEANING Water screen cloth Unplug the power cord, take out the AIR FILTER (7), and then undo the SCREW (6), press the button on the DUST PROTECTION PANEL (5), and then withdraw it. Turn the KNOB (2) at each side of the WATER SCREEN CLOTH PANEL (3) and then lift up to remove the WATER SCREEN CLOTH PANEL (3). -
Page 9: Air Filter
Air Filter Unplug the power cord, loosen the screw of the air filter and then press the button on the side to remove the air filter. In a smoky or dusty environment the filter may appear gray after 1 -2 months and will need to be cleaned. -
Page 10: Specifications
• When adding water, do not overfill water above “MAX” level. If ice blocks are being used, place the ice block(s) in the water tank when the tank is empty, then fill the tank with water to the maximum level. •...


Need help?
Do you have a question about the EV100 and is the answer not in the manual?
Questions and answers
where is the internal safety switch