Table of Contents
Advertisement
Available languages
Available languages
Advertisement
Table of Contents

Subscribe to Our Youtube Channel
Related Manuals for DeLonghi EL275 Series


Summary of Contents for DeLonghi EL275 Series
- Page 1 www.delonghi.com...
-
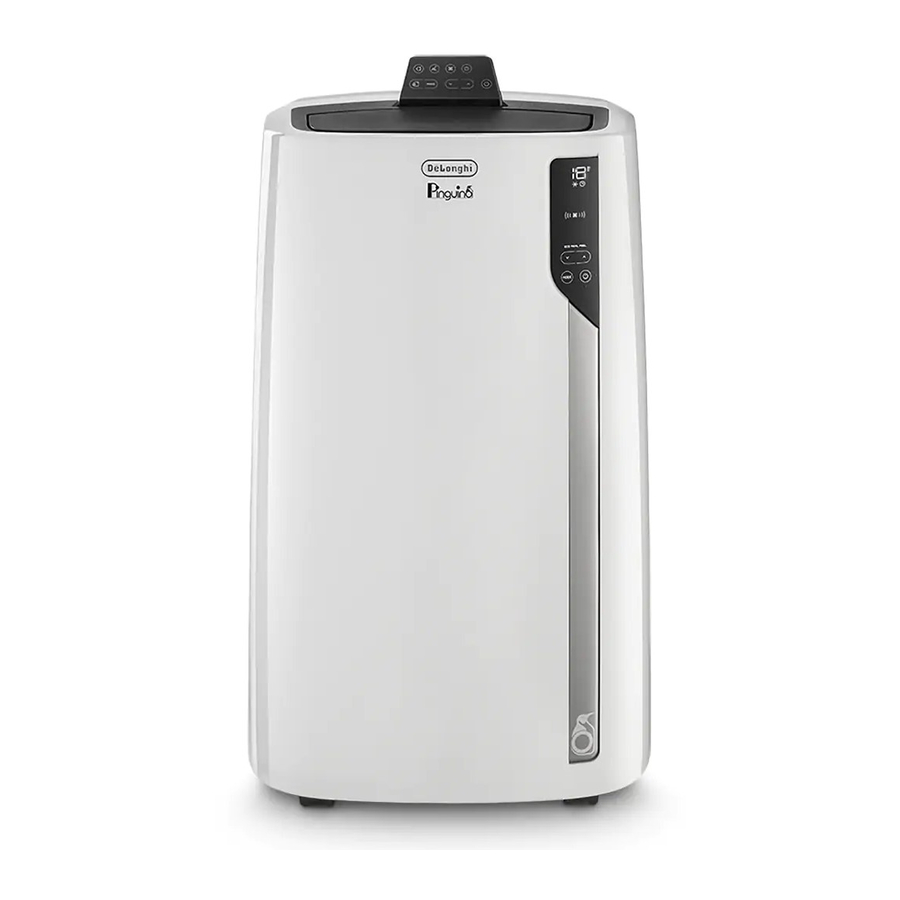
Page 2: Portable Air Conditioner
EL275 SERIES PORTABLE AIR CONDITIONER Instructions for use. Keep these instructions Visit www.delonghi.com for a list of service centers near you. ELECTRIC CHARACTERISTICS 115 V~ 60 Hz CONDITIONNEUR D’AIR PORTATIF Mode d’ e mploi . Conservez cette notice Visitez www.delonghi.com pour y voir une liste des centres de réparation proches de chez vous. - Page 3 pag. 4 page 16 pág. 28...
-
Page 5: Important Safeguard
Important safeguard • Avoid using heaters near the unit. • The unit should be transported in a vertical • Use this appliance only as described in this position. If this is not possible secure the unit at instruction manual. an angle, do not lie it horizontally. As with any electrical appliance, the instructions • Before transporting the unit, drain the unit. aim to cover as many situations as possible. After transportation, wait at least 6 hours before Caution and common sense should be used when switching the unit on. - Page 6 INTRODUCTION Thank you for choosing a De’Longhi product. Please take a few Note: This appliance features an auto evaporative moments to read the instructions to avoid risks or damage to the function to remove excess condensate water appliance. during cooling and dehumidifiying modes. DESCRIPTION CONDITIONING WITH INSTALLATION Description of the appliance (See page 3 - A) For optimal results set-up your appliance in this way: A1 Air outlet grid •...
- Page 7 CONDITIONING WITHOUT INSTALLATION Proceed as follows: • Drill a hole ø 5,25 inches (134 mm) in an outside wall or You can also set-up in a double-hung window: through a wooden kickboard. Respect the dimensions and • Place the window bracket in the window sill, extend the height of the hole given in figure 3 and 4. bracket fully within the window frame, fix the bracket by using the pin then lower the window onto the bracket. (Should the window bracket be too large for the window, the plastic can be cut with a saw by a qualified profes- sional.) •...
-
Page 8: Control Panel
• Fit the assembled air exhaust hose B3 in the relevant hous- accessories and spare/replacement parts, please contact ing located on the rear side of the appliance, (fig. 1) then, our toll free customer service call center at: apply the window outlet B5 to the air exhaust hose B3 and 1-800-322-3848 [US only] place it outside the window to exhaust the hot air. 1-888-335-6644 [Canada only] or log onto our website at www.delonghi.com CONTROL PANEL DESCRIPTION OF THE CONTROL PANEL (C) C1 ON/STAND-BY (on/off) key C2 Function selection key MODE (air conditioning, dehumidifying, fan, heating) C3 Increase key C4 Decrease key C5 Temperature indicator C6 Timer indicator C7 Timer symbol... -
Page 9: Operating From The Control Panel
OPERATING FROM THE CONTROL PANEL DEHUMIDIFYING MODE TURNING THE APPLIANCE ON/OFF This is ideal for reducing humidity in the Before plugging the appliance room (spring and autumn, damp rooms, check the cap on back of the unit rainy periods, etc). For this type of use, the are correctly inserted on drain- appliance must be set up as for air condi- age hose A11. -
Page 10: Operating From The Remote Control
Notes: • In this mode, the air flow is selected automatically by the ORANGE LIGHT: Room conditions far appliance and cannot be set manually. from optimal level. • When operating in very cold rooms, the appliance defreezes automatically, momentarily interrupting normal operation. In GREEN LIGHT: Most people feel good this case, “ Lt “ appears on the display. During this operation, it room conditions, near optimal level. is normal for the noise made by the appliance to change. • In this mode, you may have to wait a few minutes before the appliance starts giving out hot air. Perfect! BLUE LIGHT: Best comfort level. • In this mode, the fan may operate for short periods, even Perfect! though the set temperature has already been reached. • It may happen that the display shows “HL” alarm. In this case, empty the internal safety tank following the instruc- •... - Page 11 Do not mix alkaline, standard (carbon-zinc) or rechargeable TURNING THE APPLIANCE ON/OFF (nickel-cadmium) batteries. Do not dispose of batteries in fire. • Plug into the outlet. Batteries may explode or leak. If the remote control is not be • Press the button (D1) (when turned on, the air con- used for a certain length of time, remove the batteries. ditioner starts operating in the same mode as when it was turned off) .
-
Page 12: Setting The Timer
SETTING THE TIMER Notes: • This equipment has been tested and found to comply with the limits for a Class B digital device, pursuant to part 15 of the FCC Rules. T hese limits are designed to provide reasona- ble protection against harmful interference in a residential installation. • This equipment generates, uses and can radiate radio fre- quency energy and, if not installed and used in accordance with the instructions, may cause harmful interference to radio communications. However, there is no guarantee that interference will not occur in a particular installation. If this equipment does cause harmful interference to radio or television reception, which can be determined by turn- The timer allows for the delayed start up or shut down of the ing the equipment off and on, the user is encouraged to try appliance. This function will prevent wasting electricity by opti- to correct the interference by one or more of the following mising the operating periods. measures: - Reorient or relocate the receiving antenna. How to program delayed shut down - Increase the separation between the equipment and •... -
Page 13: Self-Diagnosis
SELF-DIAGNOSIS The appliance has a self diagnosis system to identify a number of warning/malfunctions. Error messages are displayed on the appliance display. IF ... IS DISPLAYED, IF ... IS DISPLAYED, IF ... IS DISPLAYED, “Low Temperature” Probe Failure “High Level” (frost prevention) (Probe damaged) (Internal tray full) ..WHAT SHOULD I DO? ..WHAT SHOULD I DO? ..WHAT SHOULD I DO? The appliance is fitted with a frost protec- If this is displayed, contact your local au- Empty the internal safety tank following tion device to avoid excessive formation of thorized service center. -
Page 14: Tips For Correct Use
TIPS FOR CORRECT USE CLEANING To ensure optimal results from your air conditioner, follow these Before cleaning or maintenance, turn the appliance off by recommendations: touching the button, then unplug from the outlet. • close the windows and doors in the room to be air condi- tioned When installing the air conditioner semi-perma- CLEANING THE CABINET nently, you should leave a door slightly open (as little as You should clean the appliance with a slightly damp cloth then 0.39 inch. (1 cm)) to guarantee proper ventilation. dry with a dry cloth. For safety reasons, never wash the air con- ditioner with water. Precautions Never use petrol, alcohol or solvents to clean the appliance. Nev- er spray insecticide liquids or similar. CLEANING THE BIO SILVER AIR FILTER (If fitted) If the filter is dirty, air circulation is compromised and the ef- ficiency of the dehumidifying and air purifying functions de- creases. -
Page 15: Technical Specifications
CHECKS AT THE START OF THE SEASON Transport, filling, cleaning, recovery and disposal of refrigerant should be performed by a technical service Make sure the power cable and socket are in perfect condition and make sure the earthing system is efficient. Comply strictly centre appointed by the manufacturer only. with the installation standards. The appliance should be disposed of by a specialist centre appointed by the manufacturer only. -
Page 16: Troubleshooting
TROUBLESHOOTING Check the following points before calling the authorised Technical Service Centre in your area. PROBLEMS CAUSES SOLUTIONS The air conditioner does not turn on lt is not plugged in plug it in there is no power wait the internal protection device was triggered call the help centre The air conditioner works for a short the air exhaust hose is obstructed or bent correctly position the air exhaust hose, period of time limiting the length and curves as much as possible and avoiding any obstructions an obstruction is impeding air exhaust identify and remove the obstacles that outside impede air exhaust outside... -
Page 17: Précautions Importantes
Précautions importantes • Ne posez pas d’ o bjets chauds ou lourds sur l’appareil. • Utilisez cet appareil uniquement tel que décrit • Nettoyez les filtres au moins une fois par dans le présent manuel d’instructions. semaine. Comme avec tous les appareils électriques, les • Évitez d’utiliser des chauffages près de l’appareil. instructions visent à couvrir autant de situations • L’appareil doit être transporté en position que possible. Il faut utiliser des précautions verticale. S’il n’... - Page 18 INTRODUCTION UTILISATION Merci d’avoir choisi un produit De’Longhi. Veuillez prendre quel- Remarque: L’appareil est fourni avec une fonction ques moment pour lire les instructions afin d’ é viter les risques ou d’auto-évaporation permettant d'éliminer d’ e ndommager l’appareil. le condensat pendant les modes de refroi- dissement et de déshumidification. DESCRIPTION INSTALLATION DU CONDITIONNEUR D’AIR Description de l’appareil (voir page 3 - A). A1 Grille d’...
- Page 19 CONDITIONNEUR D’AIR SANS INSTALLATION Procédez comme suit : • Percez un orifice de ø 134 mm dans un mur extérieur ou Vous pouvez également installer l’appareil dans une dans un panneau de fenêtre. Respectez les dimensions et la fenêtre à guillotine : hauteur de l’ o rifice donné dans la figure 3 et 4. • Placez le support de fenêtre sur le rebord de fenêtre, étendez le support pleinement à l’intérieur du cadre de la fenêtre, fixez le support à l’aide de la goupille, puis abaissez la fenêtre sur le support. (Si le support de fenêtre est trop grand pour la fenêtre, le plastique peut être coupé à l'aide d'une scie par un professionnel qualifié.) • Fixez le flexible d’ é vacuation d’air B3 dans le logement cor- respondant situé à l’arrière de l’appareil. (fig. 1).
-
Page 20: Panneau De Commande
• Logez l’ e nsemble du flexible d’ é vacuation d’air B3 dans le rechange, veuillez contacter notre numéro sans frais pour boîtier à l’arrière de l'appareil (fig. 1) puis appliquez la sor- le service à la clientèle au: tie de fenêtre B5 au flexible d'évacuation B3 et placez-le à 1-800-322-3848 [États-Unis seulement] l'extérieur de la fenêtre pour évacuer l'air chaud. 1-888-335-6644 [Canada seulement] ou visitez notre site Web au: www.delonghi.com PANNEAU DE COMMANDE DESCRIPTION DU PANNEAU DE COMMANDE (C) C1 MARCHE/VEILLE touche marche/arrêt C2 Touche de sélection de fonctions MODE (conditionneur d’air, déshumidifiant, ventilateur, chauffage) C3 Touche d'augmentation C4 Touche de diminution C5 Indicateur de température... -
Page 21: Mode Déshumidification
FONCTIONNEMENT MODE DÉSHUMIDIFICATION MISE EN MARCHE/EXTINCTION DE L’APPAREIL Ceci est idéal pour réduire l'humidité dans la Avant de brancher l’appareil véri- pièce (au printemps et à l'automne, pièces fiez toujours que les bouchons qui humides, périodes pluvieuses, etc). Pour ce se trouvent à l’arrière de l’appa- type d'utilisation, l'appareil doit être réglé reil sont bien insérés dans le drai- en mode conditionnement de l'air. En nage A11. - Page 22 Remarques : LUMIÈRE ORANGE:Conditions de la pièce • Dans ce mode, le débit d'air est automatiquement sélection- loin du niveau optimal. né par l'appareil et ne peut pas être réglé manuellement. • En cas de fonctionnement dans des pièces très froides, l'appareil se désactive automatiquement, interrompant LUMIÈRE VERTE: La plupart des gens temporairement le fonctionnement normal. Dans ce cas, ressentent de bonnes conditions environ- "Lt" apparaît sur l'écran. Pendant cette opération, il est nementales, proches du niveau optimal.
-
Page 23: Utilisation De La Télécommande
Ne mélangez pas des piles alcalines, standard (carbone-zinc) ou MISE EN MARCHE/EXTINCTION DE L’APPAREIL rechargeable (nickel-cadmium). Ne jetez pas les piles dans le • Branchez le câble dans la prise secteur. feu. Les piles peuvent exploser ou fuir. Si vous n’utilisez plus • Appuyez sur le bouton (D1) (lorsqu'il est allumé, le condi- la télécommande pendant un certain temps, retirez les piles. tionneur d'air démarre dans le même mode qu’il a été éteint) . -
Page 24: Réglage De La Minuterie
RÉGLAGE DE LA MINUTERIE Remarques : • Cet équipement a été testé et jugé conforme aux critères de seuils pour un appareil numérique de classe B, conformé- ment à la partie 15 des Règles FCC. Ces seuils sont destinés à fournir une protection raisonnable contre les interfé- rences nuisibles dans une installation résidentielle. • Cet équipement génère, utilise et émet de l’ é nergie de fréquence radio et, s’il n’ e st pas installé et utilisé conformé- ment aux instructions, peut provoquer des interférences nocives avec les communications radio. Cependant, rien ne garantit qu’aucune interférence ne se produira dans une installation particulière. Si cet équipement cause des... -
Page 25: Auto-Diagnostic
AUTO-DIAGNOSTIC L'appareil possède un système d’auto-diagnostic permettant d'identifier un certain nombre d'avertissements/dysfonctionnements. Les messages d’ e rreur s’affichent sur l’ é cran de l’appareil. SI ... S'AFFICHE, SI ... S'AFFICHE, SI ... S'AFFICHE, « Basse température » Échec sonde « Niveau élevé » (prévention contre le gel) (Sonde endommagée) (Bac interne plein) ..QUE DEVRAIS-JE FAIRE ? ..QUE DEVRAIS-JE FAIRE ? ..QUE DEVRAIS-JE FAIRE ? L'appareil est équipé d'un dispositif de Si cela est affiché, contactez le service Vider le réservoir de sécurité interne en protection antigel afin d'éviter la for-... -
Page 26: Conseils Pour L'utilisation
CONSEILS POUR L’UTILISATION NETTOYAGE Afin d’ o btenir des résultats optimaux de votre conditionneur Avant le nettoyage ou la maintenance, éteignez l’appareil en d'air, suivez les recommandations suivantes : appuyant sur le bouton , puis débranchez-le de la prise. • Fermez les fenêtres et les portes de la pièce à traiter. Lors- que vous installez le conditionneur d’air de façon semi-per- NETTOYAGE DE L’ARMOIRE manente, vous devriez laisser la porte légèrement ouverte Vous devriez nettoyer l'appareil avec un chiffon légèrement (1 cm environ) afin de garantir une ventilation adéquate. -
Page 27: Spécifications Techniques
INSPECTIONS AU DÉBUT DE LA SAISON Toutes les opérations de transport, remplissage, nettoyage, récupération et élimination doivent être Assurez-vous que le câble d'alimentation est en parfait état et effectuées uniquement par un centre de service agréés que le système de mise à la terre est efficace. Conformez-vous par le fabricant. strictement aux normes d’installation. La mise au rebut de l’appareil doit être effectuée exclusi- vement par un personnel spécialisé... -
Page 28: Dépannage
DÉPANNAGE Vérifiez les points suivants avant d'appeler votre SAV agréé le plus proche. PROBLÈMES CAUSES SOLUTIONS Le conditionneur d’air ne s’allume pas ll n'est pas branché branchez-le il n'y a pas de courant attendez le dispositif de protection interne a été Appelez le centre d’assistance déclenché Le conditionneur d’air fonctionne pendant le flexible d’ é vacuation d'air est obstrué positionnez correctement le flexible un court instant ou plié d’ é vacuation d'air, en limitant la longueur et les courbures autant que possible et en évitant toutes les obstructions Une obstruction empêche l’air de s’ é vacuer Identifiez et retirez les obstacles qui à l’... -
Page 29: Importantes Medidas De Seguridad
Importantes medidas de • No deje objetos pesados o calientes sobre el aparato. seguridad • Limpie los filtros al menos una vez a la semana. • Evitar el uso de calentadores cerca de la unidad. • Utilice este aparato sólo como se describe en • La unidad debe ser transportada en posición este manual de instrucciones. vertical. Si esto no es posible, fijar la unidad en Al igual que con cualquier aparato eléctrico, las un ángulo, no acostarla horizontalmente. instrucciones están destinadas a cubrir tantas • Antes de transportar la unidad, vaciar la unidad. - Page 30 INTRODUCCIÓN Gracias por elegir un producto De'Longhi. Le rogamos que dedi- Nota: Este aparato se suministra con una función de que unos instantes a leer las instrucciones para evitar riesgos o auto-evaporación para extracción de condensado daños en el aparato. durante los modos de enfriamiento y deshumidi- ficación. DESCRIPCIÓN Descripción del aparato (consulte la página 3 - A) AIRE ACONDICIONADO CON INSTALACIÓN A1 Rejilla de salida de aire Para resultados óptimos configurar su aparato de esta A2 Panel de control...
- Page 31 AIRE ACONDICIONADO SIN INSTALACIÓN Proceda como sigue: • Perfore un orificio de Ø 5,25 pulgadas (134 mm) en una También se puede configurar en una ventana doble: pared exterior o a través de un panel de ventana. Respetar • Coloque el soporte de ventana en el alféizar de la ventana, las dimensiones y la altura del orificio de la figura 3 y 4. extienda el soporte completamente dentro del marco de la ventana, fije el soporte utilizando el pasador y luego bajar el cristal en el soporte. (Si el soporte de la ventana es de- masiado grande para la ventana, un profesional calificado puede cortar el plástico con una sierra.) • Colocar la manguera de escape de aire B3 en el receptáculo co- rrespondiente situado en la parte posterior del aparato. (fig. 1). • Conecte la salida de la ventana B5 en el otro extremo de la manguera de escape. •...
-
Page 32: Panel De Control
Coloque la manguera de escape de aire B3 en el receptá- póngase en contacto con nuestro centro de servicio de culo correspondiente situado en la parte posterior del apa- atención al cliente gratuito en: rato, (fig. 1) luego, coloque la salida de la ventana B5 para 1-800-322-3848 [EE. UU. solamente] la manguera de escape de aire B3 y colóquela fuera de la 1-888-335-6644 [Canadá solamente] ventana para agotar el aire caliente. O inicie sesión en nuestro sitio web en www.delonghi.com PANEL DE CONTROL DESCRIPCIÓN DEL PANEL DE CONTROL (C) C1 ENCENDIDO/ESPERA (Tecla on/off) C2 Tecla de selección de función MODO (aire acondicionado, deshumidificador, ventilador, calefacción) C3 Tecla de aumento C4 Tecla de disminución C5 Indicador de temperatura C6 Indicador temporizador C7 Símbolo de temporizador C8 Símbolo de aire acondicionado... -
Page 33: Modo De Deshumidificación
OPERACIÓN DESDE EL PANEL DE CONTROL MODO DE DESHUMIDIFICACIÓN ENCENDER Y APAGAR EL APARATO Esto es ideal para reducir la humedad en la habitación (primavera y otoño, habitacio- Antes de enchufar el aparato nes muy húmedas, época de lluvias, etc). compruebe la tapa en la parte Para este tipo de uso, el aparato debe estar posterior de la unidad está correc- tamente insertada en la mangue- configurado en modo aire acondicionado. - Page 34 Notas: • De este modo, el flujo de aire se selecciona automáticamen- LUZ NARANJA: Condiciones en la habita- te en el aparato y no puede ser configurado manualmente. ción lejos del nivel óptimo. • Cuando está trabajando en habitaciones muy frías, el apa- rato descongela automáticamente, momentáneamente LUZ VERDE: La mayoría de las personas interrumpiendo la operación normal. En este caso, “ Lt “ siente buenas condiciones de habitación, aparece en la pantalla. Durante esta operación, es normal cerca del nivel óptimo. por el ruido hecho por el equipo a cambiar. • En este modo, es posible que tenga que esperar unos minu- Perfect! tos antes de que el aparato empiece a emitir aire caliente. LUZ AZUL: Best comfort level.
-
Page 35: Descripción Del Control Remoto
No mezcle pilas alcalinas, de carbono-zinc (estándar) o recarga- ENCENDIDO DEL APARATO ON/OFF bles (níquel-cadmio). No arroje las pilas al fuego. Las baterías • Enchufar en la toma. pueden explotar o tener filtraciones. Si no va a utilizar el control • Pulsar el botón (D1) (cuando se enciende, el acondi- remoto durante un cierto período de tiempo, quite las pilas. -
Page 36: Ajuste Del Temporizador
AJUSTE DEL TEMPORIZADOR Notas: • Este equipo ha sido probado y cumple con los límites para un dispositivo digital de Clase B, conforme a la parte 15 de las normas FCC. Estos límites están diseñados para propor- cionar una protección razonable contra interferencias per- judiciales en una instalación residencial. • Este equipo genera, utiliza y puede irradiar energía de ra- diofrecuencia y, si no se instala y utiliza de acuerdo con las instrucciones, puede provocar interferencias dañinas a las comunicaciones de radio. Sin embargo, no hay garantía de que no ocurrirá interferencia en una instalación en particu- lar. Si este equipo causa interferencias perjudiciales para la El temporizador permite el retraso en el encendido o el apagado recepción de radio o televisión, lo cual puede determinarse del aparato. Esta función será prevenir el desperdicio de electrici- apagando y encendiendo el equipo, se recomienda al usua- dad mediante la optimización de los periodos de funcionamiento. rio que intente corregir la interferencia mediante una o más de las siguientes medidas: Cómo programar el apagado del modo de retraso - Reoriente o cambie de lugar la antena receptora. • Mientras el aparato está en cualquier modo de funciona- - Aumente la separación entre el equipo y el receptor. miento, se puede programar el modo de retraso. - Conecte el equipo a una toma de un circuito diferente al •... - Page 37 AUTODIAGNÓSTICO El aparato tiene un sistema de autodiagnóstico para identificar una serie de advertencias / malos funcionamientos. Los mensajes de error se muestran en la pantalla del dispositivo. SI ... APARECE, SI ... APARECE, SI ... APARECE, "Baja Temperatura". Error de sonda "Alto nivel" (prevención de heladas) (Sonda dañada) (Bandeja interna llena) ¿QUÉ DEBERÍA HACER? ¿QUÉ DEBERÍA HACER? ¿QUÉ DEBERÍA HACER? El aparato está equipado con un dispo- Si esto aparece, póngase en contacto con Vacíe la bandeja interior de seguridad si- sitivo de protección contra congelación el centro de servicio local.
-
Page 38: Limpieza De La Carcasa
CONSEJOS PARA EL USO CORRECTO LIMPIEZA Para garantizar resultados óptimos con el aire acondicionado, Antes de proceder a la limpieza o mantenimiento, apague el siga estas recomendaciones: aparato pulsando el botón y, a continuación, desenchúfelo • Cerrar las puertas y ventanas en la habitación a acondicio- de la corriente. nar cuando se instala el aire acondicionado de modo semi- permanente, debe dejar una puerta ligeramente abierta LIMPIEZA DE LA CARCASA (tan poco como 0,39 pulgadas. (1 cm) para garantizar una Usted debe limpiar el aparato con un paño ligeramente húmedo ventilación adecuada. -
Page 39: Especificaciones Técnicas
CONTROLES AL INICIO DE LA TEMPORADA El transporte, llenado, limpieza, recuperación y elimina- Asegúrese de que el cable de alimentación y el zócalo estén en ción de refrigerante deben ser realizados por un centro perfectas condiciones y asegúrese de que el sistema de puesta de servicio técnico designado por el fabricante. El aparato debe ser eliminado por un centro especializa- a tierra es eficiente. Cumplir estrictamente con las normas de instalación. -
Page 40: Solución De Problemas
SOLUCIÓN DE PROBLEMAS Compruebe los siguientes puntos antes de llamar al Centro de Servicio Técnico autorizado en su zona. PROBLEMAS CAUSAS SOLUCIONES El acondicionador de aire no se enciende. no está enchufado Enchúfelo no hay alimentación espere el dispositivo de protección interna se ha Llame al Centro de ayuda disparado El aire acondicionado funciona por un la manguera de escape de aire está Posicionar correctamente la manguera corto período de tiempo obstruida o doblada de escape de aire, limitando la longitud y curvas tanto como sea posible y evitar cualquier obstrucción...
Need help?
Do you have a question about the EL275 Series and is the answer not in the manual?
Questions and answers