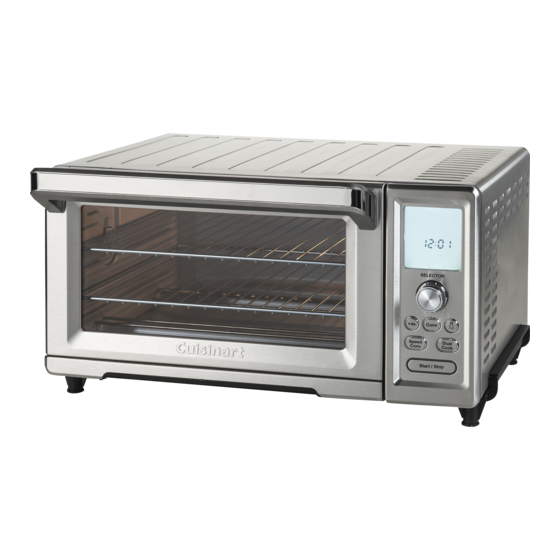
Cuisinart TOB-260 Instruction And Recipe Booklet
Chef's convection toaster oven
Hide thumbs
Also See for TOB-260:
- Instruction manual (80 pages) ,
- Quick start manual (4 pages) ,
- User manual
Table of Contents
Advertisement
Advertisement
Chapters
Table of Contents

Related Manuals for Cuisinart TOB-260


Summary of Contents for Cuisinart TOB-260
- Page 1 INSTRUCTION AND RECIPE BOOKLET Chef's Convection Toaster Oven TOB-260...
-
Page 2: Important Safeguards
22. Do not attempt to dislodge food when the oven is plugged into an way or is not operating properly. Return the oven to the nearest Cuisinart electrical outlet. -
Page 3: Table Of Contents
SPECIAL CORDSET INSTRUCTIONS BEFORE THE FIRST USE Before using your Cuisinart Chef's Convection Toaster Oven for the first ® A short power supply cord is provided to reduce the risks resulting from time, remove any dust from shipping by wiping the base, cover and controls becoming entangled in or tripping over a longer cord. -
Page 4: Features And Benefits
FEATURES AND BENEFITS 12. Baking/Drip Pan A baking/drip pan is included for your convenience. Use with the broiling pan when broiling. Use alone when baking or roasting. 1. Blue Backlit LCD Digital Display Shows selected function, shade setting, temperature, and cooking time. 13. -
Page 5: Getting To Know Your Control Panel
Getting to Know Your Control Panel LCD Display The large blue-backlit LCD screen is easy to read, and clearly displays the function, time, temperature, and toast shade you have selected. When oven is plugged in and not in use, clock will be displayed. Selector Dial/Button Use to select cook function, change preset time or temperature, and choose toast shade. -
Page 6: Set Your Clock
Set Your Clock Plug the oven into a 120 volt AC outlet. The LCD display will be illuminated white. Clock will read 12:00. To set clock, press and hold the selector button until the time starts flashing. Turn the selector dial to set hour and then press it to select. To select “PM” scroll through past “11” until “PM” displays. Turn the dial for minutes and then press to set. -
Page 7: Oven Functions
OVEN FUNCTIONS Toasting functions – All toasting functions offer a built-in defrost option. Turn the Selector dial to select the snowflake for toasting frozen items. Toasting Function Rack Position Preset Shade Shade Range Preset Slices Possible slices Toast 1 to 7 3 - 4 1-2, 3-4, 5-6, 7-9 Bagel... -
Page 8: Operation
OPERATION Snowflake will flash – turn selector dial to select this if using frozen bagels. Otherwise just press Start/Stop to begin toasting. TOAST Bagel tip This function provides full heat on the top and half heat on the bottom. For Adjust rack to position 3. - Page 9 BAKE BROIL Adjust rack to desired position (either 1, 2 Adjust rack to desired position (either 3 or 4). or 3). Turn Selector dial to Broil and press. Turn Selector dial to Bake and press. Broil temperature is fixed. It cannot be changed. Baking temperature will flash.
- Page 10 preheat (display will read PREHEATING). When oven reaches set temperature If preparing fresh pizza, make sure pizza is ready to bake on a pizza peel the oven will beep and display will read READY. Put food in the oven. The or on an inverted sheet tray that is well dusted with cornmeal so that the timer will begin counting down.
-
Page 11: Keep Warm
Put sandwich on broiling pan fitted inside the baking Put food in oven and press Start/Stop to begin heating. pan and place in the oven and press Start/Stop to begin. The timer will begin counting down. It will beep again when cooking time has The timer will begin counting down. - Page 12 setting the function – during preheating (to eliminate the preheat) or Slow cooked ribs Bake/375°F/45 minutes Bake/250°F/1 hour 30 during cooking. minutes When baking fresh pizza, it is important to preheat the pizza stone, so if you Casserole Bake/375°F/50 minutes Keep Warm/150°F/3 to opt to combine Speed Convection with the Pizza function, it is recommended 30 minutes...
-
Page 13: Cleaning And Maintenance
CLEANING AND MAINTENANCE sounds and the LCD screen displays the previously selected temperature flashing. Turn the Selector dial to desired temperature. Press to set new Always allow the oven to cool completely before cleaning. temperature. A beep will sound. 1. Always unplug the oven from the electrical outlet. To change time: Press and hold the Selector button until set temperature starts flashing. -
Page 14: Warranty
(A) to the store where it replacement parts or repair service other than those authorized by Cuisinart. was purchased or (B) to another retail store that sells Cuisinart products of the This warranty does not cover any damage caused by accident, misuse, same type. - Page 15 Recipes Asparagus and Leek Quiche with Gruyère ........16 Braised Two-Pepper Chicken with Onions ........28 Pâte Brisée ..................16 Green Chile and Apple Pork Roast ............ 28 Spicy Baked Eggs in Tomato Sauce ..........17 Pizza Dough ..................29 Banana Crunch Muffins ..............
-
Page 16: Asparagus And Leek Quiche With Gruyère
¼ teaspoon freshly ground black pepper tablespoons ice water ¼ teaspoon fresh thyme leaves 1. Put flour and salt into a Cuisinart Food Processor fitted with the ® ½ cup whole milk chopping blade. Process for 10 seconds. Add butter to work bowl and ½... -
Page 17: Spicy Baked Eggs In Tomato Sauce
selecting Bake at 350°F for 35 minutes. Once oven beeps to signal that 1. Put 1 tablespoon of the oil into a medium saucepan over medium heat. it is preheated, wait 10 minutes more to fully heat the stone before 2. -
Page 18: Banana Crunch Muffins
Banana Crunch Muffins 4. Spoon evenly into prepared muffin cups and top with the crumb topping. These muffins are a delicious way to use those over-ripe bananas. 5. Adjust the rack to position 1 and preheat by selecting Bake with Makes 6 muffins Convection at 400°F for 15 minutes. -
Page 19: Harvest Stuffed Squash
1. Line the baking pan with aluminum foil. Evenly distribute half of the Filling: chips in the prepared pan. Cover with about ½ cup of the cheese, then cups cooked quinoa (any variety) the remaining chips. Top with the remaining ingredients, as evenly as ½... -
Page 20: Creamy Macaroni And Cheese
Creamy Macaroni and Cheese cook, whisking constantly. Once mixture comes close to a boil (this may take up to 12 minutes), reduce heat to medium-low to maintain a A combination between the creaminess of stove-top style slight simmer. Simmer, while constantly whisking, until the mixture macaroni and cheese and broiled oven-baked, becomes thick, about 20 minutes. -
Page 21: Stuffed Twice Baked Potatoes
teaspoon grated orange zest 1. With the tines of a fork, evenly prick each potato all over, about 8 times. Divide the oil evenly over the potatoes and rub well into the ½ cup oil-cured black olives, pitted and halved skins. -
Page 22: California Sandwich
California Sandwich Open Faced Reuben The variety of textures in the sandwich, from the creamy avocado A homemade version of the deli favorite. We also provide you to the crunchy bacon, make it stand out from the rest. In true with a simple recipe for a quick Russian dressing. -
Page 23: Herb Roasted Chicken
Herb Roasted Chicken Shepherd’s Pie A combination of dried and fresh herbs dresses up this classic bird. We’ve made a few twists to this comfort food classic while still retaining its rich, satisfying flavor. Makes 6 servings Makes 12 servings tablespoon olive oil Topping: teaspoon dried basil... -
Page 24: Black Bean And Sweet Potato Enchiladas With Red Chile Sauce
Black Bean and Sweet Potato Enchiladas 1. Fill a large saucepan with cold water. Add the potatoes and bring to a boil over high heat. Once the water comes to a boil, add the cauliflower with Red Chile Sauce florets and reduce to maintain a strong simmer. Cook until the vegetables are very tender and meet no resistance when pierced with A simple-to-prepare, meatless meal. -
Page 25: Middle Eastern Leg Of Lamb With Yogurt-Tahini Sauce
lime wedges, for serving 7. Once the oven beeps to signal it is preheated, put the pan in the oven and bake. The top of the enchiladas should be nicely melted and lightly 1. First prepare the red chile sauce: Put the oil in a medium sauté pan browned. -
Page 26: Oven Barbecued Ribs
1. Prepare the marinade for the lamb: Put the cumin and coriander seeds in a small, dry skillet over medium heat. Cook until seeds are just Don’t wait for the summer for barbecued ribs. toasted and fragrant. Put the toasted seeds in a Cuisinart spice ®... -
Page 27: Turketta
5. When cooking is complete, cut into individual ribs and serve with covered. Cover with plastic and refrigerate for 3 hours. barbecue sauce if desired. 2. While the turkey is in the fridge, prepare the herb rub. In a small food Nutritional information per serving (based on 6 servings): processor or spice grinder, pulse the garlic until finely chopped. -
Page 28: Braised Two-Pepper Chicken With Onions
Braised Two-Pepper Chicken with Onions into the vegetable layer, skin side up. Pour over any excess marinade from the chicken into the pan. Cook until the thighs have reached an Spicy, tangy and vinegary, this colorful dish is best served over a starchy internal temperature of 170˚F and the skins are browned and crisp. -
Page 29: Pizza Dough
This dough can be used for more than just the obvious, although who the roasted onion and garlic, as well as the apple, sage, ¾ teaspoon of doesn’t love homemade pizza? Check our website, www.cuisinart.com, the salt, ¼ teaspoon of pepper and cinnamon. Pulse a few times to for additional pizza and calzone recipes. -
Page 30: Gluten-Free Pizza Dough
¼ teaspoon kosher salt pinch freshly ground black pepper 1. Put the flours, xanthan gum, salt and sugar into the Cuisinart® Stand ½ cup pitted kalamata olives Mixer mixing bowl fitted with the dough hook. Mix on speed 3 to ½... -
Page 31: Meatball Pizza With Roasted Tomatoes And Peppers (Allergen Free)
pizza to the oven, placing directly on top of the hot pizza stone. recipe gluten-free pizza dough (page 30) extra virgin olive oil for drizzling 4. Allow to cook for the allotted time, 15 minutes, adding more time pinch kosher salt if needed. -
Page 32: Roasted Eggplant Pizza (Gluten Free)
Roasted Eggplant Pizza (gluten free) Nutritional information per serving: Calories 260 (49% from fat) • carb. 24g • pro. 9g • fat 14g • sat. fat 7g • chol. 34mg • sod. 339mg • calc. 73mg • fiber 2g A delightful combination for the gluten-free pizza dough. Makes about 6 servings, one 10-inch pizza Calzones - Three Ways eggplant, cut into ¼-inch slices... -
Page 33: Sausage And Broccoli Filling
Sausage and broccoli filling 2. Stir in the thyme. Add the spinach and cook until wilted, about 2 to 3 Makes 3 cups minutes. Taste and adjust seasoning as desired. Let cool to room temperature. cups broccoli florets, steamed and finely chopped 3. -
Page 34: Sweet Potato Rolls
Sweet Potato Rolls process for 30 seconds. If dough seems too sticky, sprinkle an additional tablespoon of flour on the top of the dough, and another A basket of these deserves a place on the Thanksgiving table. tablespoon of flour on a clean work surface and knead the dough on it a couple of times by hand. -
Page 35: Rustic Italian Bread
Rustic Italian Bread 5. Adjust the rack to position 1 fitted with the pizza stone. Preheat oven by selecting Bake with Convection at 400°F for 40 minutes. Once the This airy and crusty loaf proves that making artisanal-style bread oven beeps to signal that it is preheated, continue heating the stone for at home has never been easier. -
Page 36: Salted Caramel Custards
Salted Caramel Custards 4. While the milk/cream mixture is heating, whisk the eggs, yolks and remaining ¼ cup of sugar together in a medium mixing bowl until These are served in the same fashion as the classic crème caramel, which lightened;... -
Page 37: Strawberry Rhubarb Crisp
but you will not have the sauce at the bottom of the custard. Because of 1. Put the rhubarb, sugar, salt, vanilla and lemon juice in a large mixing that, you do you not have to invert the custard; you can serve in the bowl;... -
Page 38: Chocolate Glazed Coconut Layer Cake
Chocolate Glazed Coconut Layer Cake 1. Spray two 9-inch round baking pans with cooking spray. Line the bottoms with parchment paper rounds and spray the parchment. Set Coconut lovers rejoice! Decadent without being overly sweet, aside. this moist layer cake incorporates coconut four ways 2. - Page 39 piece at a time, until completely incorporated and chocolate is shiny. The glaze consistency should not be too thick and should flow easily from a spoon. 8. Working quickly, evenly divide the glaze over the tops of the cakes, pouring it directly in the center. With an offset spatula, smooth the glaze as evenly as possible over the top and the sides of each cake so both are completely covered in chocolate.
- Page 40 ©2014 Cuisinart 150 Milford Road East Windsor, NJ 08520 Printed in China www.cuisinart.com 13CE129284 IB-12142-ESP Any other trademarks or service marks referred to herein are the trademarks or service marks of their respective owners.
Need help?
Do you have a question about the TOB-260 and is the answer not in the manual?
Questions and answers