Table of Contents
Advertisement
• Use this appliance only as described in this instruction manual.
As with any electrical appliance, the instructions aim to cover as many situations as possible.
Caution and common sense should be used when operating and installing this air conditioner.
• This appliance has been manufactured to cool and dehumidify domestic environments and
must not be used for other purposes.
• It is dangerous to alter or modify the unit's characteristics in any way.
• The appliance must be installed in accordance with the relevant national legislation.
• Should repairs be necessary, contact the nearest authorized Repair Service Center. Unautho-
rized servicing can be dangerous.
• The appliance is not intended for use by persons (including children) with reduced physical,
sensory or mental capabilities, or lack of experience and knowledge, unless they have been
given supervision or instruction concerning use of the appliance by a person responsible for
their safety.
Children should be supervised to ensure that they do not play with the appliance.
• In the case that the power cord becomes damaged, this must be repaired only by specialized
personnel authorized by the manufacturer in order to protect against fire.
• Always ensure the appliance is plugged into a grounded 3-prong outlet. If you have any
doubts check with a qualified electrician.
• We strongly discourage the use of an extension cord due to potential safety hazards. For tem-
porary situations, use only CSA certified and UL listed 3-prong grounded extension cord,
attachment plug and connector, rated 15A, 125V
• Before cleaning or maintenance operations, always unplug the unit from the outlet.
• Do not pull on or place strain on the power cord when moving the appliance.
• The appliance should not be installed where the atmosphere may contain combustible gases,
oil or sulphur, or near heat sources.
• Do not rest hot or heavy objects on the appliance.
• Clean the filters at least once a week.
• Avoid using heaters near the unit.
• The unit should be transported in a vertical position. If this is not possible secure the unit at an
angle, do not lie it horizontally.
• Before transporting the unit, drain the unit. After transportation, wait at least 6 hours before
switching the unit on.
• The packaging materials can be recycled. You are therefore recommended to place them in
the special containers for differentiated waste collection.
• This appliance is fitted with a special safety device. When the compressor switches off, this
device prevents it from switching on again for at least 3 minutes.
• WARNING: Changes or modifications not expressly approved by the party responsible for com-
pliance could void the user's authority to operate the equipment.
SPECIFIC WARNINGS FOR APPLIANCES WITH R410A REFRIGERANT GAS
R410A refrigerant gas conforms to EC regulations on the environment.
Avoid perforating the refrigerant circuit of the appliance.
ENVIRONMENTAL INFORMATION:
This unit contains fluorinated greenhouse gases covered by the Kyoto Protocol.
Maintenance and disposal must be carried out by qualified personnel only (R410A,
GWP=1975).
.SAVE THESE INSTRUCTIONS
THIS PRODUCT IS FOR HOUSEHOLD ONLY
22
Important safeguards
Advertisement
Table of Contents

Related Manuals for DeLonghi PACA130HPEM


Summary of Contents for DeLonghi PACA130HPEM
-
Page 1: Important Safeguards
Important safeguards • Use this appliance only as described in this instruction manual. As with any electrical appliance, the instructions aim to cover as many situations as possible. Caution and common sense should be used when operating and installing this air conditioner. •... -
Page 2: Electrical Connections
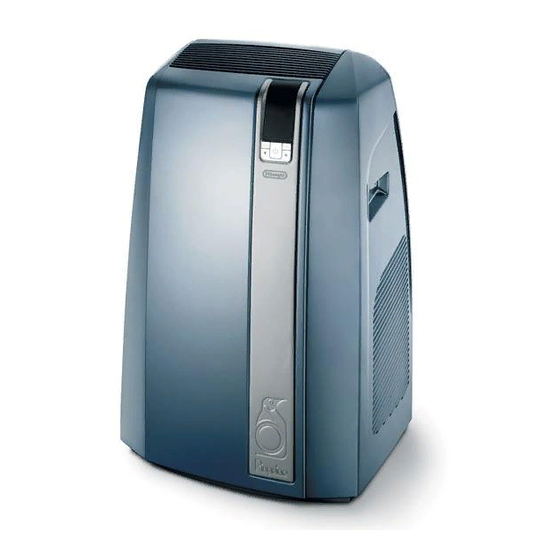
Description DESCRIPTION 10 Power cable 1 Air outlet grille 11 Wall flange 2 Control panel 12 Air exhaust hose 3 Remote control receiver 13 Window outlet 4 Castor wheels 14 Castor locks 5 Handles 15 Remote control 6 Filter 16 Window bracket with locking pins 7 Air intake grille End of season dust cover... -
Page 3: Setting Up Your Portable Air Conditioner
(fig. B). For help with installation, operation, accessories spare/replacement parts, please con- tact our toll free customer service call center at: 1-800-322-3848 [US only] 1-888-335-6644 [Canada only] 01-800-711-8805 ( Mexico only] or log onto our website at www.delonghi.com... -
Page 4: Semi-Permanent Installation
Semi-permanent installation SEMI-PERMANENT INSTALLATION • Fit the wall flange into the hole. If required, your appliance can also be • Fit the air exhaust hose into the air installed semi-permanently (Fig. E). exhaust hose housing located on the rear side of the appliance (fig. A page 24). -
Page 5: Description Of The Control Panel
Control panel THE CONTROL PANEL DESCRIPTION OF THE CONTROL PANEL 10 AUTOFAN indicator 1 Air conditioning symbol 11 Fan speed indicator 2 Dehumidifying symbol 12 SLEEP symbol 3 Fan symbol 13 MODE button (selects the modes) 4 Heating symbol 14 BOOST button 5 SMART symbol 15 FAN button 6 BOOST symbol... -
Page 6: Operation
Operation AIR CONDITIONING MODE Ideal for hot muggy weather when you need to cool and dehumidify the room. To set this mode: • Press the MODE button a number of times until the air- conditioning symbol appears. • Select the target temperature by pressing the button until the desired temperature is reached. -
Page 7: Heating Mode
Operation • Press the MODE button a number of times until the fan symbol appears. • Select the required fan speed by pressing the FAN but- ton. Three speeds are available: Maximum speed: to achieve the target ven- tilation as rapidly as possible Medium speed: reduces noise levels while maintaining a comfortable ventilation Low speed: for silent operation and maxi-... -
Page 8: Smart Mode
Operation SMART MODE The appliance chooses automatically whether to operate in air conditioning, fan or heating (certain models only) mode based on the set temperature and current room tem- perature. To set this mode: • Press the MODE button a number of times until the SMART symbol appears. -
Page 9: Description Of The Remote Control
Description of the remote control DESCRIPTION OF THE REMOTE CONTROL 1 Signal transmission 2 Air conditioning symbol 3 Dehumidifying symbol 4 Fan symbol 5 HEATING symbol 6 SMART symbol 7 Selected temperature scale indicator 8 Temperature selected 9 SLEEP symbol 10 BOOST symbol 11 Fan speed indicator 12 AUTOFAN indicator... -
Page 10: Using The Remote Control
Using the remote control NSERTING OR REPLACING THE BATTERIES • Remove the cover on the rear of the remote control. • Insert two “AAA” 1.5V batteries, making sure they are in the correct position (see the instructions inside the bat- tery compartment). - Page 11 Using the remote control OOST FUNCTION Ideal for the summer to cool rooms rapidly. To set this mode: • Press the button. The appliance operates in air conditioning mode at maxi- mum fan speed. While this function is selected, it is not pos- sible to set the temperature or change fan speed.
- Page 12 Using the remote control ELECTING THE TEMPERATURE SCALE Press the button to switch the temperature scale from Centigrade to Fahrenheit and vice-versa. ROGRAMMING THE TIMER The appliance can be programmed to start up and shut down when desired. Programming start up •...
-
Page 13: Self-Diagnosis
Self-diagnosis SELF-DIAGNOSIS The appliance has a self diagnosis system to identify a number of malfunctions. Error messages are displayed on the appliance display. … IS DISPLAYED WHAT SHOULD I DO The appliance is fitted with a frost protection device to avoid excessive formation of ice on internal components. - Page 14 Tips To ensure optimal performance from • Minimize the number of heat sources your portable air conditioner, follow in the room. these recommendations: • Never use the appliance in very • Close the windows and doors in the damp rooms (laundries for example). room to be air conditioned.
-
Page 15: Cleaning The Air Filters
Cleaning START OF SEASON CHECKS Before cleaning or maintenance, turn the appliance off by pressing the ON/STAND- Make sure the power cable and plug are BY button then always unplug the undamaged and the outlet is in good appliance from the outlet. condition. -
Page 16: Troubleshooting
Troubleshooting NOTE: NEVER TRANSPORT OR TURN THE APPLIANCE UPSIDE DOWN OR ON ITS SIDE. IF THIS OCCURS, WAIT 6 HOURS BEFORE TURNING THE APPLIANCE ON, 24 HOURS IS RECOM- MENDED. (After the unit has been on its side, oil needs to return to the compressor to ensure proper function. -
Page 17: Limit Conditions
Technical specifications TECHNICAL SPECIFICATION LIMIT CONDITIONS Power supply voltage see rating label Max. absorbed power during air conditioning “ Room temperature for Refrigerant “ air conditioning 69,8 ÷ 95°F (21° ÷ 35°C) Cooling capacity “ Room temperature for Absorbed power heating “... -
Page 18: Warranty Policy
Product: AIR CONDITIONER Brand name: DEʼLONGHI Model (s): PACA130HPEM Servicios Home Depot, S.A. de C.V. guarantees, for a period of 1 YEAR, that this product, including all its parts and workmanship, is free from defects in material and operation, starting on the date of purchase or installation... - Page 19 www.delonghi.com...
Need help?
Do you have a question about the PACA130HPEM and is the answer not in the manual?
Questions and answers