Table of Contents
Advertisement
Quick Links
Important safeguard
• Use this appliance only as described in this
instruction manual.
As with any electrical appliance, the instructions
aim to cover as many situations as possible.
Caution and common sense should be used when
operating and installing this air conditioner.
• This appliance has been manufactured to cool
and dehumidify domestic environments and
must not be used for other purposes.
• It is dangerous to alter or modify the unit's
characteristics in any way.
• The appliance must be installed in accordance
with the relevant national legislation.
• Should repairs be necessary, contact the nearest
authorized Repair Service Center. Unauthorized
servicing can be dangerous.
• The appliance is not intended for use by persons
(including children) with reduced physical,
sensory or mental capabilities, or lack of
experience and knowledge, unless they have
been given supervision or instruction concerning
use of the appliance by a person responsible for
their safety.
Children should be supervised to ensure that
they do not play with the appliance.
• If the power cable is damaged, it must be
replaced by the manufacturer or an authorized
technical service centre in order to avoid all risk.
• Always ensure the appliance is plugged into a
grounded 3-prong outlet. If you have any doubts
check with a qualified electrician.
• Do not use extension cables.
• Before cleaning or maintenance operations,
always unplug the unit from the outlet.
• Do not pull on or place strain on the power cord
when moving the appliance.
• The appliance should not be installed where the
atmosphere may contain combustible gases, oil
or sulphur, or near heat sources.
• Do not rest hot or heavy objects on the appliance.
• Clean the filters at least once a week.
• Avoid using heaters near the unit.
• The unit should be transported in a vertical
position. If this is not possible secure the unit at
an angle, do not lie it horizontally.
• Before transporting the unit, drain the unit.
After transportation, wait at least 6 hours before
switching the unit on.
• The packaging materials can be recycled. You
are therefore recommended to place them in
the special containers for differentiated waste
collection.
• This appliance is fitted with a special safety
device. When the compressor switches off, this
device prevents it from switching on again for at
least 3 minutes.
• WARNING: Changes or modifications not
expressly approved by the party responsible for
compliance could void the user's authority to
operate the equipment.
Specific warnings for appliances with R410A
refrigerant gas
R410A refrigerant gas conforms to EC regulations on
the environment.
Avoid perforating the refrigerant circuit of the
appliance.
ENVIRONMENTAL INFORMATION:
This unit contains fluorinated greenhouse gases
covered by the Kyoto Protocol.
Maintenance and disposal must be carried out by
qualified personnel only (R410A, GWP=1975).
Save these instructions
This product is for household only
4
Advertisement
Table of Contents

Subscribe to Our Youtube Channel
Related Manuals for DeLonghi PACAN125HPEKC1ADG


Summary of Contents for DeLonghi PACAN125HPEKC1ADG
- Page 1 Important safeguard • The unit should be transported in a vertical position. If this is not possible secure the unit at • Use this appliance only as described in this an angle, do not lie it horizontally. instruction manual. • Before transporting the unit, drain the unit. As with any electrical appliance, the instructions After transportation, wait at least 6 hours before aim to cover as many situations as possible. switching the unit on.
-
Page 2: Air Conditioning Without Installation
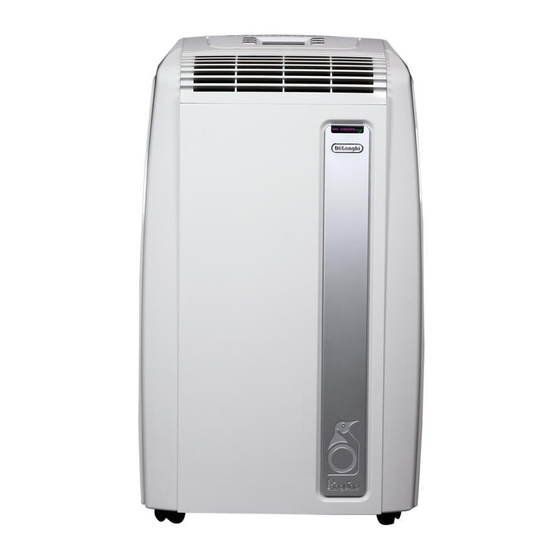
INTRODUCTION Thank you for choosing a De’Longhi product. Please take a few AIR CONDITIONING WITHOUT INSTALLATION moments to read the instructions to avoid risks or damage to the For optimal results set-up in a double-hung window: appliance. 1) Place the bracket in the window sill, extend the bracket DESCRIPTION fully within the window frame, fix the bracket by using the pin then lower the window onto the bracket. (Should the Description of the appliance (see page 3 - Fig. A) window bracket be too large for the window. The plastic A1 air outlet grille can be cut with a saw by a qualified professional.) -
Page 3: Semi-Permanent Installation
B5 (if provided) to cover your window aperture, extending it to the required length, then blocking it with the locking pins supplied (see figure 5). Make sure you do not cover the hole for the window outlet. in the wall: in the in the wooden you are window kickboard recommended panel of a French to insulate the window section of wall using suitable insulation. • Fit the wall flange B1 into the hole. For help with installation, operation, and for all • Fit the air exhaust hose B2 in the relevant housing located accessories and spare/replacement parts, please contact on the rear side of the appliance. (fig. 1). our toll free customer service call center at: • Fit the end of the hose B2 to the wall flange B1 as shown in 1-800-322-3848 [US only] fig. 8. 1-888-335-6644 [Canada only] • When the hose B2 is not connected, the drilled hole can be 01-800-711-8805 (Mexico only] closed with the flange cap B1. or log onto our website at www.delonghi.com... -
Page 4: Control Panel
NOTE: As special tools are required for installation, we suggest you have the appliance installed by specialized MAX 39 in personnel. NOTE: When installing the air conditioner semi-permanently, you should leave a door slightly open little as 1/2“ (1 cm) to guarantee correct ventilation and room pressure. NOTE: Keep the air hoses as short and free of curves as possible to avoid constrictions. MIN 14 in CONTROL PANEL C8 C9 DESCRIPTION OF THE CONTROL PANEL ( Fig. C) C11 Alarm symbol C1 ON/STAND-BY button C12 Fan speed indicator... -
Page 5: Operating From The Control Panel
OPERATING FROM THE CONTROL PANEL Maximum speed: to achieve the target tempera- ture as rapidly as possible. TURNING THE APPLIANCE ON/OFF the appliance automatically selects the most suitable fan speed in relation to the temperature set on the digital display and current room temperature. The most suitable indoor temperature for the room during the summer varies from 75°F to 81°F (24 to 27°C). You are recom- mended, however, not to set a temperature much below the out- door temperature. -
Page 6: Operating From The Remote Control
The timer can be used to delay appliance start up or shutdown. Maximum speed: for maximum fan power. This avoids wasting electricity by not operating the appliance when it is not needed. HEATING MODE How to program delayed start up • Plug the appliance into the electrical receptacle and turn the unit to standby. • Press the timer button (C4): the timer symbol (C13) and the number of hours come on. • Use the + (C6) or - (C3) buttons to set the number of hours delay before the appliance comes on. • A few second after set, the setting is memorised, the timer symbol is lit and the display shows that the appliance is in standby. This is ideal in spring and autumn when outdoor temperatures • The appliance will start working using the mode previously are not particularly severe. For this mode, the appliance should set. The appliance can be set to come on within the next 24 be prepared in the same way as for air conditioning, with the hours. -
Page 7: Inserting Or Replacing The Batteries
DESCRIPTION OF THE REMOTE CONTROL (FIG. D) FUNCTIONS SELECTION D1) ON/STAND-BY button The controls on the remote control are the same as those on the D2) Increase/decrease temperature/programmed operation control panel of the appliance (C). You should therefore refer to D3) “ MODE” selection button the instructions in the chapter “OPERATING FROM THE CON- D4) Fan speed selection button TROL PANEL” to select the desired functions. Press button D5 D5) Switch button °C/°F to switch the temperature display from °C to °F and vice versa. D6) TIMER button Note: • This equipment has been tested and found to comply with the limits for a Class B digital device, pursuant to part 15 of the FCC Rules. These limits are designed to provide reason- able protection against harmful interference in a residen- tial installation. -
Page 8: Self-Diagnosis
SELF-DIAGNOSIS The appliance has a self diagnosis system to identify a number of malfunctions. Error messages are displayed on the appliance display. IF ... IS DISPLAYED, IF ... IS DISPLAYED, IF ... IS DISPLAYED, “Low Temperature” Probe Failure “High Level” (frost prevention) (Probe damaged) (Internal tray full) ..WHAT SHOULD I DO? ..WHAT SHOULD I DO? ..WHAT SHOULD I DO? The appliance is fitted with a frost protec- If this is displayed, contact your local au- Empty the internal safety tank following tion device to avoid excessive formation of thorized service center. -
Page 9: Cleaning The Cabinet
CLEANING END OF SEASON OPERATIONS Before cleaning or maintenance, turn the appliance off by To drain all water from the circuit, remove the cap A10 from the pressing the button, then unplug from electrical recep- drainage on the back of the appliance and allow the water to tacle. drain out into a basin (fig. 10). To facilitate this operation, at the start of the season, it’s possi- CLEANING THE CABINET ble to apply the water drain hose with cap B6. You should clean the appliance with a slightly damp cloth then In order to properly storage the appliance at the end of the sea- dry with a dry cloth. For safety reasons, never wash the air con- son, we suggest you cover it with the supplied end of season ditioner with water. Precautions dust cover B8 and you put the accessories in the relevant end of season accessories bag B9. Never use petrol, alcohol or solvents to clean the appliance. Never spray insecticide liquids or similar. - Page 10 Transport, filling, cleaning, recovery and disposal of refrigerant should be performed by a technical service centre appointed by the manufacturer only. The appliance should be disposed of by a specialist centre appointed by the manufacturer only. TO AVOID DAMAGE TO THE UNIT: NEVER TRANSPORT OR TURN THE APPLIANCE UPSIDE DOWN OR ON ITS SIDE. IF THIS OCCURS, WAIT 6 HOURS BEFORE TURNING THE APPLIANCE ON, 24 HOURS IS RECOMMENDED. After the unit...
-
Page 11: Troubleshooting
TROUBLESHOOTING PROBLEM CAUSE SOLUTION The air conditioner does not come on it is not plugged into the electrical plug into the electrical receptacle receptacle there is no current wait the internal safety device has tripped call the Service Center The air conditioner works for a short there are bends or kinks in the air position the air hose correctly, keeping it time only exhaust hose as short and free of curves as possible to avoid bottleneck something is preventing the air from check and remove any obstacles being discharged obstructing air discharge The air conditioner works, but does not windows, doors and/or curtains opened close doors, windows and curtains, cool the room bearing in mind the “ TIPS FOR CORRECT USE” given previously there are heat sources in the room (oven, eliminate the heat sources hairdryer, etc) the air exhaust hose is detached from fit the air exhaust hose in the housing at the appliance the back of the appliance (fig. 1). filter clogged clean or replace the filter as previously described the technical specification of the... -
Page 12: Limited Warranty
If repairs become necessary, see contact information below: U.S. Residents: Please contact our toll free hotline at 1-800-322-3848 or log onto our website at www.delonghi.com CANADA Residents: Please contact our toll free hotline at 1-888-335-6644 or log onto our website at www.delonghi.com MEXICO Residents: Please contact our toll free hotline at 01-800-711-8805 or log onto our website at www.delonghi.com The above warranty is in lieu of all other express warranties and representations. All implied warranties are limited to the applicable warranty period set forth above. This limitation does not apply if you enter into an extended warranty with De’Longhi. Some states/countries do not allow limitations on how long an implied warranty lasts, so the above exclusions may not apply to you. De’Longhi does not authorize any other person or company to assume for it any liability in...
Need help?
Do you have a question about the PACAN125HPEKC1ADG and is the answer not in the manual?
Questions and answers