Garmin GHC 10 Owner's Manual
Hide thumbs
Also See for GHC 10:
- Quick start manual (21 pages) ,
- Quick reference manual (6 pages) ,
- Instructions (2 pages)
Table of Contents
Advertisement
Advertisement
Table of Contents

Related Manuals for Garmin GHC 10


Summary of Contents for Garmin GHC 10
- Page 1 GHC 10 owner’s manual...
- Page 2 All rights reserved. Except as expressly provided herein, no part of this manual may be reproduced, copied, transmitted, disseminated, downloaded or stored in any storage medium, for any purpose without the express prior written consent of Garmin. Garmin hereby grants permission to download a single copy of this manual onto a hard drive or other electronic storage medium to be viewed and to print one copy of this manual or of any revision hereto, provided that such electronic or printed copy of this manual must contain the complete text of this copyright notice and provided further that any unauthorized commercial distribution of this manual or any revision hereto is strictly prohibited.
-
Page 3: Tips And Shortcuts
NoTe: If more than one GHC 10 device is wired to turn on the your boat. Avoid navigational hazards and never leave the helm unattended. autopilot, you must turn off all of the wired GHC 10 devices to turn off the autopilot. -
Page 4: Table Of Contents
Direction Control ......Adjusting the Color Mode ..system settings..... Using Direction Control ....Adjusting the Backlight ....GHC 10 Remote Settings ..Steering Patterns ....... Turning On Network Sharing ..Connecting the GHC 10 Zigzag Pattern ......About the Heading Screen .. -
Page 5: Getting Started
Turning Off the autopilot Hold NoTe: If more than one GHC 10 device is wired to turn on the autopilot, you must turn off all of the wired GHC 10 devices to turn off the autopilot. adjusting the Display adjusting the Color Mode 1. -
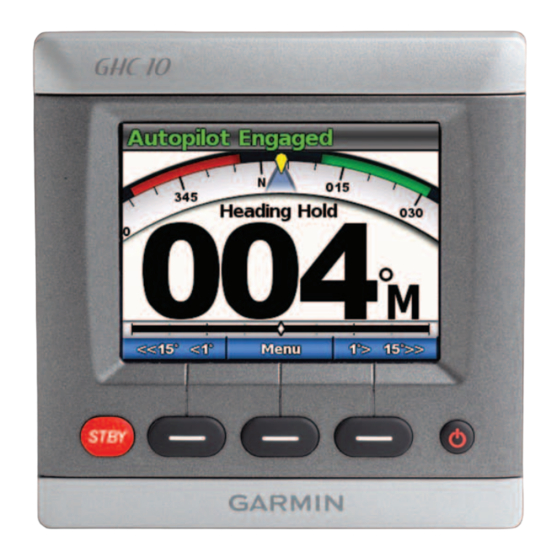
Page 6: About The Heading Screen
➊ screen. from the heading screen. When you turn on the autopilot, the system starts in standby mode, and displays the heading screen on the GHC 10. ➊ ➊ ➋ Refer to page 12 for information about the sailboat wind hold screen. -
Page 7: Powerboat Autopilot Operation
(if your autopilot is equipped with Shadow Drive ) or the soft keys on the ™ autopilot. • Select Steering Mode > Rudder to enable rudder steering • Select Steering Mode > Step to enable step steering. GHC 10 Owner’s Manual... -
Page 8: Direction Control
• If you have step steering enabled, select removed from the heading screen. • If you have rudder steering enabled, select The autopilot steers the boat, and the heading screen shows your actual heading and intended heading ➊ ➋ ➋ ➊ GHC 10 Owner’s Manual... -
Page 9: Steering Patterns
The autopilot can steer the boat in preset patterns for fishing, and it can also perform other specialty maneuvers such as U-turns and man-overboard retrieval. You can use the GHC 10 to begin pattern steering. Pattern steering is not based on GPS, and it can be used without a GPS device connected to the autopilot. -
Page 10: Circles Pattern
• Select to begin a counter-clockwise turn. TIP: To quickly resume a pattern after you make a heading adjustment with the helm or the soft keys (page 3), select the center soft key twice. GHC 10 Owner’s Manual... -
Page 11: U-Turn Pattern
When the u-turn is completed, the autopilot maintains the new heading. TIP: To quickly resume a pattern after you make a heading adjustment with the helm or the soft keys (page 3), select the center soft key twice. GHC 10 Owner’s Manual... -
Page 12: Cancelling A Steering Pattern
While following a steering pattern, perform one of the following actions: • Physically steer the boat at the helm (if your autopilot is equipped with Shadow Drive). • Use the soft keys to manually adjust the heading. • Select STBY. GHC 10 Owner’s Manual... -
Page 13: Route To
The autopilot steers the boat according to a route defined on your The orbit pattern steers the boat in a continuous circle around the active chartplotter. Your GHC 10 must be connected to a NMEA 2000 or NMEA waypoint (page 8). -
Page 14: Cloverleaf Pattern
You can adjust the distance between each circle in the spiral. The default distance between the circles is 50 ft. (20 m). 1. From the heading screen, select Menu > GPS Steering > Search > Spacing. 2. Select to set the spacing. 3. Select Done. GHC 10 Owner’s Manual... -
Page 15: Cancelling A Gps Steering Pattern
• Use the soft keys to manually adjust the heading. • Select to begin a port turn. • Select STBY. The autopilot follows the search pattern around the active waypoint, and the heading screen shows the spacing of the search pattern ➀. ➊ GHC 10 Owner’s Manual... -
Page 16: Sailboat Autopilot Operation
You must set the autopilot to standby to adjust the heading using the helm. adjusting the step steering Increments 1. From the heading screen, select Menu > Step Turn Size. 2. Select to set the step turn size. 3. Select Done. GHC 10 Owner’s Manual... -
Page 17: Wind Hold
The autopilot steers your boat directly into the wind, which is ideal for ➊ raising and lowering sails. ➋ ➌ ➍ ➎ Autopilot status ➊ Compass displaying current heading ➋ Wind type: true or apparent ➌ GHC 10 Owner’s Manual... -
Page 18: Wind Hold Adjustment
1. Engage heading hold (page 2. Select Menu > Tack/Gybe. 3. Select to choose a direction. The autopilot steers your boat through a tack or gybe, and the heading screen shows a “Tacking” message until the maneuver is complete. GHC 10 Owner’s Manual... -
Page 19: Route To
The autopilot steers the boat according to a route defined on your chartplotter. Your GHC 10 must be connected to a NMEA 2000 or NMEA 0183 compatible chartplotter to use route to. -
Page 20: Settings
Connecting the gHC 10 remote • Heading—set the reference used in calculating heading information. Before using the GHC 10 remote, you must connect the remote to the ◦ Magnetic—calculates the heading based on magnetic north. GHC 10 and configure the settings. -
Page 21: Configuring The Ghc 10 Remote
Settings • Shadow Drive Sensitivity—Shadow Drive is activated when a certain Configuring the gHC 10 remote 1. From the Heading screen, select Menu > Setup > Remote. amount of pressure is placed on the helm. Adjust this setting if the Shadow Drive is being falsely tripped or not activating properly. - Page 22 If the rate of turn is too slow, decrease the wind limiter value. If the rate of turn is too fast, increase the wind limiter value. GHC 10 Owner’s Manual...
-
Page 23: Appendix
Appendix appendix software License agreement BY USING THE GHP 10/10V/12 AND THE GHC 10, YOU AGREE TO BE Configuring the autopilot BOUND BY THE TERMS AND CONDITIONS OF THE FOLLOWING SOFTWARE LICENSE AGREEMENT. PLEASE READ THIS AGREEMENT NOTICE CAREFULLY. Changes made to the configuration of the autopilot directly affect the Garmin Ltd. -
Page 24: Error And Warning Messages
The autopilot has detected that the user has attempted to • Sounds alarm like to continue? initiate a gybe. • GHC 10 prompts for user input. Selecting gybe initiates the gybe, and selecting Cancel cancels the gybe. GHC 10 Owner’s Manual... -
Page 25: Index
North Zigzag Magnetic/True setting Tack/Gybe Variance Demo Mode From Heading Hold Direction Control From Wind Hold Settings Orbit Settings Using Troubleshooting Display Turning Off the Autopilot Product Support Adjusting Turning On the Autopilot Backlight Color Mode GHC 10 Owner’s Manual... - Page 26 For the latest free software updates (excluding map data) throughout the life of your garmin products, go to the garmin Web site at www.garmin.com. © 2011 Garmin Ltd. or its subsidiaries Garmin International, Inc. 1200 East 151 Street, Olathe, Kansas 66062, USA Garmin (Europe) Ltd.
Need help?
Do you have a question about the GHC 10 and is the answer not in the manual?
Questions and answers