Table of Contents
Advertisement
Advertisement
Table of Contents
Troubleshooting

Summary of Contents for Acomdata Hard Drive Enclosure
-
Page 1: Important
Hard Drive For 3.5" IDE hard drives... -
Page 2: Table Of Contents
Package Contents ............... 8 System Requirements for PC ..........9 System Requirements for Mac ......... 10 AcomData 2163 Drive Enclosure at a Glance ....11 AcomData 2163 Drive Enclosure Features Explored ..12 Hi-Speed USB 2.0 ..................12 FireWire 400 (FireWire-equipped Drives only) ........13 Hot-Pluggable ....................15... - Page 3 Frequently Asked Questions ........... 38 Troubleshooting ............... 41 Troubleshooting for PC Users ..............41 Troubleshooting for Mac users ..............44 Glossary ................46 One Year Limited Warranty ..........48 Obtaining Service for Your AcomData Product ....50 How to Purchase Accessories ........... 51 Notices ................52...
-
Page 4: Acomdata Contact Information
AcomData Contact Information Address: 3410 Pomona Blvd. Pomona, CA 91768 Telephone: (909) 348-0680 Fax: (909) 598-8663 Web Site: www.acomdata.com Customer Service: customerservice@acomdata.com Technical Support: techsupport@acomdata.com Pre-Sales Questions: sales@acomdata.com... -
Page 5: Welcome
Drive Enclosure. This guide contains important information for the proper installation, use, and care of your AcomData product. Please read this guide carefully and retain it for future reference. Symbols used in this guide:... -
Page 6: Product Registration For Warranty Coverage
You may also register via mail by filling out and returning the Registration Card included in the package. When registering your AcomData product you will need the Model number and Serial number. Both of these are printed on the UPC label affixed to the bottom of the box, and on the label affixed to the Drive Enclosure. -
Page 7: Precautions
• If using your AcomData product as a general-purpose storage device (as opposed to a backup device) AcomData strongly recommends that you backup the files stored on the device. AcomData is not responsible for data loss or corruption; nor will AcomData perform recovery of lost data or files. -
Page 8: Package Contents
AC Adapter & USB 2.0 Driver Power Cord Software CD Rubber Feet Mail-In Drive Mounting User’s Guide Registration Card Screws If you are missing any item listed above, please contact Customer Service at customerservice@acomdata.com, or call 800-470-4495. – 8 –... -
Page 9: System Requirements For Pc
��������� ������� System Requirements for PC • Minimum 233 MHz processor (Pentium, Celeron, AMD, etc.) • Windows XP, 2000, Me or 98SE • Available data port: - USB 2.0 users: USB port - FireWire 400 users: 6-pin FireWire port Windows XP/USB 2.0 users: You must have Windows XP Service Pack 1 or later or the Drive will operate at USB 1.x speeds. -
Page 10: System Requirements For Mac
System Requirements for Mac • Power Macintosh (G5, G4, G3, iBook, PowerBook or iMac) • Mac OS 9 or Mac OS X • Available data port: - USB 2.0 users: USB port - FireWire 400 users: 6-pin FireWire port Mac OS 9 Users: •... -
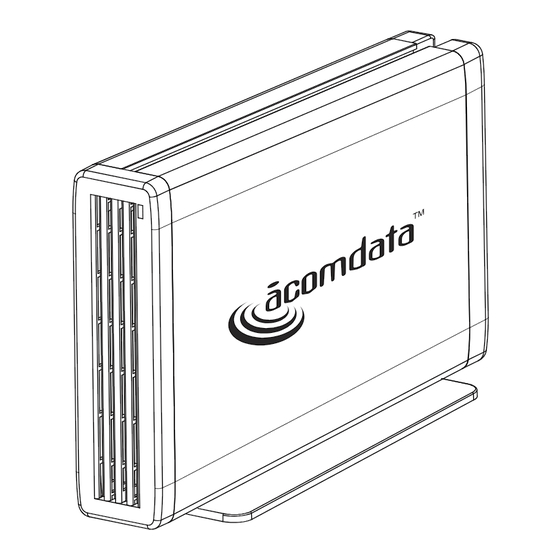
Page 11: Acomdata 2163 Drive Enclosure At A Glance
AcomData 2163 Drive Enclosure at a Glance FRONT VIEW Power-Data Light Lights up blue when powered on. Flashes red when reading or writing data. Zinc Alloy Stand Can be removed for horizontal placement. BACK PANEL Actual layout may not be exactly as shown. -
Page 12: Acomdata 2163 Drive Enclosure Features Explored
AcomData 2163 Drive Enclosure Features Explored Hi-Speed USB 2.0 USB (Universal Serial Bus) is an interface technology for the serial transmission of digital data. The original standard (USB 1.x) had an interface transfer rate of up to 12 Mbps. USB 2.0 has a maximum interface transfer rate of 480 Mbps (60 Megabytes/s) ––... -
Page 13: Firewire 400 (Firewire-Equipped Drives Only)
Plug & Play You do not need to assign ID numbers, or connect termina- tors. On most operating system you do not need to install drivers. Your AcomData 2163 Drive Enclosure comes with USB 2.0 driver software for Windows 98SE users. Hot-Pluggable Devices can be added/removed while the computer is run- ning. - Page 14 the same FireWire bus. With the use of FireWire hubs, up to 63 devices can be linked on a single FireWire bus. FireWire- equipped 2163 Enclosures come with two FireWire ports: one port is for connecting the device to your computer; the other can be used for daisy-chaining other FireWire devices.
-
Page 15: Hot-Pluggable
Hot-Pluggable You can connect or disconnect FireWire devices while your computer is running. This makes portability much easier and saves you the time and hassle of shutting down and restarting your computer. You can also turn a device on and off while your computer is running. -
Page 16: Technical Specifications
Technical Specifications Model #: USB 2.0 ................HDEXXU2E3 FireWire & USB 2.0 ........... HDEXXU2FE3 Dimensions: (inches) ..............5.3” X 1.5” X 8.8” (mm) ..............134.6 X 38.1 X 223.5 Weight ................780 g / 1.72 lbs. Interface transfer rate (max. Mbps) USB 2.0 .....................480 FireWire 400 ...................400 Chassis (approved/recognized) ........ -
Page 17: Installing A 3.5" Ide Hard Drive
Installing a 3.5” IDE Hard Drive 1. Configure Your IDE Hard Drive as a Master Your IDE drive has a jumper block at ������������� the back (situated ��������� between the ATA interface connector and the power con- ������ nector). The jumper �����... -
Page 18: Disassemble The Drive Enclosure
2. Disassemble the Drive Enclosure ������ 1. Using a Philips screw- driver, remove the four screws on the back panel. 2. Remove the back fascia. 3. Grab the front fascia and carefully slide out the Drive/PCB Carrier, which is attached to the front fascia. - Page 19 3. Connect the Drive to the Carrier 1. The Drive/PCB Carrier contains the ATA interface cable and the power cable., which are attached to the PCB (printed circuit board). Orient your 3.5” IDE drive so that the drive’s connectors are aligned with the ATA interface cable and the power cable.
-
Page 20: Re-Assemble The Drive Enclosure
1. Carefully slide the Drive/PCB Carrier back into the Drive Enclosure, making sure that the fascia is properly seated and pressed tightly against the enclosure’s edge. 2 Place the back fascia back onto the enclosure, making sure it is properly seated and pressed tightly against the enclosure’s edge. -
Page 21: Setting Up The Drive
Do not place the 2163 on your desk in any way other than what is described in this guide or it may get damaged. Vertical Placement Most likely, your 2163 Drive Enclosure was packaged with the zinc alloy stand attached. However, if the stand was not already attached, follow the steps below: 1. - Page 22 2. With both screws and nuts in place, push down on each screw head to make sure the screws extend through the holes as far as they will go. 3. Attach the stand to the Drive case by sliding the nuts through the groove in the Drive case, enter-...
-
Page 23: Horizontal Placement
Horizontal Placement Removing the stand Use a screw driver with the proper type and size head to loosen the two screws located on the underside of the stand. Loosen the screws just enough so that you can easily slide the stand out of the groove. Keep the nuts attached to the screws. -
Page 24: Connecting The Drive To Your Computer
�������� �������� Connecting ���������� ���������� ��������� ��������� the Drive to Your Computer ����������� �������������� ���������� ������������ ��������� USB Users: Each end of the USB cable has different connectors called 'A' and 'B' . The 'A' con- nector plugs into your computer or USB hub. - Page 25 1. The pins of the small AC adapter plug are arranged in a pattern such that the plug can be inserted into the Drive’s Power Port only one way. Orient the plug correctly and insert the plug into the Power Port. The plug should not require much effort to insert.
-
Page 26: Mounting The Drive
Mounting the Drive This section assumes that your Drive is already formatted for your computer’s operating system. If this is not the case, format the Drive according to the instructions in the section “Formatting the Drive” and then return to this section. Mounting a FireWire-Connected Drive Mac Users: Once the Drive has been properly connected and powered... -
Page 27: Mounting A Usb-Connected Drive
install the driver named GPIO98.SYS. If you have Windows 98 Second Edition 1394 Storage Supplement, this file should be located at C:\WINDOWS/SYSTEM\IOSUBSYS\GPIO98.SYS. Mounting a USB-Connected Drive Mac Users: Once the Drive has been properly connected and powered on, it should mount to your Desktop. Windows 2000/XP Users: Once the Drive has been properly connected and powered on, you should see a new hard drive icon and drive letter in... -
Page 28: Naming Your Drive
CD-ROM drive and insert the USB 2.0 Installation CD into your CD drive. Click Next. 4. You will then see the message: “Windows is now ready to install the best driver for this device…” Click Next. 5. Once the installation is complete, you will see the mes- sage “Windows has finished installing the software…. -
Page 29: Formatting The Drive
Formatting the Drive FORMATTING A HARD DRIVE ERASES ALL DATA STORED ON THE DRIVE! BEFORE YOU FORMAT THE DRIVE, BE SURE TO SAVE A COPY OF ANY FILES YOU WISH TO KEEP TO ANOTHER STORAGE DEVICE. Follow the instructions in this section if your IDE hard drive was not already formatted prior to installation, or if you want to re-format the drive. -
Page 30: Formatting The Drive In Windows 2000 Or Xp
2. Double-click on My Computer/Explorer. In the My Computer/Explorer window you should see the icon and drive letter for the AcomData Drive. (If you are not sure which drive letter represents the AcomData Drive, turn it off and see which one of the icons disappears. Then turn on the Drive and wait for the drive letter to reappear.) -
Page 31: Formatting The Drive In Windows 98Se Or Me
2. Double-click on the My Computer icon. In the My Computer window you should see an icon and drive let- ter for the AcomData Drive. (If you are not sure which icon represents the Drive, turn off the Drive and see which icon disappears. -
Page 32: Formatting The Drive In Mac Os 9
Formatting the Drive in Mac OS X 1. Disable any anti-virus software you may have running in the background. 2. Launch the Disk Utility application (Applications folder > Utilities folder > Disk Utility). The Disk Utility window will open with a small window at left and a larger window with a series of tabs at the top. -
Page 33: Formatting The Drive In Mac Os 9
1. Disable any anti-virus software you may have running in the background. 2. Insert the System Software CD into your CD drive. 3. With your AcomData Drive connected and powered on, restart the computer and hold down the C key while the computer is starting up. -
Page 34: Using Your Drive For Routine Tasks
Using Your Drive for Routine Tasks Opening files and folders (All Users) 1. Double-click on the Drive icon. A window showing the files and folders stored on the Drive will appear. 2. Double-click on the file or folder that you want to open. Copying files and folders to your Drive PC Users ���������... -
Page 35: How To Safely Dismount & Turn Off The Drive
On Windows 2000 and XP you will see the alert message “Safely Remove…” or “Stop…” followed by the drive letter. 2. Select the AcomData Drive. After a few seconds, Windows will give you a message that it is safe to remove the device. -
Page 36: Maintaining Your Drive & Safeguarding Your Data
Maintaining Your Drive & Safeguarding Your Data A hard drive is a very sophisticated and sensitive device that requires proper care and maintenance to ensure the longest possible life, reliable operation, and the integrity of your stored data. Backing Up Your Data The single most important action you can take to safeguard your valuable data is to backup the data to another stor- age device. -
Page 37: Examining And Repairing A Hard Drive
dates file fragments that are scattered on your hard drive into more efficient contiguous clusters. Quite often, defragging and optimization functions will be included in one software package, such that both opera- tions are performed at the same time. Examining and Repairing a Hard Drive There are a number of reasons why a hard drive may become damaged or the data may become corrupted. -
Page 38: Frequently Asked Questions
(maximum 4 GB). NTFS is more secure and has fewer limitations. The NTFS file system can only be used on Windows 2000 and XP. If you plan to use your AcomData Drive on Windows 2000/XP only, consider re-formatting the Drive using the NTFS file system. - Page 39 Q: Can I connect the AcomData Drive to a USB or FireWire expansion card? A: Yes, but you may need to update the software/firmware for the card. We recommend you check with the card’s manufacturer for the latest updates. Q: Is the AcomData Drive compatible with Windows 95, 98 (First Edition) or Windows NT 4.0?
- Page 40 Q: Can you use the Drive as a startup disk? A: It is possible to use an AcomData Drive as a startup (boot) vol- ume on Mac OS 9 and Mac OS X. Follow the instructions in your Mac OS manual for the proper installation of the Mac OS. If you wish to use your AcomData Drive as a boot volume, make sure you install the Mac OS on the Drive before saving any data to the Drive.
-
Page 41: Troubleshooting
Troubleshooting If you experience a problem with your AcomData product, you should take the following actions in the order specified: 1. Make sure you followed all of the instructions in this guide properly; 2. Consult the Troubleshooting sections of this guide;... - Page 42 Create New Partition in the pop-up menu. When the Partition Wizard appears, select Primary Partition and click on Next. You will see a default value for the AcomData Drive; click Next. You will then see a drive letter (you can change this drive letter if you wish);...
- Page 43 card to connect the Drive. Plug the Drive into a data port on your computer and try the format again. You may also come across this error if you are using Windows 2000 or XP and you try to format the Drive using the FAT32 file system. If reformatting the Drive and you do not need Mac compat- ibility, Windows 2000/XP users should use the NTFS files system.
-
Page 44: Troubleshooting For Mac Users
A: First, make sure the connections are secure. Make sure you properly connected the Drive’s internal power cable to the installed IDE drive. Second, check if your AcomData Drive is listed in the Apple System Profiler. If the driver listed is “USB Authoring Support”... - Page 45 Mac reboots, the AcomData Drive should mount nor- mally and you should not have this problem again. I set up my AcomData Drive on Mac OS 9 and it was working fine. Then when I upgraded to Mac OS X my computer asked me to re-initialize the Drive.
-
Page 46: Glossary
Glossary Bit - The smallest unit of digital data. In binary code, a bit is repre- sented logically as a either a 1 or a 0. Buffer – RAM cache that temporarily stores data so it can be deliv- ered to a device as it is needed. Bus –... - Page 47 devices while the computer is running. Hub – A device which links peripherals together onto the same data bus. Interface – Junction between two items of hardware or software for the exchange of data. Mb (Megabit) – One million bits. Mbps (Megabits per second) –...
-
Page 48: One Year Limited Warranty
This Warranty does not apply if the malfunction results from: (1) the use of this Product in conjunction with accessories, products or ancillary or periph- eral equipment, or where it is determined by AcomData that there is no fault with this Product itself; (2) improper installation, operation, testing or main- tenance of this Product;... - Page 49 (which is evidence that the Product is within the warranty period) must be presented to obtain warranty service. When sending an AcomData Product in for service you must take the Product, or deliver the Product (freight prepaid) to AcomData, in either its original packaging or in a package that provides the Product with a degree of protection equivalent to that of the original packaging.
-
Page 50: Obtaining Service For Your Acomdata Product
Do not send a product in for service without first contacting AcomData Technical Support and following the instructions from your TSS. AcomData will not accept returned products that have not been assigned an RMA number. – 50 –... -
Page 51: How To Purchase Accessories
How to Purchase Accessories Contact Customer Service at customerservice@acomdata. com. In your e-mail, please include: • your name; • phone number; • mailing address; • model number or description of item, and; • quantity per item. A Customer Service agent will contact you to complete the transaction. -
Page 52: Notices
Notices OPYRIGHTS Copyright © 2005 AcomData. All rights reserved. No part of this publication may be reproduced stored in a retrieval system, or transmitted in any form or by any means, electronic, mechanical photocopying, recording or otherwise, without the prior written consent of AcomData.
Need help?
Do you have a question about the Hard Drive Enclosure and is the answer not in the manual?
Questions and answers