Table of Contents
Advertisement
Quick Links
Download this manual
See also:
User Manual
Advertisement
Table of Contents

Related Manuals for Electrolux EH L4-4


Summary of Contents for Electrolux EH L4-4
- Page 1 Cooker EH L4-4...
-
Page 2: Table Of Contents
2 electrolux Electrolux. Thinking of you. Share more of our thinking at www.electrolux.com Contents Safety instructions........3 Cleaning and Care......... 24 Description of the Appliance ....4 What to do if …........30 Before Using for the first time ....5 Installation Instructions ...... -
Page 3: Safety Instructions
electrolux 3 Safety instructions Electrical safety How to avoid damage to the appliance • This appliance must be only connected • Do not line the oven with aluminium foil by a registered electrician. and do not place baking trays, pots, etc. on the oven floor, as the heat that builds •... -
Page 4: Description Of The Appliance
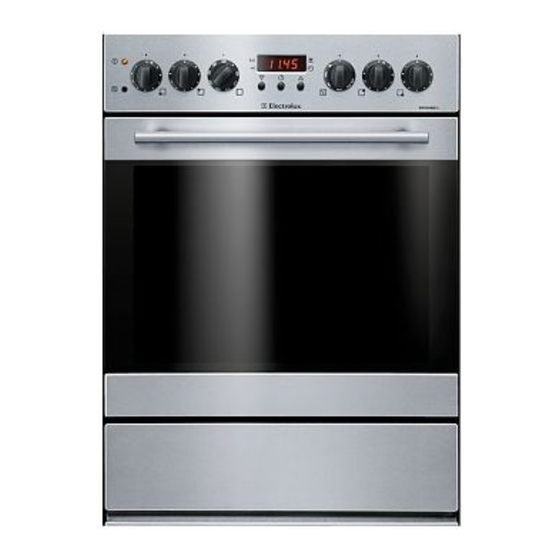
4 electrolux Description of the Appliance General Overview Control panel Door handle Oven door Appliance drawer Control Panel Time display Oven Power Indicator Temperature Pilot Light Oven Functions Temperature selector Clock function buttons Hob Cooking Zone Control Knobs Hob Cooking Zone Control Knobs... -
Page 5: Before Using For The First Time
electrolux 5 Oven Features Top heat and heating elements Fat trap Oven lighting Shelf positions Fat Filter Oven lighting Fan heating element Aluminium base plate Bottom heating element, removable Oven shelf runners, removable Oven accessories Oven shelf Baking tray For cookware, cake tins, roasts and grilled For cakes and biscuits. -
Page 6: Using The Rings
6 electrolux 1. To change a time that has already been The appliance is now ready to use. set, press the Selection button re- The time can only be changed if no au- peatedly until the function indicator Time tomatic function (Duration or End of day flashes. -
Page 7: Setting The Heat Setting
electrolux 7 front left rear left rear right front right Hob Cooking Zone Control Knobs Setting the heat setting Switching on the dual fry/cook area 1. Select the heat setting. The control for the dual fry/cook area is switched on by turning to the right, and cannot be turned past the stop! Turn the dual fry/cook control to the right. -
Page 8: Using The Oven
8 electrolux Using the Oven Switching the Oven On and Off Oven Power Indicator Temperature selector Oven Functions Temperature Pilot Light To turn the oven off, turn the oven func- 1. Turn the oven functions dial to the de- tions dial and the temperature selector sired function. - Page 9 electrolux 9 Oven function Application Grill For grilling flat food items placed in the middle of the grill and for toasting. Dual grill For grilling flat food items in large quantities and for toasting. Convection grilling For roasting larger joints of meat or poultry on one level. The function is also suitable for gratinating and browning.
-
Page 10: Clock Functions
10 electrolux Inserting/Removing the Fat Filter Inserting the fat filter Hold the fat filter by the grip and insert the Only use the fat filter when roasting to two mounts downwards into the opening protect the rear heating elements from fat on the rear wall of the oven (fan opening). - Page 11 electrolux 11 Using the button set the de- How to use the clock functions sired Countdown (max. 2 hours • After a function has been selected, the 30 minutes). corresponding function indicator flashes for about 5 seconds. During this period, the desired times can be set using the button.
- Page 12 12 electrolux Duration When the time has elapsed, the function in- dicator flashes, an audible signal sounds for 1. Press the Selection button repeated- 2 minutes and the oven switches itself off. ly until the function indicator Duration flashes. The signal and the programme can be stopped by pressing any button.
- Page 13 electrolux 13 After approx. 5 seconds the display returns Using the End function, set the time to showing the current time. at which the dish should be ready. The function indicator End lights up. In this case 14:05:00. When the time has elapsed, the function in- The function indicators Duration dicator flashes, an audible signal sounds for light up and the current time is...
-
Page 14: Uses, Tables And Tips
14 electrolux Uses, Tables and Tips Cooking table The information given in the following table is for guidance only. Heat Cooking- Cooking set- suitable for Tips/Hints process time ting Residual heat, Off position Keeping Keeping cooked foods warm as required Cover food warm Hollandaise sauce,... - Page 15 electrolux 15 Oven levels This does not significantly increase bak- ing time. • Baking with Conventional is possible on one oven level. When frozen foods are used the trays in- • With Convection with ring heating serted may distort during cooking. This element you can bake on up to 3 is due to the large difference in temper-...
-
Page 16: Baking Table
16 electrolux Baking table Baking on one oven level Type of Oven Temperature Time Oven function baking level °C Mins. Baking in tins Ring cake or brioche Convection with ring 150-160 50-60 heating element Madeira cake/fruit cakes Convection with ring 140-160 60-80 heating element... - Page 17 electrolux 17 Type of Oven Temperature Time Oven function baking level °C Mins. Fruit flans made with short pastry Convection with ring 160-170 50-70 heating element Yeast cakes with delicate toppings Conventional 160-180 50-70 (e. g, quark, cream, custard) Pizza (with a lot of topping) Convection with ring 180-200 30-50...
-
Page 18: Tips On Baking
18 electrolux Baking on more than one oven level Convection Convection with ring with ring heating heating Temperature Time element element Type of baking in °C Mins. Shelf positions from bottom 2 levels 3 levels Cakes/pastries/breads on baking trays Cream puffs/Eclairs 1 / 4 160-180 35-45... - Page 19 electrolux 19 Baking results Possible cause Remedy Cake browns unevenly Oven temperature too high and baking Set a lower oven temperature and a time too short longer baking time Mixture is unevenly distributed Spread the mixture evenly on the baking tray Cake is not done within the Temperature too low Use a slightly higher oven setting...
- Page 20 20 electrolux Frozen Ready Meals Table Food to be Shelf Temperature Oven function Time cooked position °C as per manufactur- as per manufactur- Frozen pizza Conventional er’s instructions er’s instructions Chips Convection with ring as per manufactur- 200-220 (500 g) heating element er’s instructions as per manufactur-...
- Page 21 electrolux 21 Temper- Shelf Time Type of meat Quantity Ovenfunction ature position Mins. °C Pork Convection Shoulder, neck, ham joint 1-1.5 kg 160-180 90-120 grilling Convection Chop, spare rib 1-1.5 kg 170-180 60-90 grilling Convection Meat loaf 750 g-1 kg 160-170 50-60 grilling...
-
Page 22: Grill Sizes
22 electrolux Grill sizes Oven function: Grill or Dual grill • For grilling, place the shelf in the with maximum temperature setting recommended shelf position. • Always insert the tray into the first Important: Always grill with the oven shelf position from the bottom. door closed. -
Page 23: Making Preserves
electrolux 23 Drying Oven function: Convection with ring heating element • Use oven shelves covered with grease- proof paper or baking parchment. • You get a better result if you switch the oven off halfway through the drying time, open the door and leave the oven to cool down overnight. -
Page 24: Cleaning And Care
24 electrolux Preserves table The times and temperatures for making pre- serves are for guidance only. Cooking time until Continue to cook Temperature Preserve simmering at 100°C in°C in mins. in mins. Soft fruit Strawberries, blueberries, raspber- 160-170 35-45 ries, ripe gooseberries Unripe gooseberries 160-170 35-45... -
Page 25: Fat Filter
electrolux 25 Fat Filter Fitting the shelf support rails 1. Clean the fat filter in hot water and washing up liquid or in the dishwasher. 2. Badly burned on soiling can be removed by boiling the filter in a little water to which 2-3 tablespoonsful of dishwasher clean- er has been added. -
Page 26: Oven Lighting
26 electrolux 1. Pull the top heating elements out of the Oven Lighting plug connection to the front (see illustra- Warning: Risk of electric shock! Prior to tion). changing the oven light bulb: – Switch off the oven! – Disconnect from the electricity supply. Place a cloth on the oven floor to protect the oven light and glass cover. -
Page 27: Oven Ceiling
electrolux 27 4. Refit the glass cover. Grip the heating element at the front and pull it forwards and out over the support lug on the inner wall of the oven. The heating element will now fold down. Caution: Do not use force to press the heating element down! The heating ele- ment might break. -
Page 28: Oven Door
28 electrolux Oven door Take hold of the oven door with a hand on each side and pull it away from the For easier cleaning of the oven interior the oven at an upwards angle (Take care: It oven door of your appliance can be taken off is heavy). - Page 29 electrolux 29 2. Open the oven door as far as it will go. 3. Fold up the clamping levers (A) on both door hinges back into their original positions. 4. Close the oven door.
-
Page 30: What To Do If
30 electrolux What to do if … Problem Possible cause Remedy The oven does not heat up The oven is not switched on Switch the oven on The clock is not set Set the current time on the clock The required settings have not Check the settings been set The house wiring fuse (in the fuse... -
Page 31: Installation Instructions
electrolux 31 Installation Instructions Built-in cooker SMS width 55 cm Installation into flammable material must comply with NIN 2005, Chapter 4.2.2 of the VKF (Association of Cantonal Fire In- surers) fire protection guidelines and regulations. 1. a) Install the hotplates according to the installation insruction no.374307900/ 374307901 so that the hotplate socket connections can be carried out before... - Page 32 32 electrolux To secure it, you can bore 2 x 2.8mm In case of repair the appliance must holes at the top where the indents are be switched off from the mains. provided (detail C). Installation diagram 400V Electrical connection/power supply The oven must be connected to the electric- ity supply by a designated electrician.
-
Page 33: Disposal
electrolux 33 Disposal Packaging material The packaging materials are environ- mentally friendly and can be recycled. The plastic components are identified by markings, e.g. >PE<, >PS<, etc. Please dispose of the packaging materials in the appropriate container at the com- munity waste disposal facilities. - Page 34 34 electrolux Garantie/Kundendienst, Garantie/service-clientèle, Garanzia/Servizio clienti, Guarantee/Customer Service Centres Servicestellen Points de Service Servizio dopo vendita Point of Service 5506 Mägenwil/Zürich 3018 Bern 1028 Préverenges 6916 Grancia Industriestrasse 10 Morgenstrasse 131 Le Trési 6 Zona Industriale E 9000 St. Gallen Zürcherstrasse 204 e 4127 Birsfelden Hauptstrasse 52...
-
Page 35: Service
electrolux 35 Service In the event of technical faults, please first check whether you can remedy the problem yourself with the help of the operating in- structions (section “What to do if…”). If you were not able to remedy the problem yourself, please contact the Customer Care Department or one of our service partners. - Page 36 www.electrolux.com www.electrolux.ch 315 9033 03-N-150109-01...
Need help?
Do you have a question about the EH L4-4 and is the answer not in the manual?
Questions and answers