Pima 896 User Manual
Hunter-pro series sa alarm systems
Hide thumbs
Also See for 896:
- Installation manual (83 pages) ,
- User manual (39 pages) ,
- Programming steps (2 pages)

Related Manuals for Pima 896


Summary of Contents for Pima 896
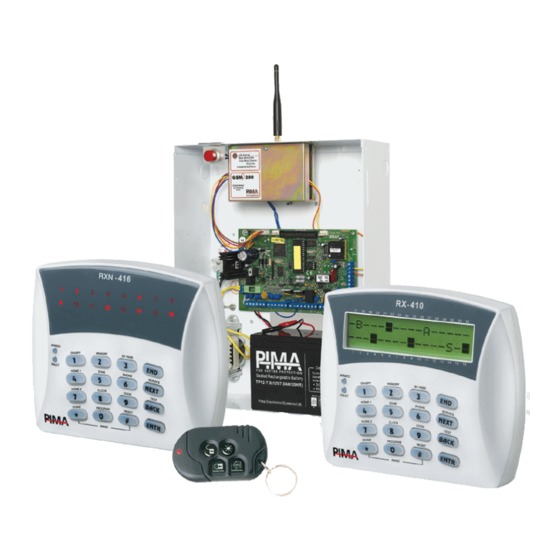
- Page 1 HUNTER-PRO S ERIES Models 832/896/8144 ALARM SYSTEMS UIDE The LED’S in all PIMA keypads are: RED: ARMED GREEN: FAULT PIMA Electronic Systems Ltd. P/N 4410298 A www.pima-alarms.com ZA, en, June 2011...
- Page 2 PIMA’s prior written consent is granted. All efforts have been made to ensure that the content of this manual is accurate. Pima retains the right to modify this manual or any part thereof, from time to time, without serving any prior notice of such modification.
-
Page 3: Table Of Contents
Deleting a User code ................21 The Duress code ................... 21 The Short code ..................21 The Door code ..................21 The User name ..................21 User settings ..................22 Disarming time window ................22 User partitions ..................23 PIMA Alarm Systems Ltd. - Page 4 Disable the chime per zone ..............30 13.4.3 Enable the chime feature globally ............. 31 13.5 Turning ON/OFF the chime ..............31 13.6 PANIC alarm ..................31 13.7 Resetting Smoke/Fire/Anti-Mask detectors..........31 Troubleshooting ................32 Appendix: Zone Name Table ............34 PIMA Alarm Systems Ltd.
-
Page 5: Introduction
(see instructions on section 1 0). For any further questions, please contact your local PIMA distributor. Up to date literature is available to download from our website at: www.pima-alarms.com Safety instructions Your Hunter-Pro Series alarm system has been registered in accordance with EN60950 and its rules. -
Page 6: Signs In This Guide And Codes
These can be referred to as sub-systems. 1.4.1 Programming Partitions In the User menu, partitions are programmed in a 2-state parameter bar, where “+” is enabled and “-” is disabled. To change the state of a parameter/partition, (toggle). PIMA Alarm Systems Ltd. -
Page 7: The User Menu
When a user tries to enter a sub-menu it is not authorized to: The LCD keypad The RXN-400 and RXN-410 (including the RFID model) are PIMA‟s LCD (Liquid Crystal Display) keypads. The two models are identical, except for their screen size - the RXN-410‟s is larger. -
Page 8: The Keypad Keys & Functions
Hunter-Pro Series - User Guide Figure 1. PIMA‟s RXN-410 LCD keypad 1.6.1 The keypad keys & functions ON/OFF MEMO. BYPASS HOME 1 ZONE PHONES SERVICE NEXT HOME 2 CLOCK CODES TEST BACK CHIME PROG. RESET ENTR Option 1: enter the Master or user... -
Page 9: Key #1: Arming & Disarming
System Armed! ON/OFF Select 1,2... Master code The Exit delay countdown starts, the keypad chime sounds beeps and the ARMED LED flashes. To enable auto-arming with open zones and faults, ask your Installer. PIMA Alarm Systems Ltd. -
Page 10: Arming With The Master Code
OP:Front door To cancel the arming: If you do not press [END], the panel will indeed be armed, but alarms will be generated from the open zones immediately after the exit delay ends. PIMA Alarm Systems Ltd. -
Page 11: Arming Using A Key, Key Fob, Or Rfid Accessory
The Visonic MCT-234 key fob has 4 push buttons. See the next figure for their functionality. Note, that to use a key fob you need a wireless module, like Pima‟s I/O-WN. Figure 2. Visonic MCT-234 key fob Figure 3. -
Page 12: Rfid Accessory
Zone Alarms-2 To view the other options: Show: NEXT Arming/Dis.-3 To select a different viewing options within one of the screens: to show all the events; to show faults only; PIMA Alarm Systems Ltd. -
Page 13: Key #3: Temporary Zone Bypassing
Entr-Conf #-Rst Master code zone number ENTR The zone is immediately bypassed. The next time the system is disarmed (or if the bypass limit time passes) the bypassed zone is automatically reinstated. PIMA Alarm Systems Ltd. -
Page 14: Keys #4, #7: Arming To "Home 1" And "Home 2" Modes
If Fast Arming was enabled by the installer: Master code/Short code To arm to “HOME 2” repeat the above steps only with key To change between the HOME modes while the system is already armed, first disarm it. PIMA Alarm Systems Ltd. -
Page 15: Key #5: Displaying Types
Open (violated) and not ready to arm zone Alarming zone. This zone was violated the last time the system was armed, or it is a 24 Hour zone. This zone will be bypassed the next time the system will be armed Chime zone PIMA Alarm Systems Ltd. -
Page 16: Scan Open Zones" Auto-Scrolling Display Type
Chime zones The Fast 32 zone display, extended to all the zones; see the NEXT X7 All Zones Status next section. The partitions (i.e. the allocated zones) that are operated Show Partitions Names NEXT by this keypad PIMA Alarm Systems Ltd. -
Page 17: All Zones Status Display
A “Stop Dialer” command is received over the telephone; All numbers were dialed, each number twice (even if the calls were answered). Calls that report on faults, are not followed up by “back to normal” calls. PIMA Alarm Systems Ltd. -
Page 18: Sms Phone Settings
In the Dialer test menu, press a number between 1 and 4 (in correspondence with the telephone numbers) and the dialer calls that number. If a call is not received, check the programmed number; if it is correct, call a service technician. PIMA Alarm Systems Ltd. -
Page 19: Key #8: Time And Date
ENTER/NEXT/END Master Code The default Master code is 5555; the code should be replaced immediately after installation (see how in this section). The Master code is a super user code with all the access authorizations. PIMA Alarm Systems Ltd. -
Page 20: Changing The Master Code
User indicators indicate on what has been assigned to this user. They appear to the right of the user name. The indicators are: Indicator Description User User User Remote control name number indicators RFID accessory JANE (24 )AK* User code ENTER/NEXT/END For example: PIMA Alarm Systems Ltd. -
Page 21: Deleting A User Code
See “Entering names and characters”, section 1 3.1. User 1 1) * User Codes CODES NEXT ENTR ENTER/NEXT/END ENTER/NEXT/END Master code The code is active if the system is disarmed too. PIMA Alarm Systems Ltd. -
Page 22: User Settings
Master Code User number User 1 1) * Disarm Window ENTER/NEXT/END ENTR NEXT ENTR ENTER/NEXT/END User 1 ENTR 00:00 23:59 Enter start and end window time in HH:MM format PIMA Alarm Systems Ltd. -
Page 23: User Partitions
Keyfob User 1 (1) * ENTER/NEXT/END ENTR NEXT ENTER/NEXT/END User number Keyfob ENTR Activate device Press one of the Key fob‟s buttons and wait for Device added! Press END confirmation message: PIMA Alarm Systems Ltd. -
Page 24: Deleting A Key Fob
Bring the tag/key chain near the left side of the keypad (see the Tag Received! Press END next image) until a confirmation message is displayed The letter „A‟ in the User screen indicates the user has an RFID tag. Figure 6. RFID key chain PIMA Alarm Systems Ltd. -
Page 25: Deleting A Tag/Key Chain
Master Code InActivityToArm InActivityToArm ENTR Minutes ENTER/NEXT/END the inactivity time in minutes Inact. Per Part ENTR ++++++++++++++++ the partitions that will be armed (see section 1 .4.1) ENTR to save. PIMA Alarm Systems Ltd. -
Page 26: Rxn-700 Screen Options
Full - that also includes activating all the outputs in the expansion cards (where there are), that in turn, activate gates, doors, spotlights etc. By default, the system is set to the basic mode. The modes can be changed by the installer only PIMA Alarm Systems Ltd. -
Page 27: Basic Remote Control
Follow steps 1 - 3 in the previous Basic mode section, to establish communication with the panel. To activate an output: press a number; To deactivate an output: press a number. In the “User settings”. See section 9 .7. PIMA Alarm Systems Ltd. -
Page 28: Examples
Silence the external siren and terminate the dialer: Dial and wait for confirmation tone to end Master/Authorized User code. After hearing 2 beeps [*] [0] [0] Deactivate the RELAY in I/O-8N #8: PIMA Alarm Systems Ltd. -
Page 29: Other Topics
To enter 2 or more characters using the same key, pause 2 seconds between each character. Keystrokes ON/OFF BYPASS CODES Space Zero 13.2 Programming keys Description Uppercase/Lowercase Cancel/Return to previous screen without saving Next character Previous character ENTR Select/Save The following example illustrates writing the word „KITCHEN‟: PIMA Alarm Systems Ltd. -
Page 30: Enabling Remote Upload (For The First Time Only)
13.4.2 Disable the chime per zone User Menu Zone Number: 1 ENTR-Conf #-Rst Select 1,2... Master code zone number ENTR This feature can be enabled only by using the Master code. PIMA Alarm Systems Ltd. -
Page 31: Enable The Chime Feature Globally
Violating a PANIC zone. As in any other event, the responses to PANIC alarm are set by the installer. 13.7 Resetting Smoke/Fire/Anti-Mask detectors To reset smoke/fire/anti-mask detectors: until a confirmation tone is sounded. PIMA Alarm Systems Ltd. -
Page 32: Troubleshooting
IO-R X Voltage Low voltage on the I/O-R relay expander. IO-8 XX Voltage Low voltage to the I/O-8 zone expander. Wireless Jamming The wireless receiver (I/O-WN) is jammed. Supervision A wireless detector “life signal” has not been received. PIMA Alarm Systems Ltd. - Page 33 The external siren is faulty. Video X fault Communication fault between the panel and the video unit VVR #X. Video X power fault Voltage fault in VVR #X. net4pro fault Communication fault between the panel and the net4pro network card. PIMA Alarm Systems Ltd.
-
Page 34: Appendix Zone Name Table
Hunter-Pro Series - User Guide PPENDIX ABLE Zone Name Zone Name PIMA Alarm Systems Ltd. - Page 35 139. 140. 141. 142. 100. 143. 101. 144. 102. 103. 104. 105. 106. 107. 108. 109. 110. 111. 112. 113. 114. 115. 116. 117. 118. 119. 120. 121. 122. 123. 124. 125. 126. 127. 128. 129. PIMA Alarm Systems Ltd.
- Page 36 Hunter-Pro Series - User Guide Installer Details: Name: _________________________________________ Telephone: _________________________________________ Company: _________________________________________ Telephone: _________________________________________ Date of installation: Day _____ Month _____ Year _______ End of service: Day _____ Month _____ Year _______ PIMA Alarm Systems Ltd.
Need help?
Do you have a question about the 896 and is the answer not in the manual?
Questions and answers
Please advise why my keyboard shows not connected
Your Pima keyboard model 896 may be showing as "NOT CONNECTED" due to the following reasons:
1. Disconnection – Check if the PCB’s "OUT" terminal is properly connected to the keypad.
2. Low Voltage Supply – Ensure the keypad is receiving at least 13V and no more than 8 keypads are connected.
3. Faulty Keypad – The keypad itself may be faulty and may need to be replaced.
4. PCB Fault – If all connections and voltage are correct, the PCB may be faulty and require replacement.
Check these factors to identify and resolve the issue.
This answer is automatically generated