Table of Contents
Advertisement
Quick Links
Advertisement
Table of Contents

Subscribe to Our Youtube Channel
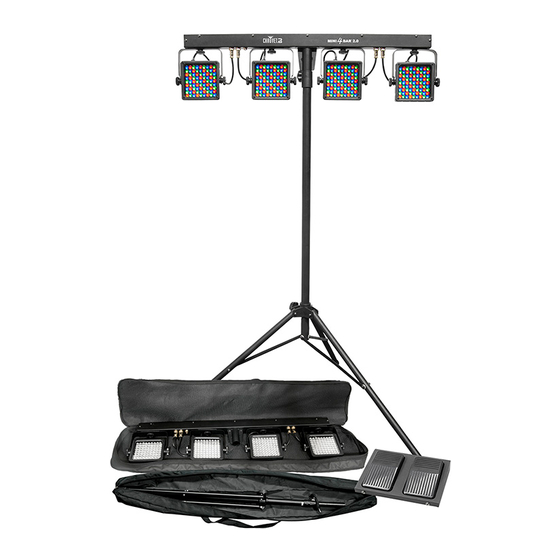
Summary of Contents for Chauvet Mini 4 Bar
- Page 1 User Manual...
-
Page 2: Table Of Contents
DMX Channel Assignments and Values ................... 12 15-CH ............................. 12 3-CH ............................... 12 5. Technical Information ....................13 Maintenance ..........................13 6. Technical Specifications ....................14 Contact Us ..........................15 Returning Products to CHAUVET® ..................15 Page 2 of 15 Mini 4 Bar™ 2.0 User Manual Rev. 6... -
Page 3: Before You Begin
For other issues such as missing components or parts, damage not related to shipping, or concealed damage, file a claim with CHAUVET® within seven (7) days of receiving the merchandise. Convention... -
Page 4: Product At A Glance
Please contact the nearest authorized technical assistance center. · Keep this User Manual for future consultation. If you sell this product to another user, be sure that they also receive this document. Page 4 of 15 Mini 4 Bar™ 2.0 User Manual Rev. 6... -
Page 5: Introduction
2. I NTRODUCTION Product Overview Power Out Power In LED Display DMX In/Out Text here Footswitch Input Microphone Microphone Sensitivity Knob Product Dimensions Mini 4 Bar™ 2.0 User Manual Rev. 6 Page 5 of 15... -
Page 6: Setup
Although the safety cap does have room for a spare fuse, this product ships with no spare fuse. Always replace a blown fuse of the same type and rating. Page 6 of 15 Mini 4 Bar™ 2.0 User Manual Rev. 6... -
Page 7: Power Linking
Product Other products You can power link up to 18 Mini 4 Bar™ 2.0 units on 120 VAC or up to 32 Mini 4 Bar™ 2.0 units on 230 VAC. The power linking diagram shown above corresponds to the North American version of this product ONLY! If using this product in other markets, you must consult with the local CHAUVET®... -
Page 8: Mounting
Before mounting this product, read and follow the safety recommendations indicated in the Safety Notes section. Orientation The Mini 4 Bar™ 2.0 may be mounted in any position; however, make sure adequate ventilation is provided around the product. Rigging This product has multiple rigging options. They are as follows: ·... -
Page 9: Operation
DMX mode uses. If you choose a starting address that is too high, you could restrict the access to some of the product’s channels. The Mini 4 Bar™ 2.0 uses up to 15 DMX channels in its 15-channel DMX mode, which defines the highest configurable address to 498. -
Page 10: Configuration (Standalone)
S__1 (fast) to S100 (slow). Press <ENTER>. Master/Slave This mode allows a single Mini 4 Bar™ 2.0 unit (the “master”) to control the actions of one or more Mini 4 Bar™ 2.0 units (the “slaves”) without the need of a DMX controller. Mode The master unit will be set to operate in either Automatic or Sound Active mode, while the slave units will be set to operate in Slave Mode. -
Page 11: Footswitch Operation
Press both pedals Sound-active mode simultaneously (Sound Active) There is no need to modify any settings for the Mini 4 Bar™ 2.0 before connecting the footswitch. It will operate properly in any mode. Plug the master fixture in LAST! Disconnecting... -
Page 12: Dmx Channel Assignments And Values
Color Mixing for Pod 4 000 ó 255 0~100% Blue 4 Channel Function Value Setting 3-CH 000 ó 255 0~100% 000 ó 255 0~100% Green 000 ó 255 0~100% Blue Page 12 of 15 Mini 4 Bar™ 2.0 User Manual Rev. 6... -
Page 13: Technical Information
Softly drag any dirt or grime to the outside of the glass/transparent surface. · Gently polish the external optics and glass/transparent surfaces until they are free of haze and lint. Always dry the glass/transparent surfaces carefully after cleaning them. Mini 4 Bar™ 2.0 User Manual Rev. 6 Page 13 of 15... -
Page 14: Technical Specifications
104° F (40° C) Convection I/O Connectors Connector Type Channel Range 3-pin XLR Sockets 3 or 15 Ordering Product Name Item Code Item Number Mini 4 Bar™ 2.0 03030341 MINI4BAR2.0 Page 14 of 15 Mini 4 Bar™ 2.0 User Manual Rev. 6... -
Page 15: Contact Us
You must send the merchandise prepaid, in its original box, and with its original packing and accessories. CHAUVET® will not issue call tags. Clearly label the package with the RMA number. CHAUVET® will refuse any product returned without an RMA number.


Need help?
Do you have a question about the Mini 4 Bar and is the answer not in the manual?
Questions and answers