
Related Manuals for Clarke BANDIT


Summary of Contents for Clarke BANDIT
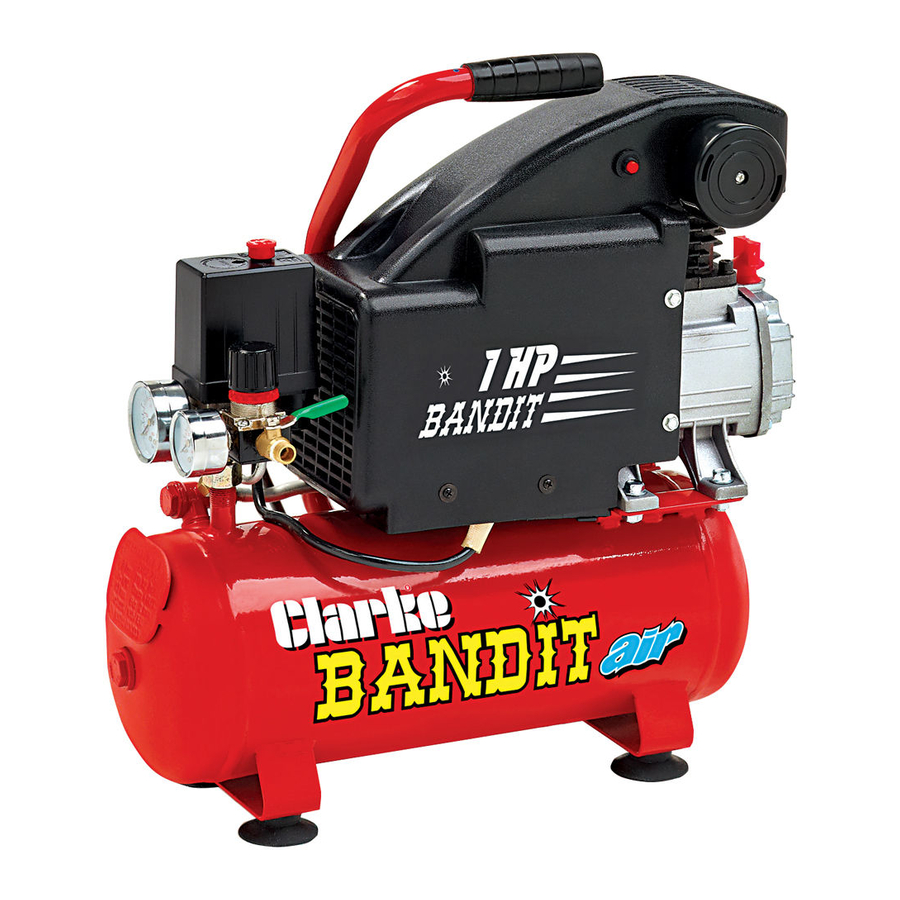
- Page 1 BANDIT BANDIT AIR COMPRESSOR AIR COMPRESSOR OPERATION & MAINTENANCE INSTRUCTIONS 1004...
-
Page 2: Declaration Of Conformity
Accessories A range of accessories, for inflating tyres, air brushing, stapling, blowing, paint spraying etc., is available from your Clarke dealer. Also available in kit form, as illustrated below...Model KIT1000. NOTE: If this compressor is supplied with an Air Nailer/Stapler as part of a kit, then a 4.5 metre Recoil Hose is also provided. -
Page 3: Table Of Contents
Thank you for purchasing this Clarke Air Compressor set. Before attempting to operate the machine, please read this instruction manual thoroughly and carefully follow all directions given. This is for your own safety and that of others around you, and also to help you achieve long and trouble free service from your compressor. -
Page 4: Safety Precautions
Wait until the machine has cooled down. ✘ NEVER attempt to modify your compressor - in any way. Electrical or mechanical repairs should only be carried out by a qualified engineer. If problems occur, contact your Clarke dealer. - 4 -... -
Page 5: Electrical Connections
Electrical Connections This product is provided with a standard 13 amp, 230 volt (50Hz), BS 1363 plug, for connection to a standard, 13 amp domestic electrical supply. Should the plug need changing at any time, ensure that a plug of identical specification is used. WARNING! THIS APPLIANCE MUST BE EARTHED Should the plug need changing at any time, ensure that a plug of identical specification is used. -
Page 6: Pre-Operation Checks
Pre-Operation Checks Before using your compressor it is necessary to perform the following operations, ensuring the unit is NOT plugged into the mains supply. Fig.1 1. Remove the Oil Filler Travel plug and fill with the SAE 30 oil supplied, to the centre of the red dot on the oil sight glass. -
Page 7: Operation
Operation Once the hose connections are complete, plug in to the mains supply and start the compressor by pulling the STOP/START switch upwards. Pressure will build up in the receiver, as indicated on the gauge, to a predetermined maximum 116 PSI/8bar, when it will then stop. At this point, slowly turn the pressure regulator clockwise to reach the desired setting for the air tool to be used, as indicated on the Air Outlet Gauge. -
Page 8: Maintenance
Caution Do not attempt any repairs or adjustments if you are uncertain as how it should be done. If you have any queries, please contact your nearest CLARKE dealer, or otherwise telephone CLARKE International, Service Department, on: 020 8988 7400). -
Page 9: Fault Finding
Under these circumstances, it must be switched OFF for at least a 2 minute period. Please note that the details and specifications contained herein are correct at the time of going to print. However CLARKE International reserve the right to change specifications at any time without prior notice. Always consult the machines data plate... -
Page 10: Parts List & Diagrams
HTBAN28 Parts & Service Contacts For Spare Parts and Service, please contact your nearest dealer, or CLARKE International, on one of the following numbers. PARTS & SERVICE TEL: 020 8988 7400 PARTS & SERVICE FAX: 020 8558 3622 e-mail as follows: PARTS: Parts@clarkeinternational.com... - Page 11 Parts Drawing - 11 -...
Need help?
Do you have a question about the BANDIT and is the answer not in the manual?
Questions and answers