Table of Contents
Advertisement
Quick Links
Download this manual
See also:
Service Manual
Advertisement
Table of Contents

Related Manuals for Küppersbusch EKDG 6800.0


Summary of Contents for Küppersbusch EKDG 6800.0
-
Page 1: Instructions For Use
Instructions for use and installation instructions EKDG 6800.0... -
Page 2: Table Of Contents
Content Safety instructions ......4 Prior to initial operation ..............4 Appropriate use ................4 When children are present in the home........... 4 On operation................ - Page 3 ... Content Care and maintenance ..... 44 Cleaning the outside of the oven..........44 Interior oven care............... 44 Decalcifying ................46 Carrying out minor repairs yourself .
-
Page 4: Safety Instructions
Safety instructions This appliance has been designed in accordance with recognised statutory technical regulations and the respective safety regulations. However, in order to avoid any damage or accidents, it is essential that the appliance be appropriately handled. Please observe the instructions contained in this manual. -
Page 5: On Operation
... Safety instructions • The appliance is intended for use by adults who are familiar with the instructions for use. • Children are frequently not able to recognise risks involved on handling the appliance. Please ensure that they are supervised accordingly and never allow them to play with the appliance. - Page 6 ... Safety instructions • The oven door, in particular the glass pane, may become hot. Danger of burns, do not touch! Keep children away! • On opening the oven door, steam and drops of water may escape from the appliance. Do not put your hands in the appliance in the case of the occurence of steam.
-
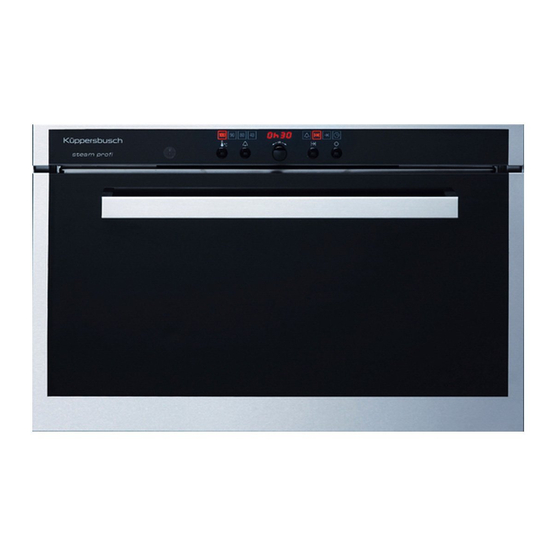
Page 7: Your Appliance
Your appliance Appliance parts 1 Control elements and display 9 Oven cavity temperature gauge elements 10 Socket for roasting thermometer 2 Oven cavity ventilation 11 Rack levels 3 Steam inlet 12 Water tank 4 Oven cavity light 13 Roasting thermometer 5 Hot air fan 14 Roasting grid (2 units) 6 Door sealing... -
Page 8: Control Elements And Display Elements
... Your appliance Control elements and display elements C D E F Buttons /setting elements A ok with an indicator lamp B Oven lighting with an indicator lamp Clock D Timer with an indicator lamp Switch-off time with an indicator lamp Operation duration with an indicator lamp G Oven cavity temperature... -
Page 9: Initial Operation
... Your appliance Initial operation Prior to initial use of a newly-installed appliance, the following steps should be taken: • Remove packaging and transport materials from the oven interior. • Set the clock: Press the button lightly and set the hours with the control dial. -
Page 10: General Information On Operation
... Your appliance General information on operation Settings can be undertaken with the control dial once the button for the relevant operating mode has been pressed. For the duration of the “period set” (see page 15), settings can be made. Should you, subsequent to the final setting, not wish to wait until the time set has expired, you may also use the button to start the selected function... -
Page 11: Settings
Settings Certain user settings on the appliance can be adapted to suit your requirements. The general procedure is equivalent for all settings. Language selection • Press the button and turn the control dial until the clear text display indicates “user settings”. •... -
Page 12: Switching The Childproof Lock On And Off
... Settings Switching the childproof lock on and off When the childproof lock is switched on, only the oven lamp can be switched on and off. Before the childproof lock can be switched off, it must first be temporarily put out of operation. •... -
Page 13: Switching The Clock On Or Off
... Settings Switching the clock on or off The clock can be switched off if the appliance is not used for some time, in order to reduce energy consumption. The clock continues to run invisibly. The appliance can be put into operation at any given time. •... -
Page 14: Changing The Volume Of The Buzzer
... Settings Changing the volume of the buzzer The volume of the buzzer can be altered in two stages. • Press the button and turn the control dial until the clear text display indicates “user settings”. • Press the button and turn the control dial until the clear text display indicates “buzzer”. -
Page 15: Changing The Switch-On Time Setting
... Settings Changing the switch-on time setting The switch-on time (i.e. the stand-by time between the last setting and the commencement of the selected operation mode by the appliance) can be adjusted in three stages. • Press the button and turn the control dial until the clear text display indicates “user settings”. -
Page 16: Switching The Automatic Oven Cavity Light On And Off
... Settings Switching the automatic oven cavity light on and off Should, in the settings, “oven cavity lighting have been selected automatically with door”, the oven cavity light will always be switched on as soon as the oven door is opened. •... -
Page 17: Cooking And Baking
Cooking and baking Do not forget: Baking and cooking result in the occurence of heat. Risk of burns! Please read the safety instructions prior to cooking or baking page 4. You have acquired a modern appliance which “differs” from older appliances in its operation. -
Page 18: The Operating Modes And Their Application
... Cooking and baking The operating modes and their application Your appliance offers you the following heating methods for cooking and baking, described below in more detail. Steaming • Suggested oven temperature: 100 °C (equivalent to the maximum possible boiling temperature) •... - Page 19 ... Cooking and baking Regenerating • Suggested oven temperature: 130 °C • Application range: 100 to 150 °C In the case of “Regenerating” the oven is heated with steam and hot air. This enables the food to be heated evenly and quickly without it drying out. The operating mode “Regenerating”...
- Page 20 ... Cooking and baking Baking like professionals • Suggested oven temperature: 210 °C • Application range: 100 to 230 °C In the case of “Baking like professionals” the food is placed in a cold oven, which has not been pre-heated. When the process is started the food is dampened with steam in a first phase (also termed misting), and then automatically adapted to the second phase - the hot air phase - in a steaming period which depends on the quantity of food contained in the oven.
- Page 21 ... Cooking and baking Hot air • Suggested oven temperature: 180 °C • Application range: 30 to 230 °C In the case of the “Hot air” heating mode the air in the oven is heated up by means of a heater installed behind the back of the appliance and then circulated evenly throughout the oven with the hot-air fan.
-
Page 22: Switching The Appliance On And Off
... Cooking and baking Switching the appliance on and off Sample setting Operation is explained by means of an example: You would like to bake a loaf of bread. The table of settings (compare chapter “Instructions for use, setting tables” beginning on page 33) states: Baking like Tray Operating... - Page 23 ... Cooking and baking Refilling of water on steaming The contents of the water tank are sufficient for one cooking procedure. Normally the water does not need to be topped up during operation. Should, during the steaming process, the water tank need to be refilled and only a short time remain until the cooking procedure has been completed, the water tank should not be completely filled up, since the volume of the water tank may not be sufficient when the water is pumped back.
- Page 24 ... Cooking and baking – The oven temperature can be set in 5 °C steps. The temperature range from which the temperature can be set depends on the respective operating mode. – When the switch-on time has been reached, the current oven temperature will be indicated (or “–...
- Page 25 ... Cooking and baking End of cooking time On opening the door, hot steam or hot air may escape from the oven. As a reminder, you could set the timer to 50 minutes after switching on the oven (see page 38). The buzzer will then sound when the 50 minutes are The oven can also be switched off automatically, see page 39.
- Page 26 ... Cooking and baking Emptying the water tank The water in the water tank may be hot. The residual water which remains in the steam generator is pumped back into the water tank after the appliance has been switched off. –...
-
Page 27: Operation When The Childproof Lock Is Activated
... Cooking and baking Operation when the childproof lock is activated The childproof lock has been designed to prevent any unauthorised switch-on of the appliance. When the childproof lock is switched on, only the oven lamp can be switched on and off. For switching the childproof lock on and off, see page 12. -
Page 28: Roasting Thermometer
... Cooking and baking Roasting thermometer The roasting thermometer can be used to measure and monitor the temperature on the inside of the food being cooked. Once the required temperature has been reached, the oven heating switches off automatically. If you set the temperature in accordance with the type of food to be cooked and place the roasting thermometer correctly, you can be sure that your food will be cooked to perfection. - Page 29 ... Cooking and baking • The plug socket 2 is located on the right wall of the oven. Open the cover and put the plug into the socket (the plug and the socket have been disconnected from the mains). Always keep the plug clean. –...
- Page 30 ... Cooking and baking Finishing time On reaching the core temperature set, the operating mode automatically switches off. – A buzzer will sound for one minute. – “Core temperature reached” is indicated on the clear text display. – The display indicates the current core temperature.
-
Page 31: Instructions For Optimal Use
... Cooking and baking Instructions for optimal use Low-energy cooking and baking • Avoid opening the oven door unneccessarily while the oven is cooking or baking. In the case of steaming in particular, the cooking time may be increased considerably. •... - Page 32 ... Cooking and baking It is frequently only the temperatures for top heat/bottom heat that are indicated in recipes. Compare the instructions in the recipes with the information on the setting tables in chapter “Instructions for use, setting tables” beginning on page 33.
-
Page 33: Instructions For Use, Setting Tables
Instructions for use, setting tables On the following pages you will find hints for the practical application of your appliance and for the preparation of popular dishes. The figures provided for cooking times and temperatures serve as guidelines. Depending on the type of food and its properties, the time required for cooking may devaite from those given. -
Page 34: Cooking Time
... Instructions for use, setting tables Temperature setting Cooking time Dumplings Operating mode [°C] [min.] Steamed yeast dumplings 10-20 Steaming Yeast dough dumplings 15-20 Bread dumplings 20-25 Yeast pastries 20-25 Temperature setting Cooking time Eggs Operating mode [°C] [min.] Pickled eggs 8-10 Steaming Hard-boiled eggs... - Page 35 ... Instructions for use, setting tables Operating Temperature Cooking time Fish and seafoods Quantity mode setting [°C] [min.] Trout 3 X 250 g 15-20 Trout 1000 g 25-30 Mussels 1500 g 15-20 Steaming Green-shell mussels 1000 g 25-35 Lobster deep-frozen 20-25 Yellow mackerel ca.
- Page 36 ... Instructions for use, setting tables Operating Temperature Cooking time Defrost Quantity mode setting [°C] [min.] Bread 20-30 Regenerating Pasta approx. 500 g 20-35 Rice 500-800 g 25-30 Vegetables 300-450 g 25-40 Baking like Rack Operating Temperature Baking time professionals level mode setting [°C]...
-
Page 37: Timer
Timer The timer serves • as a kitchen clock, • as a stop-clock, which you can use at any time, independently of all of the other appliance functions, • to switch the oven off automatically, and also to switch the oven on and off automatically (so-called automatic time functions). -
Page 38: Stop Clock (Timer)
... Timer Stop clock (Timer) The timer does not have a control function. It can be used like an “egg timer” (at any time and independently of all of the other appliance functions, even if an automatic time function has been set). •... -
Page 39: Using Automatic Timing
... Timer Using automatic timing Automatic switch-off This function will be of assistance in reminding you to switch the oven off in time. Set the duration (operation duration) which your dish requires. The oven will then switch off automatically once the time set is up. •... - Page 40 ... Timer Subsequent to the operation duration – The oven switches off automatically. – A long continuous buzz will sound for one minute. – The indicator light of the button blinks. – The display indicates • In order to switch off the buzzer sound, press the button or open the oven door.
- Page 41 ... Timer Automatic switch-on and switch-off This function will be of assistance when a dish is to be ready at a certain time and you are not able to switch the oven on and off at the appropriate times since you are busy elsewhere.
- Page 42 ... Timer For example: At 9 o’clock you set a period of 1 hour and 15 min. and you set the switch-off time at 12.30. The oven will switch on at 11.15 and off again at 12.30. Operation duration “Start delay” Once switch-off time has been reached –...
- Page 43 ... Timer Checking/adjusting settings Settings can be checked or adjusted at any time. During the “start delay” phase, only the switch-off time can be adjusted • Press the button or the button. – The duration – or remaining period – set, or the switch-off time will blink. The setting can be adjusted with the control dial.
-
Page 44: Care And Maintenance
Care and maintenance Cleaning the outside of the oven Clean the front parts with a soft cloth dampened in soapy water and wipe with a dry cloth. Never rub abrasive cleaning materials, such as all-purpose scouring sponges, metal sponges, etc. on the chrome steel surfaces, as these would then be scratched, causing damage. - Page 45 ... Care and maintenance In order to facillitate cleaning the oven, various parts can easily be removed, as described below. Remove the tray holders • Pull the locks 1at the front of the tray holders away from the oven walls until they disengage.
-
Page 46: Decalcifying
... Care and maintenance Decalcifying Whenever steam is produced, calcerous deposits will form in the steam generator, irrespective of the degree of hardness of the local water (i.e. the lime content of the water). A system in the ap pliance automatically recognises when it is necessary to decalcify. –... - Page 47 ... Care and maintenance • Remove the water tank and fill it with exactly 0.5 l of a decalcifier mixture. The decalcifier mixture must comprise equal proportions (at least 0.25 l respectively) of a commercial decalcifier and freshly-tapped cold water. •...
-
Page 48: Carrying Out Minor Repairs Yourself
Carrying out minor repairs yourself What to do if … ... the appliance does not work and all of the displays are dark Possible cause Remedy • Fuse-box of the electrical • Replace the fuse. system in the flat/house is defect. - Page 49 ... Carrying out minor repairs yourself ... the clear text display indicates “insert the roasting thermometer” Possible cause Remedy • An attempt was made to • Insert the roasting thermometer (see set a core temperature page 28). without the roasting thermometer having been inserted.
- Page 50 ... Carrying out minor repairs yourself ... the clear text display indicates “F.. contact the service” Possible cause Remedy • Various situations can lead • Acknowledge the fault indication by means of to an “F“ indication. pressing the button. • Interrupt the power supply for approx. 1 minute.
-
Page 51: Tips And Tricks
Tips and tricks Tips and tricks for steaming On steaming at 100 °C, you can cook several types of food at the same time. For example, you can cook rice or pulses at the same time as vegetables with a similar cooking time, thus saving energy and using fewer dishes. - Page 52 ... Tips and tricks Tips and tricks for baking like professionals Let bread, bread rolls or other types of yeast products rise briefly after shaping them. Usually 5 to 10 minutes are sufficient. The products to be caked can then be put into the cold oven and baked with the “Baking like professionals”...
- Page 53 ... Tips and tricks Tips and tricks for Hot air Baking times can only be reduced to a limited extent by means of higher oven temperatures, since products may then appear to be ready-baked on the outside, but will still be raw and doughy on the inside. In this case, lower the temperature slightly and extend the baking time.
- Page 54 ... Tips and tricks The product is not evenly browned Some differences in the degree of browning are normal for every oven. In general lower temperatures ensure more even browning. If necessary lower the oven temperature slightly. On baking with hot air, check that the oven level used tallies with recommendations in the table.
-
Page 55: Technical Data
Technical data Appliance Oven Niche dimensions dimensions dimensions Height: 37.8 cm 25.0 cm 38.0 cm Width: 59.6 cm 35.9 cm 58.0 cm at least Depth: 56.7 cm 39.0 cm 55.0 cm at least Weight: 35 kg Electrical connection Connection voltage: 230 V ~50 Hz or 400 V 2N ~50 Hz Connection wattage: 3.5 kW... -
Page 56: Disposal
Disposal • Ensure that the appliance is functionless prior to disposal. Remove the plug from the socket or have the electrical supply disconnected by an electrician. Then cut off the connection cable on the appliance. • Please ensure that the appliance is properly disposed of. -
Page 57: Installation Instructions For Fitter
Installation instructions for fitter • Statutory regulations and the connection specifications issued by the local power supply company must be strictly observed. • On connecting the appliance, carrying out repairs or replacing the light bulb, disconnect the appliance from the power supply. Unplug the appliance or disconnect fuse. -
Page 58: Installation Dimensions
... Installation instructions for fitter Installation dimensions for a corresponding niche: for a standard niche (with a compensating panel ZUB 736):... -
Page 59: Installing In A Fitted Kitchen Unit
... Installation instructions for fitter Installing in a fitted kitchen unit Installing the appliance: • Insert the plug into the wall socket. If “U2” is indicated on the display, the plug must be turned. If this is not possible, an electrician must exchange the neutral con- ductor and the terminal conductor.
Need help?
Do you have a question about the EKDG 6800.0 and is the answer not in the manual?
Questions and answers