Table of Contents
Advertisement
Quick Links
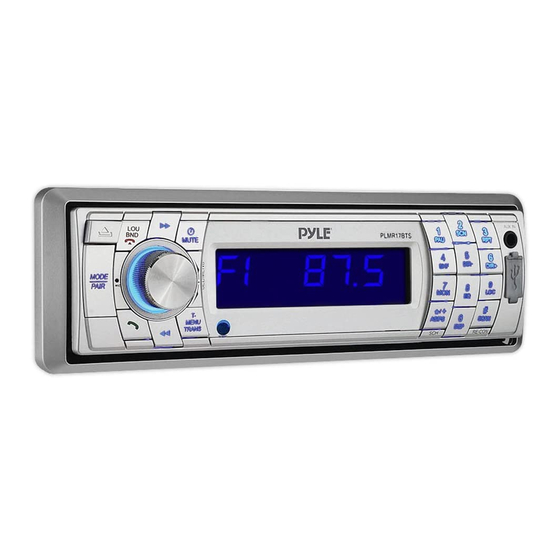
PLMR17BTS
OWNER'S MANUAL
Mobile Audio System
PLL Synthesizer Stereo Radio
Automatic Memory Storing
USB&SD/MMC Card Interface
Fold Down Detachable Panel
Auxiliary Input Function
Bluetooth Hands-free function & A2DP (Advanced Audio
Distribution Profile) Stereo Audio Transmission
Smartphone(Android and IOS system) control
1
Advertisement
Table of Contents

Related Manuals for Pyle PLMR17BTS


Summary of Contents for Pyle PLMR17BTS
- Page 1 PLMR17BTS OWNER’S MANUAL Mobile Audio System PLL Synthesizer Stereo Radio Automatic Memory Storing USB&SD/MMC Card Interface Fold Down Detachable Panel Auxiliary Input Function Bluetooth Hands-free function & A2DP (Advanced Audio Distribution Profile) Stereo Audio Transmission...
-
Page 2: Table Of Contents
CONTENTS Installation...........3 SD/MMC operation........11 DIN Front-Mount (Method A) ....3 Bluetooth operation ........12 Installing the unit........3 Preparing for operation ......12 Removing the unit .........4 Pairing ............ 13 DIN Rear-Mount (Method B)....5 Connect ..........13 Using the detachable front panel ....6 T-menu ........... -
Page 3: Installation
INSTALLATION Notes: DIN FRONT-MOUNT (Method A) Choose the mounting location where Installation Opening the unit will not interfere with the normal driving function of the driver. This unit can be installed in any dashboard Before finally installing the unit, connect having an opening as shown below: the wiring temporarily and make sure it is all connected up properly and the... -
Page 4: Removing The Unit
INSTALLATION back of the unit in place. Use the they will go (with the notches facing up) supplied hardware (Hex Nut (M5mm) into the appropriate slots at the middle and Spring Washer) to attach one end of left and right sides of the unit. Then slide the strap to the mounting bolt on the back the sleeve off the back of the unit. -
Page 5: Din Rear-Mount (Method B)
INSTALLATION front panel. 4. Lift the top of the outer trim ring then pull To fasten the unit to the factory radio it out to remove it. mounting brackets. 5. Insert both of the supplied keys into the Align the screw holes on the bracket with slots at the middle left and right sides of the screw holes on the unit, and then the unit, then pull the unit out of the... -
Page 6: Using The Detachable Front Panel
USING THE DETACHABLE FRONT PANEL Precautions when handling REMOVING THE FRONT PANEL 1. Do not drop the front panel. 1. Press the release button ( ) on the 2. Do not put pressure on the display or front panel and pull off the front panel. control buttons when removing or installing the front panel. -
Page 7: Wiring Connection
WIRING CONNECTION ISO CONNECTION... -
Page 8: Location Of Keys
OPERATION LOCATION OF KEYS 1. MODE 17. SCAN/# (release button) 18.0 DSP (hang up)/LOU/BND 19.*/+/ AS/PS 4. VOL / SEL/MENU (Audio knob) 20.8 EQ 21.7 MON 22.T-MENU/TRANS MUTE 7.LCD (pick up) 8. 4 RDM 25. Reset button 9. 5 DIR- 26. -
Page 9: Basic Operation
OPERATION BASIC OPERATION the unit working mode: Radio, USB, CARD, IPOD (optional), AUX and BT Audio. SWITCHING ON/OFF THE UNIT Press button (6) to turn on the unit. SYSTEM SETTING When the unit is on, press and hold Long press the SEL button (4) on the front button (6) to turn the unit off. -
Page 10: Auxiliary Input
OPERATION equalization function and to select desired audio mode. There are five kinds of mode SCAN as below: Press SCAN button (17) to enter scan →FLAT→CL AS→POP M→ROCK→EQ OFF mode, the unit will scan all the frequency rang and keep on each station for several seconds (the corresponding frequency will flash 5 times on LCD). -
Page 11: Selecting Directory Up/Down
OPERATION press it again will exit this mode. USB interface (15). You can connect an REPEATING THE SAME TRACK USB driver through this interface (15). Press RPT button (12) will repeat one/ When you connect an USB driver through repeat off/ random/random off the music the interface, the unit will search the MP3 playing. -
Page 12: Bluetooth Operation
OPERATION device or SD card. Do not connect it to the 4) If you turn off the mobile phone that main unit to play. Because any wrong has paired with the unit, when you turn operation may cause files loss. on the mobile phone, you need to reconnection. -
Page 13: Pairing
OPERATION you set TALK to 20. The main volume 1) If you transfer the call to mobile will set to 100 automatically when a call is coming. phone, the mute of the present mode will be released at the same time. Example: TALK volume MAIN volume... - Page 14 OPERATION 4. If you first time open the radio view, please tap the Menu key on your ---current radio frequency smartphone, and choose to connect a device as promotion, then scan for the --- previous or next radio station BT devices. 5.
- Page 15 OPERATION settings: ,enter into the USB mode: Click , entre into the tunner Click settings: If no USB, all the icons will be in grey and can’t be touch. --- music file name in the USB ---Previous or next song --- the current process status of the playing --- Time have already played /...
- Page 16 OPERATION If no SD, all the icons will be in grey and can’t be touch. ,enter into the Bluetooth Click A2DP interface as follow: , enter into the AUX IN Click mode: :Song name :the previous or next song --- the current process status of the playing ---Time have already played / The total time of the song...
-
Page 17: Remote Control
REMOTE CONTROL HANDSET(OPTIONAL) FUNCTION KEY & CONTROL 11. POWER Power ON/OFF Button 12. MODE Mode Button (S,T,U,7,For MP3/WMA Operation) 13. TUNE/SKIP Tune/SKIP Down Button(V,W,X,8 For MP3/WMA Operation) 14. 7/BND Band Select Button(When pressed shortly) 15. SCN Scanning Button(D,E,F,2 For MP3/WMA Operation) 16. -
Page 18: Specification
SPECIFICATION GENERAL Power Supply Requirements : DC 12 Volts, Negative Ground Chassis Dimensions : 178 (W) x 107 (D) x 50 (H) Tone Controls Bass (at 100 Hz) : ±10 dB Treble (at 10 kHz) : ±10 dB Maximum Output Power : 4x60watts Current Drain : 15 Ampere (max.) -
Page 19: Trouble Shooting
TROUBLE SHOOTING Before going through the checklist, check wiring connection. If any of the problems persist after checklist has been made, consult your nearest service dealer. Symptom Cause Solution The car ignition switch is If the power supply is No power not on.
Need help?
Do you have a question about the PLMR17BTS and is the answer not in the manual?
Questions and answers