NAPCO XP-400 Using Instruction
Express series
Hide thumbs
Also See for XP-400:
- Installation instructions manual (28 pages) ,
- Using instruction (16 pages) ,
- Using instructions (16 pages)
Table of Contents
Advertisement
Advertisement
Table of Contents

Summary of Contents for NAPCO XP-400
-
Page 1: Security System
Using Your XP-400 Security System NAPCO © 2005 NAPCO OI300 1/05... - Page 2 This page intentionally left blank...
- Page 3 Introduction Congratulations on your purchase of an advanced NAPCO EXPRESS XP-400 Security System. Meticulously developed by a leading manufacturer of state-of-the-art security products, this system will provide you with unprecedented peace-of-mind, and incorporates some of the most sophisticated features available today. Above all, it has been designed with an extra step, to pro- vide all those operating it with very easy, intuitive use.
-
Page 4: Table Of Contents
Introduction Table of Contents System Information Keypad Controls and Indicators ........5 Central Station Phone Number: ____________________ Arming your System (When Leaving) ........ 6 Bypassing Zones ............... 6 Central Station Account Number: ____________________ Protecting Yourself While Home ........7 Emergency Keys ............... 8 For Service Call: ____________________ Disarming the System ............ -
Page 5: Keypad Controls And Indicators
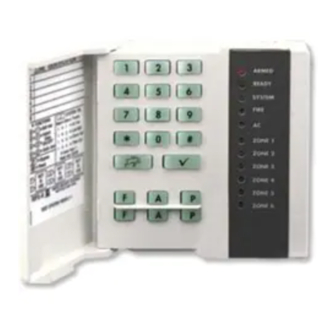
Keypad Controls and Indicators Numerical Keys 1-9, 0. Used to enter Armed Light will light when system is Armed, Key Used to enable User Codes, Zone numbers, etc. and will flash when system is in Alarm. special functions and options. Press Ready Light will light when all zones are se- then the corresponding Special Function num-... -
Page 6: Arming Your System When Leaving
Arming Your System Arming Your System When Leaving Before arming your system, make sure the Green Ready light is ON. This indicates that all of your protective zones are secure. If any zones are open, the corresponding Zone light will be ON. Secure these zones before proceeding. -
Page 7: Protecting Yourself While Home
Arming Your System Protecting Yourself While at Home Before arming the system, the Green Ready light must be ON. This indicates that all of your protective zones are secure. If any zones are open, the matching Zone light will be ON. Secure those zones before pro- ceeding. -
Page 8: Disarming The System
Emergency Conditions Auxiliary Emergency Buttons Emergency The two sets of emergency buttons, if programmed, are always active whether the system is armed Enabled? or disarmed. Discuss these buttons with your installer. The emergency signal will only be activated when the two respective buttons are pressed at the same time. Auxiliary Alarm: Simultaneously press to alert the central station of an auxiliary emer- gency, if so programmed. -
Page 9: Silencing An Alarm
Disarming Your System / Silencing an Alarm Disarming Your System when Returning Enter your premises through the Entry/Exit door. The keypad will sound a steady tone to remind you to disarm the system before your Entry Delay time expires. Enter your user code. The Red Armed light will go out, indicating that the system has been disarmed. -
Page 10: Special Functions
(see Programming user codes, page 14). sound for 2 seconds. This will also initiate a test of your bat- tery to make sure it is adequately charged. The XP-400 also Keypad Sounder On / Off performs an automatic battery test very 24 hours... -
Page 11: Programming User Codes
Programming User Codes Your Installer has assigned a User 1 Code which may be used to not only Arm and Disarm the system, but also to enter the User Program Mode, where you can program and/or reprogram up to 4 User Codes. The following explains how you will use this code to program or erase additional user codes. - Page 12 H System Troubles The XP-400 is constantly monitoring its own components, as well as all critical services, such as AC Power and the Telephone line, to insure that it is always ready to provide the protection for which it was designed.
-
Page 13: System Troubles
System Troubles Zone light System Trouble Action Keypad Beeps or Condition SYSTEM Flashes 2 Beeps Bell / Siren Trouble There is a problem with the Bell or Siren. Call installing com- pany for service. 2 Beeps Wireless Receiver A problem has been detected with the wireless receiver. Trouble Call installing company for service. -
Page 14: Glossary
Glossary from the system. Press and then Delay while remaining on the premises. Ambush Code - In the event that you are forced by an intruder to disarm your sys- (Press while armed). the zone number to bypass a zone. tem, this special code can be used to dis- arm the system, and simultaneously send Keypad Sounder - A local warning de-... - Page 15 Notes...
-
Page 16: Napco Limited Warranty
In no event shall NAPCO be liable for an amount in excess of NAPCO's original selling price of the product, for any loss or damage, whether direct, indirect, incidental, consequential, or otherwise arising out of any This warranty shall not apply to any equipment, or any part thereof, which has been repaired by others, failure of the product.


Need help?
Do you have a question about the XP-400 and is the answer not in the manual?
Questions and answers