Table of Contents
Advertisement
Quick Links
BEDIENUNGSANWEISUNG
mit Montageanweisungen
Instructions for use and installation instructions
Instructions d'utilisation et avis de montage
Gebruiksaanwijzing en montagehandleiding
Istruzioni di uso e di montaggio
Instrucciones de uso y de montaje
Instruções de uso e de montagem
Ο∆ΗΓΙΕΣ ΧΡΗΣΗΣ ΚΑΙ ΣΥΝΑΡΜΟΛΟΓΗΣΗΣ
EKE 6642.0M
EKE 8642.0M
227090 P41
Advertisement
Table of Contents

Summary of Contents for Kuppersbusch EKE 6642.0M
- Page 1 Instructions for use and installation instructions Instructions d'utilisation et avis de montage Gebruiksaanwijzing en montagehandleiding Istruzioni di uso e di montaggio Instrucciones de uso y de montaje Instruções de uso e de montagem Ο∆ΗΓΙΕΣ ΧΡΗΣΗΣ ΚΑΙ ΣΥΝΑΡΜΟΛΟΓΗΣΗΣ EKE 6642.0M EKE 8642.0M 227090 P41...
-
Page 2: Table Of Contents
Disposing of the packaging For your information... Please ensure the environmentally-friendly disposal of the pack- Please read this manual carefully before using your appliance. It aging that came with your appliance. Recycling the packaging contains important information on safety and on how to use and material saves on resources and cuts down on waste. -
Page 3: Safety Instructions
Safety instructions Connection and operation • Do not put aluminium foil or plastic onto the cooking zones. Safety instructions Keep everything which could melt, such as plastics, foil and in • The appliances are constructed in accordance with the particular sugar and sugary foods away from hot cooking relevant safety regulations. -
Page 4: Appliance Description
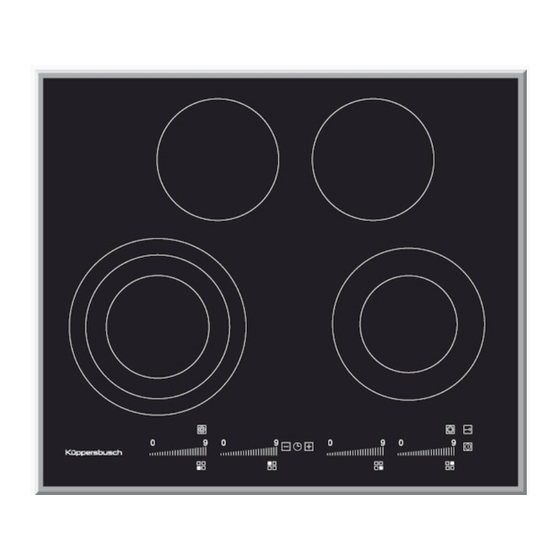
Appliance description Appliance description Sensor key Touch control 7. ON/OFF key 1. Front left cooking zone 8. Touch control 2. Back left cooking zone 9. Symbol for locating the position of a cooking zone on the 3. Back right cooking zone glass ceramic hob 4. -
Page 5: Operating The Hob With The Sensor Keys
Appliance description Operating the hob with the sensor keys Worth knowing about the slider (touch control) The ceramic glass hob is operated with touch control sensor keys. The sensor keys are operated as follows: lightly touch a In principle, the slider functions the same as the touch controls; symbol on the surface of the ceramic glass plate. -
Page 6: Operation
Operation Operation time limit How to cut power consumption Operation The following are a few useful hints to help you cut your The hob has an automatic time limit function. The duration of consumption of energy and use your new hob and the cookware continuous use of each cooking zone depends on the cooking efficiently. -
Page 7: Operating The Keys
Operation Operating the keys The controls described here expect the pressing of a (selection) key to be followed by the pressing of a subsequent key. The next key will need to be pressed within 10 seconds, otherwise the selection will be deleted. Switching on the hob and cooking zones 1. -
Page 8: Automatic Boost Function
Operation Automatic boost function Automatic boost function Parboiling takes place at power level 9 with the automatic boost function. Power setting Time (min:sec) After a certain time the power level will switch down automatically to a lower simmering setting (1 to 8). 01:00 When using the automatic boost function only the simmering setting with 03:00... -
Page 9: Keep-Warm Function
Operation Keep-warm function With the keep-warm function you can use one of the cooking zones to keep food warm. The respective cooking zone is operated at a low power level. 1. Cookware is placed on a cooking zone and a power level (e.g. 3) is selected. -
Page 10: Automatic Switch-Off (Timer)
Operation Automatic switch-off (timer) The automatic switch-off device is used to automatically switch off any cooking zone after a stipulated period of time. Cooking times ranging from 1 minute to 99 minutes can be set. 1. Switch on the hob. Switch on one or more cooking zones and set the required power settings. -
Page 11: Cleaning And Care
Cleaning and care Specific soiling Cleaning and care Heavy soiling and stains (limescaling and shiny, mother-of- pearl-type stains) can best be removed when the hob is still • Switch the hob off and let it cool down before you clean it. slightly warm. -
Page 12: What To Do If Trouble Occurs
What to do if trouble occurs The symbol flashes What to do if trouble occurs • Food which has boiled over, cookware or other items are causing the touch control sensor keys to be consistently operated. Interference with and repairs to the appliance by unqualified Remedy: Either clean the surface or remove the item. -
Page 13: Assembly Instructions
Assembly instructions Technical data Installation Assembly instructions Hob dimensions 45 x 589 x 519 (EKE6642) Important Height/ Width/ Depth ..mm 45 x 779 x 519 (EKE8642) • If the cooking surface is located above furniture parts (side Cooking zones panels, drawers, etc.), then an intermediate shelf must be front left . - Page 14 Assembly instructions Dimensions in mm Clips • Drive the clips into the worktop cut-out at the intervals indicated. It is not necessary to adjust the height due to the horizontal stop. • Important! The horizontal drive of the clips must be flush with the worktop (avoid the risk of fractures).
-
Page 15: Electrical Connection
Assembly instructions Electrical connection No mains cable present in the factory • To connect the appliance, unscrew the cover of the connection • The electrical connection must be carried out by a quali- socket on the underside of the appliance in order to be able to fied electrician who is authorised to carry out such work! access the terminal.


Need help?
Do you have a question about the EKE 6642.0M and is the answer not in the manual?
Questions and answers