Advertisement
Table of Contents
- 1 Recommendations and Suggestions
- 2 Installation
- 3 Wall Drilling and Bracket Fixing
- 4 Mounting the Hood Body
- 5 Recirculation Version Air Outlet
- 6 Electrical Connection
- 7 Flue Assembly
- 8 Control Panel
- 9 Remote Control (Optional)
- 10 Maintenance
- 11 Cleaning the Comfort Panels
- 12 Grease Filters
- 13 Light Replacement
- Download this manual
Advertisement
Table of Contents

Related Manuals for Küppersbusch KD 9650.0 E


Summary of Contents for Küppersbusch KD 9650.0 E
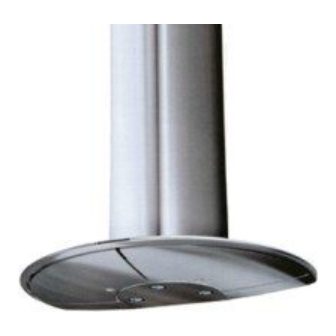
- Page 1 Bedienungsanleitung Instructions Booklet Mode d’emploi Libretto Istruzioni Gebruiksaanwijzing Manual de instrucciones KD 9650.0 E...
- Page 2 Dear Customer, If you follow the recommendations contained in this Instruction Manual, your appliance will give you constant high per- formance and will remain efficient for many years to come. CONTENTS RECOMMENDATIONS AND SUGGESTIONS CHARACTERISTICS INSTALLATION MAINTENANCE...
-
Page 3: Recommendations And Suggestions
RECOMMENDATIONS AND SUGGESTIONS INSTALLATION • The manufacturer will not be held liable for any damages resulting from incorrect or improper installation. • The minimum safety distance between the cooker top and the extractor hood is 650 mm. • Check that the mains voltage corresponds to that indicated on the rating plate fixed to the inside of the hood. - Page 4 CHARACTERISTICS Components Ref. Q.ty Product Components Hood Body, complete with: Controls, Light, Blower, Filters Telescopic Chimney comprising: Upper Section Lower Section Directional Air Outlet grille Reducer Flange ø 150-120 mm Flange ø 150 mm Ref. Q.ty Installation Components 7.2.1 Upper Chimney Section Fixing Brackets Air Outlet Connection Wall Plugs Screws 4,2 x 44,4...
-
Page 5: Installation
INSTALLATION Wall drilling and bracket fixing Wall marking: • Draw a vertical line on the supporting wall up to the ceiling, or as high as practical, at the centre of the area in which the hood will be installed. • Draw a horizontal line at 650 mm above the hob. •... -
Page 6: Mounting The Hood Body
Mounting the hood body • Before attaching the hood body, tighten the two screws Vr located on the hood body mounting points. • Hook the hood body onto the screws 12a • Fully tighten support screws 12a • Adjust screws Vr to level the hood body. Connections DUCTED VERSION AIR EXHAUST SYSTEM When installing the ducted version, connect the hood to the chimney using either a flexible or rigid pipe... -
Page 7: Electrical Connection
ELECTRICAL CONNECTION • Connect the hood to the mains through a two-pole switch having a contact gap of at least 3 mm. • Open the lighting unit by turning the knob provided. • Ensure that the supply cable connector is properly in- serted into the Suction device socket Flue assembly Upper exhaust flue... -
Page 8: Control Panel
Control panel BUTTON FUNCTIONS Turns the lighting system on and off. 0/1 Motor Fixed Turns the motor on and off. Flashing 24h Exchange Enabled by pressing and holding the button for approx. 3”. Provides 100 m 3 /h suction with a noise level of just 28dB(A). To disable, press the button again and hold for approx. -
Page 9: Remote Control (Optional)
REMOTE CONTROL (OPTIONAL) The appliance can be controlled using a remote control powered by a 1.5 V carbon-zinc alkaline batteries of the standard LR03-AAA type. • Do not place the remote control near to heat sources. • Used batteries must be disposed of in the proper manner. -
Page 10: Grease Filters
Grease filters Alarm signal reset • Turn the Lights and the suction Motor off, and disable the 24h function if it has been enabled. • Press T3 for at least 3 seconds, until indicators flash to confirm. Cleaning the filters •... -
Page 11: Light Replacement
Alarm signal reset • Turn the Lights and the suction Motor off, and disable the 24h function if it has been enabled. • Press T3 for at least 3 seconds, until the LEDs flash in confirmation. Replacing the Filter • Open the lighting unit by turning the knob provided.
Need help?
Do you have a question about the KD 9650.0 E and is the answer not in the manual?
Questions and answers