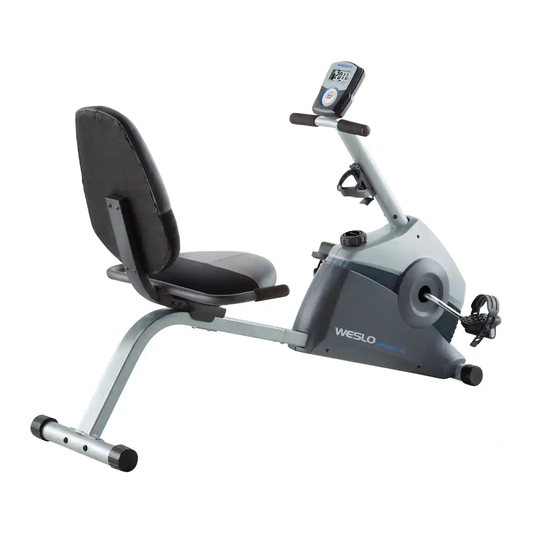
Weslo Pursuit 3.2 R Bike User Manual
Canadian english manual
Hide thumbs
Also See for Pursuit 3.2 R Bike:
- Manuel de l'utilisateur (20 pages) ,
- Manual del usuario (24 pages)
Advertisement
Table of Contents
- 1 Table of Contents
- 2 Warning Decal Placement
- 3 Important Precautions
- 4 Before You Begin
- 5 Part Identification Chart
- 6 Assembly
- 7 How to Use the Exercise Bike
- 8 Maintenance and Troubleshooting
- 9 Exercise Guidelines
- 10 Part List
- 11 Exploded Drawing
- 12 Ordering Replacement Parts
- 13 Limited Warranty
- Download this manual
www.weslo.com
Model No. WLCCEX61113.0
Serial No.
USER'S MANUAL
Write the serial number in the space
above for reference.
Serial Number Decal
(under frame)
ACTIVATE YOUR
WARRANTY
To register your product and
activate your warranty today,
contact Customer Service.
CUSTOMER SERVICE
Call toll-free 1-888-936-4266
Mon.–Fri. 7:30 a.m.–4:30 p.m. ET
(excluding holidays)
or email us at
customerservice@iconcanada.ca
Please do not contact the store.
CAUTION
Read all precautions and instruc-
tions in this manual before using
this equipment. Keep this manual
for future reference.
Advertisement
Table of Contents

Related Manuals for Weslo Pursuit 3.2 R Bike


Summary of Contents for Weslo Pursuit 3.2 R Bike
- Page 1 Model No. WLCCEX61113.0 Serial No. USER’S MANUAL Write the serial number in the space above for reference. Serial Number Decal (under frame) ACTIVATE YOUR WARRANTY To register your product and activate your warranty today, contact Customer Service. CUSTOMER SERVICE Call toll-free 1-888-936-4266 Mon.–Fri.
-
Page 2: Table Of Contents
Apply the decal in the location shown. Note: The decal(s) may not be shown at actual size. WESLO is a registered trademark of ICON IP, Inc. -
Page 3: Important Precautions
IMPORTANT PRECAUTIONS WARNING: To reduce the risk of serious injury, read all important precautions and instructions in this manual and all warnings on your exercise bike before using your exercise bike. ICON assumes no responsibility for personal injury or property damage sustained by or through the use of this product. - Page 4 Your new tness equipment represents a signi cant investment in your health. Protect your investment now from unexpected mechanical or electrical failures for up to ve years. PLAN FEATURES • Protection for one to ve years • Easy enrollment • Over 100 authorized repair centers •...
-
Page 5: Before You Begin
BEFORE YOU BEGIN Thank you for selecting the WESLO PURSUIT 3.2 manual. To help us assist you, note the product model ® R exercise bike. The PURSUIT 3.2 R exercise bike number and serial number before contacting us. The provides a selection of features designed to make your model number and the location of the serial number workouts at home more effective and enjoyable. -
Page 6: Part Identification Chart
PART IDENTIFICATION CHART Use the drawings below to identify the small parts needed for assembly. The number in parentheses below each drawing is the key number of the part, from the PART LIST near the end of this manual. The number following the key number is the quantity needed for assembly. -
Page 7: Assembly
ASSEMBLY • Assembly requires two persons. • In addition to the included tool(s), assembly requires the following tools: • Place all parts in a cleared area and remove the one Phillips screwdriver packing materials. Do not dispose of the packing materials until you complete all assembly steps. - Page 8 3. Attach the Rear Stabilizer (15) to the Seat Frame (2) with two M10 x 65mm Bolts (28) and two M10 Locknuts (45). 4. Attach the Seat Frame (2) to the Frame (1) with four M8 x 20mm Screws (40). 5.
- Page 9 6. Attach the Seat (6) and the two Seat Supports (48) to the Seat Carriage (4) with four M6 x 20mm Screws (47). 7. Insert the pin on the underside of the Seat Carriage (4) into the desired adjustment hole in the Seat Frame (2).
- Page 10 8. Attach the Backrest (7) to the Seat Carriage (4) with four M6 x 40mm Screws (44). 9. Attach the Water Bottle Holder (13) to the Upright (3) with two M4 x 19mm Screws (27).
- Page 11 10. Have a second person hold the Upright (3) near the Frame (1). Wire Tie Avoid pinching the Reed Switch Locate the wire tie in the Upright (3). Tie the Wire (33) lower end of the wire tie to the Reed Switch Wire (33).
- Page 12 12. Untie and discard the wire tie on the Reed Switch Wire (33). Avoid pinching the wires While a second person holds the Console (8) near the Upright (3), connect the wire on the Console to the Reed Switch Wire (33). Insert the excess wire into the Upright (3).
-
Page 13: How To Use The Exercise Bike
HOW TO USE THE EXERCISE BIKE HOW TO ADJUST THE SEAT HOW TO LEVEL THE EXERCISE BIKE The seat can be adjusted forward or backward to the If the exercise bike position that is the most comfortable for you. rocks slightly on your floor during To adjust the seat, first remove the two indicated use, turn one or... - Page 14 FEATURES OF THE CONSOLE HOW TO USE THE CONSOLE The console offers a selection of features designed to 1. Turn on the console. make your workouts more effective. As you pedal, the console will provide continuous exercise feedback. To turn on the console, press the Display Mode button or begin pedaling.
-
Page 15: Maintenance And Troubleshooting
To select the newly selected unit of measurement will appear in speed, time, the display. Repeat this action to change the unit of distance, or measurement again. calories mode for continuous Note: When the batteries are replaced, it may display, press be necessary to reselect the desired unit of the Display measurement. - Page 16 Locate the Reed Switch (33). Rotate the Pulley (24) Press the tabs on the until a Magnet (32) is aligned with the Reed Switch. sides of the resistance Loosen, but do not remove, the indicated M4 x 19mm control and pull the Screw (27).
-
Page 17: Exercise Guidelines
EXERCISE GUIDELINES Aerobic Exercise—If your goal is to strengthen your WARNING: cardiovascular system, you must perform aerobic Before beginning this exercise, which is activity that requires large amounts or any exercise program, consult your physi- of oxygen for prolonged periods of time. For aerobic cian. -
Page 18: Part List
PART LIST Model No. WLCCEX61113.0 R0713A Key No. Qty. Description Key No. Qty. Description Frame Axle Seat Frame M4 x 19mm Screw Upright M10 x 65mm Bolt Seat Carriage Eyebolt Handlebar Tension Bracket Seat Carriage Plate Backrest Magnet Console Reed Switch/Wire Left Shield Clamp Right Shield... -
Page 19: Exploded Drawing
EXPLODED DRAWING Model No. WLCCEX61113.0 R0713A... -
Page 20: Ordering Replacement Parts
ORDERING REPLACEMENT PARTS To order replacement parts, please see the front cover of this manual. To help us assist you, be prepared to provide the following information when contacting us: • the model number and serial number of the product (see the front cover of this manual) • the name of the product (see the front cover of this manual) • t he key number and description of the replacement part(s) (see the PART LIST and the EXPLODED DRAWING near the end of this manual) LIMITED WARRANTY IMPORTANT: To protect your fitness equipment with an extended service plan, see page 4.
Need help?
Do you have a question about the Pursuit 3.2 R Bike and is the answer not in the manual?
Questions and answers