Weider Easy Compact 90 User Manual
Uk manual
Hide thumbs
Also See for Easy Compact 90:
- Gebruiksaanwijzing (20 pages) ,
- Manuel de l'utilisateur (20 pages) ,
- Bedienungsanleitung (20 pages)
Advertisement
Model No. WEEVSY2077.0
Serial No.
Write the serial number in the
space above for future reference.
Serial Number Decal (under seat)
QUESTIONS?
As a manufacturer, we are com-
mitted to providing complete
customer satisfaction. If you have
questions, or if there are missing
parts, please contact us at the
numbers or addresses listed
below:
Call: 08457 089 009
Outside UK: 0 (44) 113 3877133
Fax: 0 (44) 113 3877125
E-mail: csuk@iconeurope.com
Write:
ICON Health & Fitness, Ltd.
Unit 4
Revie Road Industrial Estate
Revie Road, Beeston
Leeds, LS11 8JG,
UK
CAUTION
Read all precautions and instruc-
tions in this manual before using
this equipment. Keep this manu-
al for future reference.
USER'S MANUAL
Visit our website at
www.iconeurope.com
Advertisement
Table of Contents

Related Manuals for Weider Easy Compact 90


Summary of Contents for Weider Easy Compact 90
- Page 1 Model No. WEEVSY2077.0 USER’S MANUAL Serial No. Write the serial number in the space above for future reference. Serial Number Decal (under seat) QUESTIONS? As a manufacturer, we are com- mitted to providing complete customer satisfaction. If you have questions, or if there are missing parts, please contact us at the numbers or addresses listed below:...
-
Page 2: Table Of Contents
Apply the decal in the location shown. Note: The decals may not be shown at actual size. WEIDER is a registered trademark of ICON IP, Inc. -
Page 3: Important Precautions
IMPORTANT PRECAUTIONS WARNING: To reduce the risk of serious injury, read all important precautions and instructions in this manual and all warnings on the weight system before using the weight system. ICON assumes no responsibility for personal injury or property damage sustained by or through the use of this product. -
Page 4: Before You Begin
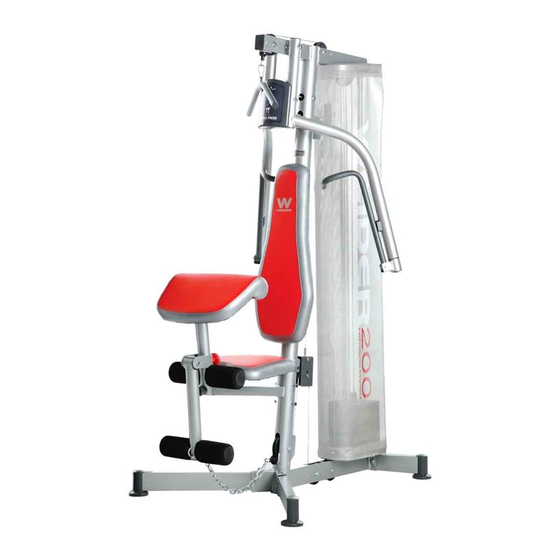
BEFORE YOU BEGIN Thank you for selecting the versatile WEIDER ® EASY reading this manual, please see the front cover of this COMPACT 90 weight system. The weight system manual. To help us assist you, note the product model offers a selection of weight stations designed to devel- number and serial number before contacting us. -
Page 5: Assembly
ASSEMBLY For your convenience, the weight system is will be used. Make sure that there is enough shipped almost fully assembled. Before complet- clearance to walk around the weight system. ing assembly, carefully read the following informa- tion and instructions. •... - Page 6 2. Locate the two indicated M6 x 30mm Bolts (74) in the top of the Frame (1). Fully tighten the Bolts. Locate the two Mounting Pegs (not shown) on the back of the Backrest (21). Insert the Mounting Pegs into the indicated brackets on the Frame (1) and then slide the Backrest down.
- Page 7 3. Attach the Curl Pad (23) to the Curl Post (6) with two M6 x 16mm Screws (67). Make sure that all parts are properly tightened. The use of the remaining parts will be explained in ADJUSTMENT, beginning on page 8. Before using the weight system, pull each cable a few times to make sure that the cables move smoothly around the pulleys.
-
Page 8: Adjustment
ADJUSTMENT This section explains how to adjust the weight system. See the EXERCISE GUIDELINES on page 15 for impor- tant information about how to get the most benefit from your exercise program. Also, refer to the accompanying exercise guide to see the correct form for a variety of exercises. Make sure all parts are properly tightened each time the weight system is used. - Page 9 ATTACHING ACCESSORIES TO THE LOW PULLEY STATION To use the low pulley station, remove the seat (see ATTACHING AND REMOVING THE SEAT below). Next, attach the Lat Bar (42) to the Low Cable (31) with a Cable Clip (43). For some exercises, attach a Chain (44) between the Lat Bar and the Cable with two Cable Clips.
- Page 10 CONNECTING THE LEG LEVER To use the Leg Lever (5), first slide the Seat Frame (4) onto a set of pegs on the Frame (1). Next, attach a Chain (44) between the Leg Lever (5) and the Low Cable (31) with two Cable Clips (43). USING THE CURL PAD To use the Curl Pad (23), first remove the upper Seat Frame Cap (35) from the Seat Frame (4).
- Page 11 LOCKING THE WEIGHT STACK To lock the weight stack, insert the Lock Pin (54) into one of the Weight Guides (19) and then attach the Lock (55) to the Lock Pin.
-
Page 12: Weight Resistance Chart
WEIGHT RESISTANCE CHART The chart below shows the approximate weight resistance at each exercise station. The numbers in the left col- umn refer to the 12.5-lb. weights. Note: The actual resistance at each station may vary due to differences in individual weights as well as friction between the cables, pulleys, and weight guides. WEIGHT PRESS ARM HIGH... -
Page 13: Maintenance
MAINTENANCE Make sure all parts are properly tightened each time the weight system is used. Replace any worn parts imme- diately. The weight system can be cleaned with a damp cloth and a mild, non-abrasive detergent. Do not use solvents. TIGHTENING THE CABLES Woven cable, the type of cable used on the weight system, can stretch slightly when it is first used. -
Page 14: Cable Diagram
CABLE DIAGRAM The diagram below shows the proper routing of the cables. The numbers in each drawing show the proper route for that cable. Use the diagram to make sure that the cables and the cable traps are assembled correctly. If the cables are not assembled correctly, the weight system will not function properly and damage may occur. -
Page 15: Exercise Guidelines
EXERCISE GUIDELINES THE FOUR BASIC TYPES OF WORKOUTS PERSONALIZING YOUR EXERCISE PROGRAM Muscle Building Determining the appropriate length of time for each To increase the size and strength of your muscles, workout, and the numbers of repetitions and sets to push them close to their maximum capacity. - Page 16 COOLING DOWN The repetitions in each set should be performed smoothly and without pausing. The exertion stage of each repetition should last about half as long as the End each workout with 5 to 10 minutes of stretching. return stage. Proper breathing is important. Exhale Include stretches for both your arms and legs.
-
Page 17: Part List
PART LIST—Model No. WEEVSY2077.0 R0108A Key No. Qty. Description Key No. Qty. Description Frame Cable Trap Rear Stabilizer Frame Foot Front Stabilizer Weight Pin Seat Frame Lock Pin Leg Lever Lock Curl Post M12 x 200mm Bolt Right Press Arm M10 Nylon Locknut Left Press Arm M6 Nylon Locknut... -
Page 18: Exploded Drawing
EXPLODED DRAWING A—Model No. WEEVSY2077.0 R0108A... - Page 19 EXPLODED DRAWING B—Model No. WEEVSY2077.0 R0108A...
-
Page 20: Ordering Replacement Parts
ORDERING REPLACEMENT PARTS To order replacement parts, please see the front cover of this manual. To help us assist you, be prepared to provide the following information when contacting us: • the model number and serial number of the product (see the front cover of this manual) •...
Need help?
Do you have a question about the Easy Compact 90 and is the answer not in the manual?
Questions and answers