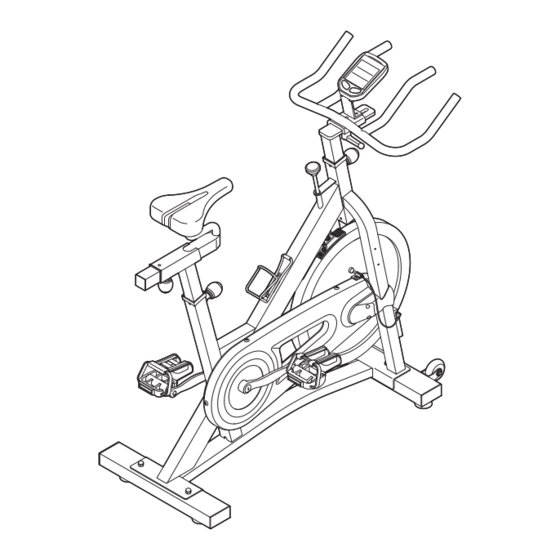
NordicTrack Gx5.1 Bike User Manual
English manual
Hide thumbs
Also See for Gx5.1 Bike:
- Nstrukcja obsługi manual (21 pages) ,
- (20 pages) ,
- Hasznalati utasitas manual (20 pages)
Advertisement
Model No. NTEVEX75911.0
Serial No.
USER'S MANUAL
Write the serial number in the space
above for reference.
Serial Number
Decal
QUESTIONS?
If you have questions, or if there are
missing parts, please contact us:
UK
Call: 08457 089 009
From Ireland: 053 92 36102
Website: www.iconsupport.eu
E-mail: csuk@iconeurope.com
Write:
ICON Health & Fitness, Ltd.
c/o HI Group PLC
Express Way
Whitwood, West Yorkshire
WF10 5QJ, UK
AUSTRALIA
Call: 1-800-237-173
E-mail:
australiacc@iconfitness.com
CAUTION
Read all precautions and instruc-
tions in this manual before using
this equipment. Keep this manual
for future reference.
www.iconeurope.com
Advertisement
Table of Contents

Related Manuals for NordicTrack Gx5.1 Bike


Summary of Contents for NordicTrack Gx5.1 Bike
- Page 1 Model No. NTEVEX75911.0 Serial No. USER’S MANUAL Write the serial number in the space above for reference. Serial Number Decal QUESTIONS? If you have questions, or if there are missing parts, please contact us: Call: 08457 089 009 From Ireland: 053 92 36102 Website: www.iconsupport.eu E-mail: csuk@iconeurope.com Write:...
-
Page 2: Table Of Contents
Apply the decal in the location shown. Note: The decal(s) may not be shown at actual size. NORDICTRACK is a registered trademark of ICON IP, Inc. -
Page 3: Important Precautions
IMPORTANT PRECAUTIONS WARNING: To reduce the risk of serious injury, read all important precautions and instructions in this manual and all warnings on your exercise bike before using your exercise bike. ICON assumes no responsibility for personal injury or property damage sustained by or through the use of this product. -
Page 4: Before You Begin
BEFORE YOU BEGIN Thank you for selecting the new NORDICTRACK reading this manual, please see the front cover of this ® 5.1 exercise bike. Cycling is an effective exercise for manual. To help us assist you, note the product model increasing cardiovascular fitness, building endurance, number and serial number before contacting us. -
Page 5: Assembly
ASSEMBLY Assembly requires two persons. Place all parts of the exercise bike in a cleared area and remove the packing materials. Do not dispose of the packing materials until assembly is completed. In addition to the included tool(s), assembly requires an adjustable wrench and a Phillips screwdriver Note: If a part is not in the hardware kit, check to see if it has been preattached. - Page 6 3. Identify the Right Pedal (60), which is marked with an “R.” Using an adjustable wrench, firmly tighten the Right Pedal (60) clockwise into the Right Crank Arm (42). Tighten the Left Pedal (35) counterclockwise into the Left Crank Arm (36). 4.
- Page 7 6. Orient the Seat Post (27) as shown. Locate the Adjustment Knob (3) on the rear of the Frame (1). Loosen the Adjustment Knob and pull it outward. Then, insert the Seat Post (27) into the Frame. Move the Seat Post (27) upward or downward to the desired position, release the Adjustment Knob (3) into an adjustment hole in the Seat Post, and then tighten the Adjustment Knob.
- Page 8 9. The Console (63) requires two AAA batteries (not included); alkaline batteries are recom- mended. IMPORTANT: If the Console has been exposed to cold temperatures, allow it to warm to room temperature before you insert batteries. Otherwise, you may dam- age the console display or other electronic components.
- Page 9 11. The Transmitter (69) requires two AAA bat- teries (not included); alkaline batteries are recommended. Remove the battery cover from the front of the Transmitter (69), and insert batteries into the bat- tery compartment. Make sure that the batteries are oriented as shown by the diagrams inside the battery compartment.
-
Page 10: How To Use The Exercise Bike
HOW TO USE THE EXERCISE BIKE HOW TO ADJUST THE ANGLE OF THE SEAT HOW TO ADJUST THE HORIZONTAL POSITION OF THE HANDLEBAR You can adjust the angle of the seat to the position that is most comfortable. You can also slide your seat for- To adjust the hori- ward or backward to increase your comfort or to adjust zontal position of the... - Page 11 HOW TO ADJUST THE PEDAL STRAPS HOW TO LEVEL THE EXERCISE BIKE To tighten the pedal straps (see the drawing on page If the exercise bike rocks slightly on your floor during 4), simply pull the ends of the pedal straps. To use, turn one or both of the leveling feet on the front or loosen the pedal straps, press and hold the tabs on the rear stabilizer (see the drawing on page 4) until the...
- Page 12 CONSOLE DIAGRAM HOW TO PERSONALIZE CONSOLE SETTINGS 1. Turn on the console. 98 rpm Press any button to turn on the console. 170 cals 175 cals 25 mph 2. Enter the setup mode. 20:28 time 7.8 dist First, press the Left but- ton repeatedly until the word SPEED appears in the lower display.
- Page 13 4. Define the target heart rate zone if desired. 6. Select a unit of measurement if desired. The maximum heart rate The console can display speed, distance, and will flash in the middle left weight in standard or metric measurements. display.
- Page 14 HOW TO SET THE CLOCK HOW TO USE THE CONSOLE 1. Turn on the console. 1. Turn on the console. Press any button to turn on the console. Press any button to turn on the console. 2. Wear an optional heart rate monitor if desired. 2.
- Page 15 The lower display—This display can show the fol- To turn on the console backlight for a few seconds, lowing workout information: press the Right button once at any time. Speed (SPEED)—This Note: The console can display speed and dis- display shows your pedal- tance in either miles or kilometers.
- Page 16 HOW TO USE THE HEART RATE ALARM THE OPTIONAL HEART RATE MONITOR 98 rpm 170 cals The heart rate alarm will alert you when your heart rate The optional heart rate monitor provides hands-free 175 cals 25 mph is below or above a defined target heart rate zone. operation and continuously monitors your heart rate 20:28 time during your workouts.
-
Page 17: Exercise Guidelines
EXERCISE GUIDELINES Burning Fat—To burn fat effectively, you must exer- WARNING: cise at a low intensity level for a sustained period of Before beginning this time. During the first few minutes of exercise, your or any exercise program, consult your physi- body uses carbohydrate calories for energy. -
Page 18: Part List
PART LIST Model No. NTEVEX75911.0 R0212A Key No. Qty. Description Key No. Qty. Description Frame Outer Shield Sleeve Drive Belt Adjustment Knob Inner Shield M8 x 40mm Socket Bolt Front Shield M8 Nut Right Crank Arm Water Bottle Holder M8 Locknut M5 x 12mm Socket Screw Split Washer Resistance Knob... -
Page 19: Exploded Drawing
EXPLODED DRAWING Model No. NTEVEX75911.0 R0212A... -
Page 20: Ordering Replacement Parts
ORDERING REPLACEMENT PARTS To order replacement parts, please see the front cover of this manual. To help us assist you, be prepared to provide the following information when contacting us: • the model number and serial number of the product (see the front cover of this manual) •...
Need help?
Do you have a question about the Gx5.1 Bike and is the answer not in the manual?
Questions and answers
Display geeft geen waarden meer aan b.v. snelheid, tijd
The display on the NordicTrack GX 5.1 Bike may not be showing values like speed and time for the following reasons:
1. Pedaling Stopped – If you are not pedaling, the display may stop updating values like speed and time.
2. Reset Required – If a time goal was previously set, the display may need to be reset by pressing and holding the right button until zeros appear.
3. Power Issue – If the bike's console is not powered correctly, it may not display any values.
4. Sensor Malfunction – If the speed or distance sensor is not functioning properly, the display may not show updates.
To troubleshoot, ensure you are pedaling, reset the display if necessary, check the power supply, and inspect the sensors.
This answer is automatically generated