Table of Contents
Advertisement
Quick Links
Table of Contents
1111 W. 35th Street, Chicago, IL 60609 USA • www.tripplite.com/support
Copyright © 2013 Tripp Lite. All trademarks are the property of their respective owners.
13-05-149-933220.indd 1
Owner's Manual
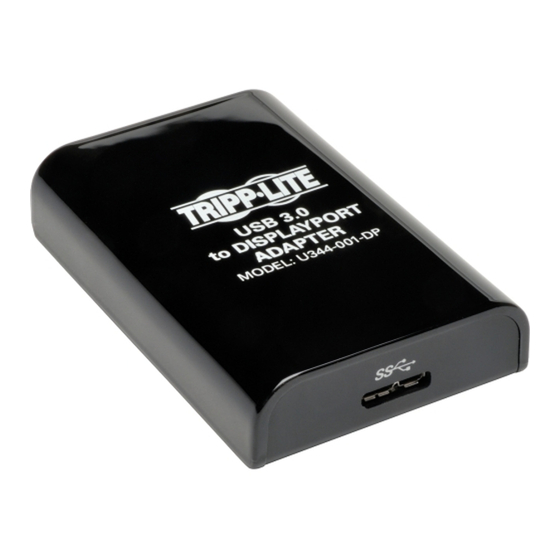
USB 3.0 to DisplayPort Adapter
USB 3.0 to DVI Adapter
USB 3.0 to HDMI Adapter
Model #: U344-001-HDMI-R
Model #: U344-001-DP
Model #: U344-001-R
1
2
2
2
3
4
5
5
7
8
8
9
11
12
6/3/2013 12:48:56 PM
Advertisement
Table of Contents

Subscribe to Our Youtube Channel
Related Manuals for Tripp Lite U344-001-DP


Summary of Contents for Tripp Lite U344-001-DP
-
Page 1: Table Of Contents
3.4 Making the Add-On Display the Primary Display 4. Troubleshooting 5. Specifications 6. Warranty And Warranty Registration 1111 W. 35th Street, Chicago, IL 60609 USA • www.tripplite.com/support Copyright © 2013 Tripp Lite. All trademarks are the property of their respective owners. 13-05-149-933220.indd 1 6/3/2013 12:48:56 PM... -
Page 2: Introduction
1.1 Features • Adds an additional monitor, LCD or projector through a single USB 3.0 port • USB 3.0 is 10 times faster than USB 2.0, with transfer rates up to 5 Gbps • Backward compatible with USB 2.0 • Simultaneously connect up to 6 display adapters • Automatically resumes from hibernation and suspend modes • U344-001-R and U344-001-HDMI-R support video resolutions up to 2048 x 1152 @ 60Hz • U344-001-DP supports video resolutions up to 2560 x 1600 @ 60Hz • Video streaming is supported up to 1080p • Set additional monitors to extend the primary display, duplicate the primary display, or set an additional monitor as the primary display • U344-001-R comes with a DVI to VGA adapter, allowing you to connect either a DVI or VGA display 1.2 Package Contents Before installation, please check the items in the package. The package should contain the following items: • (1) U344-001-R, (1) U344-001-HDMI-R or (1) U344-001-DP... -
Page 3: System Requirements
1. Introduction 1.3 System Requirements • Windows XP (32-bit), Vista (32- and 64-bit), 7 (32- and 64-bit) and ® 8 (32- and 64-bit) • USB 2.0 or 3.0 port; USB 3.0 port required for USB 3.0 speeds • VGA, DisplayPort, DVI or HDMI monitor Minimum computer requirements when using 1 – 2 display adapters: • 1.2GHz Single Core CPU • 512MB of RAM Minimum computer requirements when using 3 display adapters: • 1.6GHz Single Core CPU • 1GB of RAM Minimum computer requirements when using 4 – 6 display adapters: • 1.8GHz Core Duo CPU • 1GB of RAM Note: Only 1 added monitor can support DVD playback. -
Page 4: Installation
2. Installation Note: Install the driver on your computer before connecting the display adapter(s). 1. Insert the driver CD into your computer’s CD-ROM drive. The setup program should run automatically. If the setup program fails to start on its own, open the CD and double-click on the appropriate driver file. Note: • If you encounter a User Account Control popup, choose to allow the installation to proceed. This may require an administrator’s password. If you encounter a driver signature dialog box, choose to continue the installation. -
Page 5: Using The Adapter
3. Using the Adapter 3.1 Display Properties Once installed, the computer video can be Extended from the primary display to the add- on display, Mirrored to display the same thing on both, or changed to use the add-on display as the primary display. This can be done by opening the Display Settings page on your computer (see below) and changing the settings. To access the display settings, right-click on your computer’s desktop, and select the Properties or Personalize option, depending on your Windows operating system. From there you will need to access the Settings or Display option to get to the Display Settings page. A quick way to access this page is to use the display adapter icon in the lower-right corner of your computer screen. Right-click on this icon and select the DisplayLink Manager or Video Setup option to automatically pull up your computers Display Settings page. - Page 6 3. Using the Adapter Below are additional settings that are available via the display adapter right-click menu. Note: The settings available in this right-click menu may vary depending on your operating system. Option Description DisplayLink Manager Opens your computer’s display settings screen. Check for Updates Connects to the internet and checks for newer versions of the DisplayLink software, and downloads them if available. USB 3.0 Adapter Depending on the connected adapter, this will display as either USB 3.0 to HDMI, DVI or DisplayPort Adapter, and provides a list of settings when selected. When multiple adapters are connected, a separate menu option will be available for each one. • Screen Resolution – Click this option to bring up a list of available screen resolutions for the add-on monitor. Select the desired resolution from this list.
-
Page 7: Extending Video To The Add-On Display
3. Using the Adapter In addition to the display adapter right-click menu, Windows Vista and 7 users can press the [Windows Key] and the [P] key at the same time to pull up the menu below, which quickly allows you to switch the display settings. Note: Only Mirror mode is supported under Windows Vista Display Driver Model (WDDM) mode. In addition, the Aero Experience (Flip 3D effect) will be disabled under Windows Vista Display Driver Model (WDDM) mode as long as the display adapter is connected. 3.2 Extending Video to the Add-On Display To extend the video of the primary monitor to the add-on monitor, follow the steps below: 1. Open your computer’s Display Settings page. -
Page 8: Mirroring Video On The Add-On Display
3. Using the Adapter 3.3 Mirroring Video on the Add-On Display To display the same thing on both the primary and add-on display, follow the steps below: 1. Open your computer’s Display Settings page. 2. Select the monitor icon that represents the add-on display you wish to change, or choose the add-on display from the drop-down menu. The primary display is always icon 1. 3. Un-check the box next to Extend the desktop onto this monitor, or select the option from the drop-down menu to duplicate the display, and then click the apply button. Note: In Mirror mode, the add-on display settings are limited by those of the primary display. -
Page 9: Troubleshooting
4. Troubleshooting Q: Why is the display on the add-on monitor blank? A: If the monitor power LED is Green, wait a moment for the monitor to display the video, as it may take some time for the video to be displayed on the add-on monitor. If after a few minutes the video does not display, restart your computer. Also, make sure the computer is not in standby or hibernation mode, which will cause the add- on monitor to be blank. If the monitor power LED is Red, check if the connection is properly made. If the connection is fine and the problem still exists, uninstall the driver, unplug the adapter and reinstall the driver. Q: Why is the add-on monitor flickering? A: This is usually caused by a low refresh rate. When in “Mirror Mode,” increase the refresh rate of the main monitor. - Page 10 4. Troubleshooting Q: In “Extended Mode,” why does the add-on monitor have a black border around the desktop? A: This happens when the resolution used by the add-on monitor is larger than the resolution used by the primary monitor. To solve this problem, configure the add-on monitor to use the same resolution as the primary monitor. Q: In “Extended” mode, why does the cursor disappear? A: If you’re in extended mode but have not yet connected the add-on monitor, the desktop will still pan to the add-on monitor. It’s possible that your cursor has moved to the extended desktop and is no longer visible on the primary display.
-
Page 11: Specifications
60, 70, 75, 85 1280 x 720 (720p) 1280 x 768 60, 75, 85 60, 75, 85 1280 x 800 1280 x 1024 60, 75, 85 60, 75 Supported Video Resolutions 1366 x 768 (Note: Interlaced and reduced blanking modes are not 1400 x 1050 60, 75, 85 60, 75, 85 supported) 1600 x 1200 1680 x 1050 1920 x 1080 (1080p) 60 1920 x 1200 2048 x 1152 2048 x 1536* 2560 x 1440* 2560 x 1600* * U344-001-DP only 13-05-149-933220.indd 11 6/3/2013 12:48:57 PM... -
Page 12: Warranty And Warranty Registration
If this equipment does cause harmful interference to radio or television reception, which can be determined by turning the equipment off and on, the user is encouraged to try to correct the interference by one or more of the following measures: • Reorient or relocate the receiving antenna. • Increase the separation between the equipment and receiver. • Connect the equipment into an outlet on a circuit different from that to which the receiver is connected. • Consult the dealer or an experienced radio/TV technician for help. Any changes or modifications to this equipment not expressly approved by Tripp Lite could void the user’s authority to operate this equipment. WEEE Compliance Information for Tripp Lite Customers and Recyclers (European Union) Under the Waste Electrical and Electronic Equipment (WEEE) Directive and implementing regulations, when customers buy new electrical and electronic equipment from Tripp Lite they are entitled to: • Send old equipment for recycling on a one-for-one, like-for-like basis (this varies depending on the country) • Send the new equipment back for recycling when this ultimately becomes waste Tripp Lite follows a policy of continuous improvement. Product specifications are subject to change without notice. 1111 W. 35th Street, Chicago, IL 60609 USA • www.tripplite.com/support 13-05-149 • 9332220_RevB 13-05-149-933220.indd 12...
Need help?
Do you have a question about the U344-001-DP and is the answer not in the manual?
Questions and answers