NordicTrack 9600 Bike Manual
Canadian english manual
Hide thumbs
Also See for 9600 Bike:
- User manual (43 pages) ,
- Manual del usuario (35 pages) ,
- Manuale d'istruzioni (35 pages)
Table of Contents
Advertisement
Model No.
Serial No.
The model number and serial num-
ber are found in the location shown
below. Write the model number and
serial number in the space above.
Serial
Number
Decal
Q
UESTIONS?
At FreeMotion Fitness, we're
committed to providing complete
customer satisfaction. If you
have questions, see HOW TO
CONTACT CUSTOMER CARE on
page 2 of this manual.
C
AUTION
Read all precautions and in-
structions in this manual before
using this equipment. Keep this
manual for future reference.
U
M
SER'S
ANUAL
Advertisement
Table of Contents

Related Manuals for NordicTrack 9600 Bike


Summary of Contents for NordicTrack 9600 Bike
- Page 1 Model No. Serial No. The model number and serial num- ber are found in the location shown below. Write the model number and serial number in the space above. Serial Number Decal UESTIONS? At FreeMotion Fitness, we’re committed to providing complete customer satisfaction.
-
Page 2: Table Of Contents
Exploded Drawing ............. . .32 NordicTrack is a registered trademark of ICON IP, Inc. -
Page 3: How To Contact Customer Care
Please be prepared to give the following information: • The MODEL NUMBER OF THE PRODUCT (see the front cover of this manual for the location) • The NAME OF THE PRODUCT (NordicTrack ® 9600 recumbent bike) •... -
Page 4: Important Precautions
MPORTANT RECAUTIONS WARNING: To reduce the risk of serious injury, read the following important precautions and information before operating the recumbent bike. 1. It is the responsibility of the owner to ensure bike. Do not wear loose clothes that could be- that all users of the recumbent bike are come caught on the recumbent bike. -
Page 5: Before You Begin
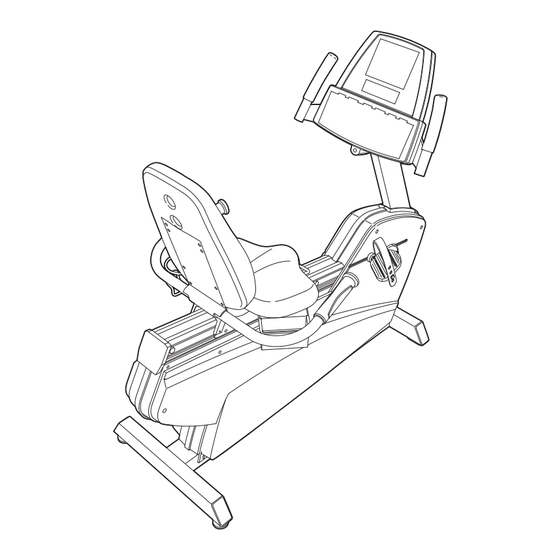
(see the front cover of this manual for the location of the decal). For your benefit, read this manual carefully before using the NordicTrack 9600 recumbent bike. If you Before reading further, please familiarise yourself with have questions after reading this manual, see HOW TO the parts that are labelled in the drawing below. -
Page 6: How To Assemble The Recumbent Bike
OW TO SSEMBLE THE ECUMBENT Assembly requires two persons. Set the recumbent bike in a cleared area and remove all packing materials. Do not dispose of the packing materials until assembly is completed. Assembly can be completed using the included tools. Use the drawings below to identify the small parts used in assembly. - Page 7 3. Attach the Seat Handlebar (6) to the Seat Carriage (5) with four 3/8” x 1 1/4” Button Screws (76) and two 3/8” x 3/4” Button Screws (81). Next, insert the Pulse Plug (78) into the pulse jack near the top of the Right Side Shield (8).
-
Page 8: How To Set Up The Recumbent Bike
OW TO P THE ECUMBENT HOW TO MOVE AND LEVEL THE RECUMBENT BIKE Before moving the recumbent bike, make sure Lift that the power cord is unplugged. Note: If a CATV Here cable is connected to the recumbent bike, it may be Handlebar necessary to disconnect the cable if the recumbent bike will be moved far. -
Page 9: How To Upgrade The Console
HOW TO CONNECT A CATV CABLE If your recumbent bike has a Workout TV console, a CATV cable must be connected to the recumbent bike for cable TV stations to be viewed. Locate the cable jack on the front of the recumbent bike. Connect the CATV cable to the cable jack. -
Page 10: How To Use The Basic Console
OW TO SE THE ASIC ONSOLE Note: If there is a sheet of clear plastic on the Matrix console, remove the clear plastic. Main Display FEATURES OF THE CONSOLE In addition, the console offers three pulse programs that adjust the resistance of the pedals to keep your The Basic console offers an impressive array of fea- heart rate near target levels during your workouts, and tures to help you get the most from your exercise. - Page 11 tance levels that you select. The flashing column HOW TO USE THE QUICK START MODE shows the current resistance level. Every thirty seconds, all columns will move one position to the left. As you increase or decrease the resistance, Plug in the power cord or begin pedalling to additional indicators will light or darken in the activate the console.
- Page 12 Distance—This section To reset the main display at any time, press the of the main display will CLEAR button. show the distance that you have pedalled, in Measure your pulse if desired. miles or kilometres. If there are thin Calories/Watts—This sheets of plastic section of the main dis- on the metal con-...
- Page 13 sistance level for the current segment. At the end HOW TO USE THE TIMED WORKOUT PROGRAM of each segment, a series of tones will sound, the time will flash in the main display, and the flashing The TIMED WORKOUT program will count down the column of the matrix will move one position to the time remaining in your workout as you control the right.
- Page 14 ment, a series of tones will sound, the time will HOW TO USE THE RANDOM HILLS PROGRAM flash in the main display, and the flashing column of the matrix will move one position to the right. The RANDOM HILLS program will automatically The resistance of the pedals will then automati- change the resistance of the pedals during your work- cally change if a different resistance level is pro-...
- Page 15 matrix will show your progress. The flashing col- HOW TO USE THE WATTS WORKOUT PROGRAM umn represents the current segment of the pro- gram. At the end of each segment, a series of The WATTS WORKOUT program will automatically tones will sound, the time will flash in the main change the resistance of the pedals to keep your display, and the flashing column of the matrix will power output near a target level during your workout.
- Page 16 gram. The flashing HOW TO USE THE CARDIO WORKOUT PROGRAM Flashing Column column represents the current seg- ment of the pro- The CARDIO WORKOUT program will automatically gram. The number change the resistance of the pedals as it guides you of lit indicators in through an effective cardiovascular workout.
- Page 17 During the pro- HOW TO USE THE HILLS INTERVAL PROGRAM Flashing Column gram, the matrix will show your The HILLS INTERVAL program will automatically progress and the change the resistance of the pedals to simulate a resistance settings series of hills as it guides you through an effective of the program.
- Page 18 the main display. To enter your age, press the + HOW TO USE THE PULSE PROGRAMS and – buttons beside the ENTER AGE/WT. but- ton. The three pulse programs automatically control the If you have selected the CARDIO PULSE pro- resistance of the pedals to keep your heart rate near gram or the ENDURANCE PULSE program, go a target level while you exercise.
- Page 19 During the program, you can change the resis- the resistance of the pedals may automatically de- tance of the pedals, if desired, by pressing the crease. If this occurs, see the instructions included RESISTANCE + and – buttons or the QUICK RE- with your chest pulse sensor.
- Page 20 Press the START button and enter your HOW TO USE THE FITNESS TEST PROGRAM weight. The FITNESS TEST program measures your VO2 max When the button is pressed, the words “ENTER level. For the best results, the program should be used WEIGHT”...
- Page 21 was reset. To reset the service distance, press HOW TO USE THE MAINTENANCE MODE the CLEAR button. Press the ENTER AGE/WT. button again and The console features a maintenance mode that allows set the delay time for the idle mode. you to access information and to view and change de- fault settings.
- Page 22 Press the ENTER AGE/WT. button again and channels or add channels. To delete or add a channel, first press the CHANNEL + and – but- program TV channels. tons until the channel appears in the main display. The console has the capability to find and store in To delete a channel, press the + or –...
- Page 23 TV CONNECTION SETTINGS Refer to the chart below to find the correct TV connection setting for your country. See step 9 on page 20 to select a setting. Note: Your recumbent bike has been pre-configured to be either NTSC-compatible or PAL-com- patible.
-
Page 24: How To Use The Workout Tv Console
OW TO SE THE ORKOUT ONSOLE Note: If there is a thin sheet of clear plastic on the face of the console, remove it. Flat Screen Television Matrix Main Display FEATURES OF THE CONSOLE In addition, the console offers three pulse programs that adjust the resistance of the pedals to keep your The state-of-the-art Workout TV console offers an im- heart rate near target levels during your workouts, and... - Page 25 Put on headphones (not included) if desired. HOW TO USE THE WORKOUT TV CONSOLE To listen to The Workout TV console offers exactly the same fea- television pro- tures as the Basic console, but incorporates a built-in grams using personal TV in addition. Note: The console has the ca- headphones, pability to find and store in memory all of the valid TV plug your...
-
Page 26: Maintenance And Troubleshooting
AINTENANCE AND ROUBLESHOOTING If you have questions about maintenance or troubleshooting, see HOW TO CONTACT CUSTOMER CARE on page 2. Regularly inspect and properly tighten all external parts of the recumbent bike. To clean the recumbent bike, apply a small amount of mild multi-purpose cleaner to a 100% cotton cloth and wipe the console, screens, and external surfaces. - Page 27 NOTES...
-
Page 28: Exercise Guidelines
NordicTrack. The actual exercise you perform is only a part of a safe and effective training program. There TARGET HEART RATE ZONES are many other aspects to developing a life-long commitment to physical fitness. - Page 29 3. Hamstring Stretch—Sit with one leg extended. WEIGHT LOSS TIPS Bring the sole of the opposite foot toward you and rest it against the inner thigh of your extended leg. At least four, 30-minute workouts per week, Reach toward your toes as far as possible. Hold along with a reduced-calorie diet, are for 15 to 30 seconds, then relax.
- Page 30 Gradually, your stamina will increase and it will become easier to exercise for longer periods of time. Get FIT with NordicTrack Cool down after aerobic exercise. Effective aerobic exercise has three major parts: frequency , intensity , and time . The acronym "FIT"...
- Page 31 At this some tips that will help ease you into your new level you should strive to achieve your fitness goals. NordicTrack routine. Set realistic short- and long-term goals for yourself. • Begin and end each exercise session with the Frequently re-evaluate your fitness goals and reward stretches on page 28.
-
Page 32: Part List
R0305A To locate the parts listed below, see the EXPLODED DRAWING on pages 32 and 33. No. Qty. Description No. Qty. Description No. Qty. Description Frame Spring Bracket 1/4” x 3/8” Button Screw Seat Rail Seat Lock #4 x 1/2” Machine Handlebar Lock Pad Screw... -
Page 33: Exploded Drawing
XPLODED RAWING R0305A... - Page 34 XPLODED RAWING R0305A...
- Page 35 FreeMotion Fitness, Inc. • 1096 Elkton Drive, Suite 600 • Colorado Springs, CO 80907 Part No. 222215 R0305A Printed in USA © 2005 ICON IP, Inc.
Need help?
Do you have a question about the 9600 Bike and is the answer not in the manual?
Questions and answers