Advertisement
Quick Links
Start Here
Installing your Microtek XT6060
Step 1:
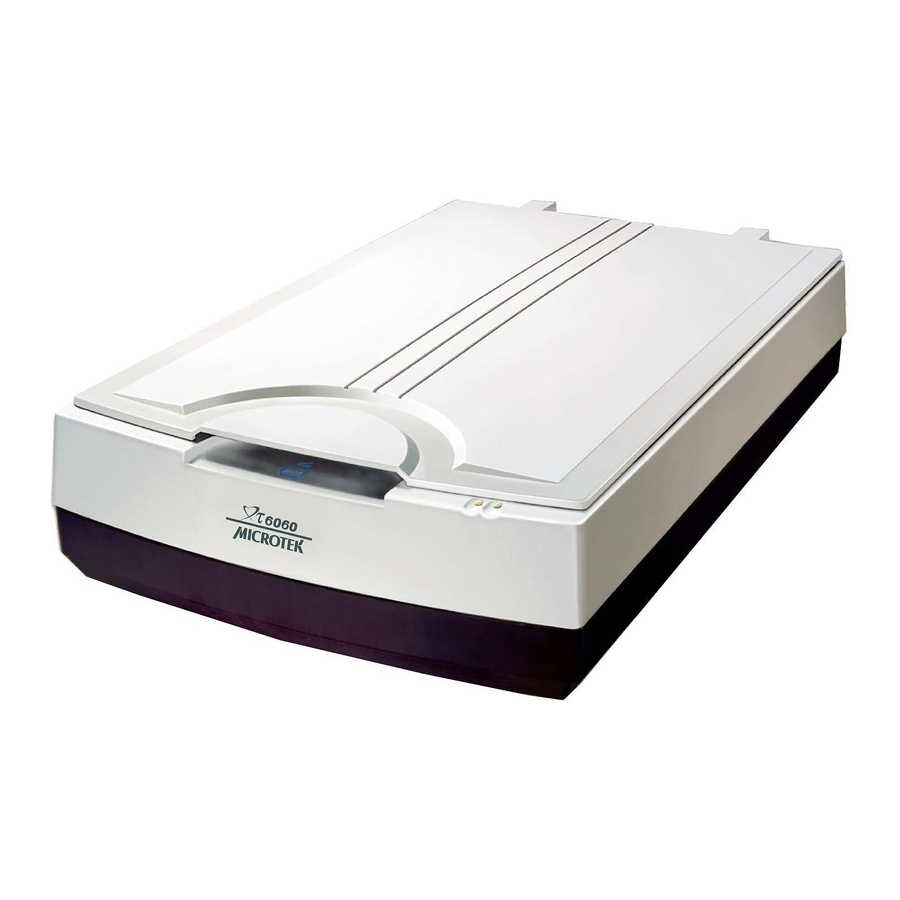
Unpack your scanner package and check
for major components.
1. XT6060 scanner
2. Power adapter
3. Power cord
4.
Software CDs/DVDs
5. Hi-Speed USB cable
Step 2:
Important: Do not remove the yellow stickers from your scanner
until you are told to do so. You must install software before
connecting your scanner.
Always close any open programs and turn off Anti-virus utilities
before installing software.
PC:
A. Place the Microtek Software CD/DVD
into a drive, and follow the on-screen
instructions to install the scanner
driver and software.
B. Restart your computer at the end of
all software installation.
NOTE: If the Microtek Software Installer
screen does not come up automatically,
double-click the following in succession: "My
Computer"; the CD/DVD-ROM icon; then
cdsetup.exe to start the installer program.
Copyright © 2013 Microtek International, Inc. http://www.microtek.com
I49-004759 B, September 2013
Unpack Contents
Install Software
1
5
MAC:
A. Place the Microtek Software CD/DVD
(ScanPotter) into a drive, and double-
click the ScanPotter installer icon to
install ScanPotter.
B. Install the remaining software
components, then restart your computer
at the end of all software installation.
NOTE: After rebooting your Macintosh, the
Microtek software will attempt to locate your
scanner on the system. Since this is your first
install and you have not yet connected the
scanner, simply ignore the message that appears
and proceed to the next step.
1
2
3
4
Advertisement

Related Manuals for Microtek XT6060


Summary of Contents for Microtek XT6060
- Page 1 NOTE: If the Microtek Software Installer NOTE: After rebooting your Macintosh, the screen does not come up automatically, Microtek software will attempt to locate your double-click the following in succession: “My scanner on the system. Since this is your first Computer”;...
-
Page 2: Unlock Scanner
Unlocked NOTE: To lock the scanner (for shipping and other reasons), refer to the XT6060 User’s Manual. Connect Scanner To the power adapter To the Hi-Speed USB cable A. - Page 3 Position Documents 1. Raise the scanner lid, and place the document to be scanned face down on the scanner glass surface. With the document face down on the scanning glass, align the document against the Horizontal Ruler of the scanner. 2.
- Page 4 (enclosed by dotted lines and labeled with the tag “Main”) Preview image (the enclosed frame bordered in red) Image type Image correction settings Preview window NOTE: For details on other scanning scenarios applicable to the XT6060, refer to the XT6060 User’s Manual.
- Page 5 9. Click the Scan button to start scanning. NOTE: For more details on using ScanPotter, refer to the ScanPotter Reference Manual in the Microtek Software CD/DVD.
- Page 6 Click the Scan Settings button Scan frame to switch back to the default (enclosed by dotted lines) control panel of ScanPotter Click the Image Settings button to switch to a window where contains a composite display of nine- image-effects (Filter column) and additional image correction tools (Additional Adjustment...
- Page 7 Disconnect the Hi-Speed USB cable from the back of your computer, and refer to the installation instructions in this guide or the XT6060 User’s Manual. 3. When trying to scan, an error message appears on your screen that reads, “Can’t Find Scanners”.
- Page 8 Finally, select and click the title of the manual you wish to view. Missing Items If your package is missing items, please call the Microtek Customer Service Department. Drivers & Software Upgrades After you finish the installation of software, if you found that the installed drivers and software cannot run your product or your computer system properly later, please go to the Microtek Download Service site at ww7.microtek.com.tw/service.php to download...
Need help?
Do you have a question about the XT6060 and is the answer not in the manual?
Questions and answers