
Related Manuals for Microtek XT5820 HS


Summary of Contents for Microtek XT5820 HS
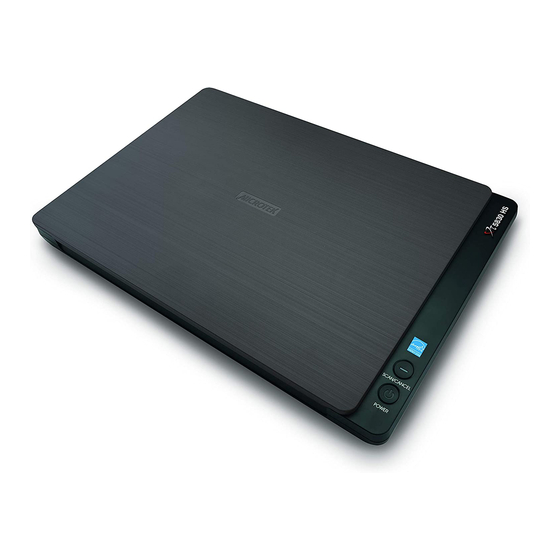
- Page 1 Document Imaging Scanner XT5830 HS XT5820 HS XT5810 HS User's Manual www.microtek.com...
-
Page 2: Preface
The contents of this manual have been checked carefully for accuracy, and every effort has been made to ensure that there are no errors. However, Microtek makes no guarantee as to the accuracy of the contents of this document and reserves the right to make changes to the contents without prior warning. -
Page 3: Fcc Compliance Statement
This device complies with Part 15 of the FCC Rules. Operation is subject to the following two conditions: (1) This device may not cause harmful interference, and (2) this device must accept any interference received, including interference that may cause undesired operation. XT5830 HS/XT5820 HS/XT5810 HS Scanner User's Manual... -
Page 4: Safety Precautions
When you need a repair service, unplug the scanner from the power outlet and consult qualified service personnel. • When replacement parts are required, use replacement parts that are specified by the manufacturer or have the same characteristics as the original parts. XT5830 HS/XT5820 HS/XT5810 HS Scanner User's Manual... -
Page 5: Table Of Contents
Scanning to Cloud ................26 Scanning to Text-to-Speech ............. 28 Scanner Buttons ................30 Starting up the Scanner Button Settings Interface ....... 31 Customizing the Scanner Button ............32 How the Scanner Button Works ............33 XT5830 HS/XT5820 HS/XT5810 HS Scanner User's Manual... - Page 6 Care and Cleaning ................34 Cleaning the Scanner Glass Surface........... 34 Appendix ...................35 Troubleshooting ................35 Specifications ................. 36 XT5830 HS/XT5820 HS/XT5810 HS Scanner User's Manual...
-
Page 7: Knowing About Your Scanner
Knowing about Your Scanner The scanner (XT5830 HS/XT5820 HS/XT5810 HS) is an A3 high-speed document scanner. With 1200 dpi optical resolution, warm-up free LED light source and a Hi-Speed USB interface, it can meet the needs and requirements of office, home and SOHO users easily. -
Page 8: Installation Requirements
Color display with 24-bit color output capability • 1 GB RAM or more) • Intel Core2 Duo Processor at 1.8 GHz PC or higher with Hi-Speed USB (USB 2.0) port • Microsoft Windows XP / 7 / 8 XT5830 HS/XT5820 HS/XT5810 HS Scanner User's Manual... -
Page 9: Taking A Closer Look
(F1) that was defined in the Scanner Button Settings interface.) Glass Surface The scan bed for placing the document to be scanned. Horizontal Ruler Used to measure the width of a scanned document. XT5830 HS/XT5820 HS/XT5810 HS Scanner User's Manual... -
Page 10: Back View
Back View Names of Parts Functions of Parts Hi-Speed USB Port Connects the Hi-Seed USB (USB 2.0) cable to the computer. Power Connector Connects the scanner to the power adapter. XT5830 HS/XT5820 HS/XT5810 HS Scanner User's Manual... -
Page 11: Initial Setup
After unpacking your scanner package, follow the steps below for a quick and easy installation process. Step 1: Unpacking Package Contents After unpacking your scanner package, please check for the major components listed below. Scanner Power Adapter Power Cord Hi-Speed USB Cable Software CDs/DVDs XT5830 HS/XT5820 HS/XT5810 HS Scanner User's Manual... -
Page 12: Step 2: Installing The Software
After you finish the installation of software, if you found that the installed drivers and software cannot run your product or your computer system properly later, please go to the Microtek Download Service site at ww7.microtek.com.tw/service.php to download and install any updates you may require. -
Page 13: Step 3: Connecting The Scanner
5. Press and hold the Power button ( ) until the Green LED at the Scan/Cancel button lights on. At the same time, the system will detect the scanner automatically. Scan/Cancel Button (LED) Power Button XT5830 HS/XT5820 HS/XT5810 HS Scanner User's Manual... -
Page 14: Positioning Documents
You may lift up the scanner lid out from its hinge sockets. Then, align the inner margin of a book along the side of the glass surface of the scanner as indicated in the graphic. XT5830 HS/XT5820 HS/XT5810 HS Scanner User's Manual... -
Page 15: Scanning Scenarios
Scanning Scenarios Using ScanWizard DI ScanWizard DI is a scanning software designed by Microtek for document scanning in color, black and white, and grayscale. Its user-friendly interface enables you to easily start the scanning process. Refer to the ScanWizard DI Reference Manual for more details. - Page 16 Thumbnail View window and labeled with the file name and file format specified earlier. 13. Click the Open Folder button to locate the scanned images if you want to view. XT5830 HS/XT5820 HS/XT5810 HS Scanner User's Manual...
- Page 17 Click on a thumbnail image to enlarge it in the Image View Window at the right side of the interface. AP control panel (Main interface) TWAIN driver control panel (Scan Setup interface) XT5830 HS/XT5820 HS/XT5810 HS Scanner User's Manual...
-
Page 18: Scanning Documents With Barcodes
Thumbnail View window and labeled with detected barcode values and chosen file format. 9. Click the Open Folder button to locate the scanned images if you want to view. XT5830 HS/XT5820 HS/XT5810 HS Scanner User's Manual... - Page 19 Click on a thumbnail image to enlarge it in the Image View Window at the right side of the interface. AP control panel (Main interface) TWAIN driver control panel (Scan Setup interface) XT5830 HS/XT5820 HS/XT5810 HS Scanner User's Manual...
-
Page 20: Scanning Documents From An Application
1. Put the document to be scanned facing down on the scanner's glass surface. 2. Launch your application (e.g., Adobe PhotoShop). 3. Select the “Microtek ScanWizard DI (TWAIN)” driver in the Import options from the File menu. When succeeded, the ScanWizard DI (TWAIN) driver interface appears on the screen. -
Page 21: Utilizing Scanned Documents
Selection tools If you like to select all images at one time, click the All button. 2. Click the OCR button in the Thumbnail View window to activate the OCR Settings window. XT5830 HS/XT5820 HS/XT5810 HS Scanner User's Manual... - Page 22 Export Mode: This menu box lets you select a layout mode when exporting a file containing text and images. The available options include Image Only, Image on Text, Text on Image and Text Only. XT5830 HS/XT5820 HS/XT5810 HS Scanner User's Manual...
- Page 23 PDF file to ensure the safety. 4. When done, click the Recognize button to perform OCR. Once OCR is complete, the converted file is sent to your chosen folder. XT5830 HS/XT5820 HS/XT5810 HS Scanner User's Manual...
-
Page 24: Scanning For E-Mail
2. Click the E-Mail button in the Thumbnail View window to activate the default E-Mail application. Then, follow instructions of the E-Mail application you are using to send out the selected image files. XT5830 HS/XT5820 HS/XT5810 HS Scanner User's Manual... -
Page 25: Scanning For Copying
If you like to select all images at one time, click the All button. 2. Click the Print button in the Thumbnail View window to activate the Print window. 3. Specify the number of copies to be made, then click OK. XT5830 HS/XT5820 HS/XT5810 HS Scanner User's Manual... -
Page 26: Scanning To Cloud
3. In the Cloud Settings window, select a cloud storage service to which you want to upload your scanned files. Please note that only the cloud storage service supported by ScanWizard DI will be available and appearing in the window. XT5830 HS/XT5820 HS/XT5810 HS Scanner User's Manual... - Page 27 4. When done, click the OK button to start uploading of scanned files. Once the uploading process is complete, there will be a “cloud” mark appearing at the left corner of the image in the Thumbnail View window. Cloud mark XT5830 HS/XT5820 HS/XT5810 HS Scanner User's Manual...
-
Page 28: Scanning To Text-To-Speech
“Text to Speech” window. OCR Languages: Select a language in which the original text document is written. Supported options include most common used languages in the world. XT5830 HS/XT5820 HS/XT5810 HS Scanner User's Manual... - Page 29 4. When done, click the OK button to perform TTS. Once TTS is complete, The scanned and recognized file will be opened in “Text to Speech” window. XT5830 HS/XT5820 HS/XT5810 HS Scanner User's Manual...
-
Page 30: Scanner Buttons
OCR, etc. Customizing is done through the Scanner Button Settings interface, as explained next. Scan/Cancel button (LED) Power button XT5830 HS/XT5820 HS/XT5810 HS Scanner User's Manual... -
Page 31: Starting Up The Scanner Button Settings Interface
2. Move your mouse onto the Scanner icon and then click the right button of the mouse. A small window appears on the screen. Select “Settings...” to activate the Scanner Button Settings interface. Scanner Button Settings Interface XT5830 HS/XT5820 HS/XT5810 HS Scanner User's Manual... -
Page 32: Customizing The Scanner Button
E-mail application. – OCR: Performs OCR (Optical Character Recognition) of a document and converts it to a fully editable digital file. Saves time from retyping documents into your word processor. XT5830 HS/XT5820 HS/XT5810 HS Scanner User's Manual... -
Page 33: How The Scanner Button Works
4. If necessary, specify new settings for the button. Follow the procedures (steps 1 through 5) for the “Customizing the Scanner Button” section to specify your new requirements for the button that you wish to redefine. XT5830 HS/XT5820 HS/XT5810 HS Scanner User's Manual... -
Page 34: Care And Cleaning
2. Then use a soft, non-abrasive and lint-free cloth to gently wipe the glass surface area on the scanner flatbed. Scanner Glass Surface NOTE: Do not use any detergents, synthetic cleaning solutions, cleaning naphtha, or other solvents to clean the glass surface directly. XT5830 HS/XT5820 HS/XT5810 HS Scanner User's Manual... -
Page 35: Appendix
Make sure your scanner is connected to your computer and plugged in to a power source (see Step 3 in the “Initial Setup” section). Uninstall and reinstall the ScanWizard DI software. 4. After clicking “Scan,” a blank screen appears. Uninstall and reinstall the ScanWizard DI software. XT5830 HS/XT5820 HS/XT5810 HS Scanner User's Manual... -
Page 36: Specifications
Scanning Area 11.69” x 17” (297 mm x 431.8 mm) Scanning Speed XT5830 HS: 3 sec @ 300 dpi, A3/Color XT5820 HS: 6 sec @ 300 dpi, A3/Color XT5810 HS: 9 sec @ 300 dpi, A3/Color Interface Hi-Speed USB 2.0 Dimensions (WxDxH) 21.85”...
Need help?
Do you have a question about the XT5820 HS and is the answer not in the manual?
Questions and answers