
Related Manuals for Digital Projection 7000 Series


Summary of Contents for Digital Projection 7000 Series
-
Page 1: User Manual
USER MANUAL INSTALLATION AND QUICK-START GUIDE CONNECTION GUIDE OPERATING GUIDE REMOTE COMMUNICATIONS GUIDE E-Vision 7000 Series High Brightness Digital Video Projector Rev B May 2013 112-457B... - Page 2 Digital Projection E-Vision 7000 Series About This Document Notes Please follow the instructions in this manual carefully to ensure safe and long-lasting use of the projector. Keep this manual handy for future reference. Symbols used in this manual Many pages in this document have a dedicated area for notes. The information in that area is accompanied by the following symbols: ELECTRICAL WARNING: this symbol indicates that there is a danger of electrical shock unless the instructions are closely followed.
- Page 3 Digital Projection E-Vision 7000 Series Introduction Notes Congratulations on your purchase of this Digital Projection product. Your projector has the following key features: • Swappable color wheels for high brightness and color critical applications. • BrilliantColor™ for increased system brightness.
-
Page 4: Table Of Contents
Digital Projection E-Vision 7000 Series CONTENTS CONNECTION GUIDE INSTALLATION AND QUICK-START GUIDE ................13 ......1 SIGNAL INPUTS AND OUTPUTS ..........15 WHAT’S IN THE BOX? ..............3 Computer 1 ..................15 GETTING TO KNOW THE PROJECTOR .......... 4 Computer 2 ..................15 Front and rear views ................ - Page 5 Digital Projection E-Vision 7000 Series Control connections ................23 Video menu ..................36 ................23 ................... 36 Screen Trigger output Overscan ..............23 ..................36 RS232 Serial control input Video System ................... 24 ..................36 LAN connection Video Setup ................... 36 Closed Caption Setup menu ..................
- Page 6 Digital Projection E-Vision 7000 Series Installation menu ................. 41 PJLINK ..................57 Settings ....................57 ..................41 Language ..................57 ..................41 Host Name Lamp Control ..................57 Domain Name ..................41 Lamp Mode ....................57 Mail .................. 41 Projection Mode ....................
-
Page 7: Installation And Quick-Start Guide
INSTALLATION AND QUICK-START GUIDE E-Vision 7000 Series High Brightness Digital Video Projector Rev B May 2013 112-458B... - Page 8 Digital Projection IN THIS GUIDE Installation and Quick-Start Guide E-Vision 7000 Series IN THIS GUIDE What’s In The Box? ..................... 3 Getting To Know The Projector..............4 Front and rear views ....................Remote control ......................Control panel and indicators ..................
-
Page 9: What's In The Box
Digital Projection What’s In The Box? Installation and Quick-Start Guide E-Vision 7000 Series What’s In The Box? Notes Make sure your box contains everything listed. If any pieces are missing, contact your dealer. You should save the original box and packing materials, in case you ever need to ship your Projector. -
Page 10: Getting To Know The Projector
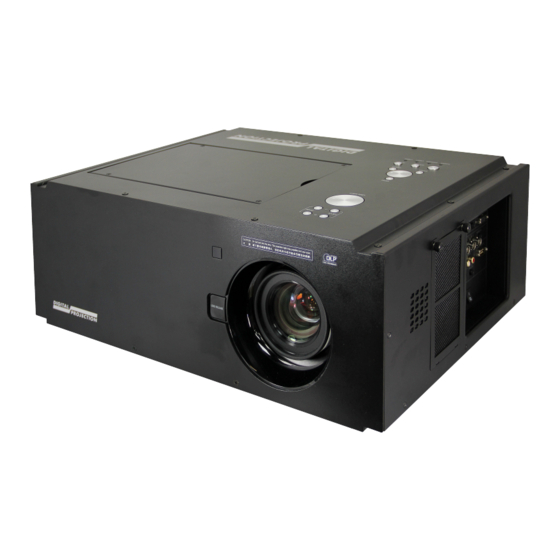
Digital Projection Getting To Know The Projector Installation and Quick-Start Guide E-Vision 7000 Series Getting To Know The Projector Notes Front and rear views Remote control The projector uses an infra-red Lamp and color remote control. 40° Control wheel cover... -
Page 11: Control Panel And Indicators
Digital Projection Getting To Know The Projector Installation and Quick-Start Guide E-Vision 7000 Series Control panel and indicators Notes Some of the controls from the remote control are duplicated on the projector control panel, as shown on the right. button has the same function as the button on the remote control. -
Page 12: Changing The Lens, Lamps And Color Wheel
Digital Projection Changing The Lens, Lamps And Color Wheel Installation and Quick-Start Guide E-Vision 7000 Series Changing The Lens, Lamps And Color Wheel Notes Removing the lens • Remove the lens cap. Always allow the lamp to cool for 5 minutes before: •... -
Page 13: Changing The Lamp
Digital Projection Changing The Lens, Lamps And Color Wheel Installation and Quick-Start Guide E-Vision 7000 Series Changing the lamp Notes • Lamp module Remove the four screws securing the lamp compartment cover. Handle screws • Open the lamp compartment. Always allow the lamp to cool for... -
Page 14: Positioning The Screen And Projector
Digital Projection Positioning The Screen And Projector Installation and Quick-Start Guide E-Vision 7000 Series Positioning The Screen And Projector Notes • Install the screen, ensuring that it is in the best position for viewing by your audience. • Mount the projector, ensuring that it is at a suitable distance from the screen for the image to fill the screen. Set the adjustable feet so that Always allow the lamp to cool for the projector is level, and perpendicular to the screen. -
Page 15: Operating The Projector
Digital Projection Operating The Projector Installation and Quick-Start Guide E-Vision 7000 Series Operating The Projector Notes Switching the projector on • Connect the power cable between the mains supply and the projector. Switch on at the switch next to the power connector. -
Page 16: Adjusting The Lens
Digital Projection Operating The Projector Installation and Quick-Start Guide E-Vision 7000 Series Adjusting the lens Notes Zoom • Use the ZOOM +/− buttons on the control panel or on the remote control to adjust the lens so that the image fills the screen. -
Page 17: Switching The Projector Off
Digital Projection Operating The Projector Installation and Quick-Start Guide E-Vision 7000 Series Switching the projector off Notes • Press on the control panel or on the remote control, then press the button a second time within 5 seconds to confirm your STANDBY intention to switch off. - Page 18 Digital Projection INSTALLATION AND QUICK-START GUIDE E-Vision 7000 Series This page is intentionally left blank.
-
Page 19: Connection Guide
CONNECTION GUIDE E-Vision 7000 Series High Brightness Digital Video Projector Rev B May 2013 112-459B... - Page 20 Digital Projection IN THIS GUIDE Connection Guide E-Vision 7000 Series IN THIS GUIDE Signal Inputs And Outputs ................15 Computer 1 ........................ Computer 2 ........................ Computer 3 ........................ Component ........................ Video or S-Video......................Monitor Out ........................ Supported Signal Input Modes ..............16 Control Connections ..................
-
Page 21: Signal Inputs And Outputs
Digital Projection Signal Inputs And Outputs Connection Guide E-Vision 7000 Series Signal Inputs And Outputs Notes Computer 1 For a complete listing of pin • Connect an analog computer (VGA) cable to the 15-pin D-type. configurations for all signal and control connectors, see Wiring •... -
Page 22: Supported Signal Input Modes
Digital Projection Supported Signal Input Modes Connection Guide E-Vision 7000 Series Supported Signal Input Modes Signal Resolution Refresh Total Horizontal Rate number Frequency ( Hz ) of lines (kHz) SDTV 480i 720 x 480 59.94 15.73 ü ü ü 576i 720 x 576 15.63... - Page 23 Digital Projection Supported Signal Input Modes Connection Guide E-Vision 7000 Series ...continued from previous page Signal Resolution Refresh Total Horizontal Rate number Frequency ( Hz ) of lines (kHz) COMPUTER WXGA60 1280 x 720 59.9 44.7 ü ü ü ü...
-
Page 24: Control Connections
Digital Projection Control Connections Connection Guide E-Vision 7000 Series Control Connections Notes For a complete listing of pin Screen Trigger configurations for all signal and control connectors, see Wiring • The Trigger output can be connected to an electrically operated screen, automatically Details later in this Guide. -
Page 25: Wiring Details
Digital Projection Wiring Details Connection Guide E-Vision 7000 Series Wiring Details Notes Signal inputs and outputs For full details of all input settings, see the Advanced menu in the Monitor video output (VGA) Operating Guide. Computer 1 video input: analog computer (VGA) -
Page 26: Computer 3 Video Input: Dvi-D
Digital Projection Wiring Details Connection Guide E-Vision 7000 Series Computer 3 video input: DVI-D Notes 24 way D-type connector TMDS Data 2- For full details of all input settings, TMDS Data 2+ see the Advanced menu in the pin view of female connector TMDS Data 2 Shield Operating Guide. -
Page 27: Monitor Audio Output
Digital Projection Wiring Details Connection Guide E-Vision 7000 Series Notes Sleeve Monitor audio output For full details of all input settings, Computer 1, 2, 3 audio inputs see the Advanced menu in the 3.5mm mini jack Operating Guide. Left Ring... -
Page 28: Video Input
Digital Projection Wiring Details Connection Guide E-Vision 7000 Series Notes Video input 1 x RCA Phono For full details of all input settings, see the Advanced menu in the Composite Video Operating Guide. Composite and S-Video audio input 2 x RCA Phono... -
Page 29: Control Connections
Digital Projection Wiring Details Connection Guide E-Vision 7000 Series Control connections Notes Screen Trigger output Sleeve 3.5mm mini jack Signal Sleeve Ground RS232 Serial control input unused Only one remote connection can be used at any one time. For more... -
Page 30: Lan Connection
Digital Projection Wiring Details Connection Guide E-Vision 7000 Series LAN connection Notes Only one remote connection can 10BaseT Unshielded Twisted Pair cable be used at any one time. For more information, see the Installation The standard wire colors are as follows: top view of cable menu in the Operating Guide. -
Page 31: Operating Guide
OPERATING GUIDE E-Vision 7000 Series High Brightness Digital Video Projector Rev B May 2013 112-460B... - Page 32 Digital Projection IN THIS GUIDE Operating Guide E-Vision 7000 Series IN THIS GUIDE Using The Remote Control ................27 Setup menu ........................ Auto Search ........................Using The Menus ....................28 Auto Power Off ........................ Navigating the menus ....................Auto Power On ........................
-
Page 33: Using The Remote Control
Digital Projection Using The Remote Control Operating Guide E-Vision 7000 Series Using The Remote Control Notes Some options and controls may not be available due to settings in the menus. POWER controls TEST PATTERN: For full details of how to use the... -
Page 34: Using The Menus
Digital Projection Using The Menus Operating Guide E-Vision 7000 Series Using The Menus Notes Use the buttons on the projector control panel or on the remote control, to access the Some menu options and controls menu system. may not be available due to settings in other menus. -
Page 35: Submenus
Digital Projection Using The Menus Operating Guide E-Vision 7000 Series Submenus Notes • Select a submenu using Some menu options and controls • may not be available due to settings then open the submenu by pressing in other menus. These will be ENTER shaded grey on the actual menu. -
Page 36: Selecting Parameters
Digital Projection Using The Menus Operating Guide E-Vision 7000 Series Selecting parameters Notes Most parameters are changed by selecting from a list: Some menu options and controls • Select from the list using may not be available due to settings in other menus. -
Page 37: Commands
Digital Projection Using The Menus Operating Guide E-Vision 7000 Series Commands Notes • To use a command, press ENTER Some menu options and controls may not be available due to settings in other menus. These will be shaded grey on the actual menu. -
Page 38: A Tour Of The Menus
Digital Projection A Tour Of The Menus Operating Guide E-Vision 7000 Series A Tour Of The Menus Notes See also Using the Menus, earlier Picture menu in this guide and Menu Map, later in this guide. Picture Mode • Select a picture mode as required. -
Page 39: Advance Setting Submenu
Digital Projection A Tour Of The Menus Operating Guide E-Vision 7000 Series continued Picture menu Notes Advance Setting submenu See also Using the Menus, earlier in this guide and Menu Map, later in this guide. Picture Menu Advance Setting Submenu Signal Type •... - Page 40 Digital Projection A Tour Of The Menus Operating Guide E-Vision 7000 Series continued Picture menu, Advance Setting submenu Notes Film Mode The Film Mode setting is available • only for interlaced signals on the Set this to Auto , and the projector will automatically detect: Video or S-Video inputs.
-
Page 41: Signal Menu
Digital Projection A Tour Of The Menus Operating Guide E-Vision 7000 Series Signal menu Notes See also Using the Menus, earlier in this guide and Menu Map, later in this guide. Horizontal and Vertical Position, Phase, Clock • These settings are used for VGA Adjust the sliders for these settings, as required. -
Page 42: Video Menu
Digital Projection A Tour Of The Menus Operating Guide E-Vision 7000 Series Video menu Notes See also Using the Menus, earlier in this guide and Menu Map, later in this guide. Overscan is used to compensate for noisy or badly defined image edges, by increasing the size of the image, to force the edges off-screen. -
Page 43: Setup Menu
Digital Projection A Tour Of The Menus Operating Guide E-Vision 7000 Series Setup menu Notes See also Using the Menus, earlier in this guide and Menu Map, later in this guide. Auto Search • To set the background screen, see... -
Page 44: Background
Digital Projection A Tour Of The Menus Operating Guide E-Vision 7000 Series continued Setup menu Notes Background To set a background image to • be displayed when Custom Set this to determine what appears on screen when the projector is searching for a valid chosen, see the Advanced Setting input source. -
Page 45: Advance Setting Submenu
Digital Projection A Tour Of The Menus Operating Guide E-Vision 7000 Series continued Setup menu Notes See also Using the Menus, earlier Advance Setting submenu in this guide and Menu Map, later in this guide. Picture Signal Video Setup Installation... -
Page 46: Messaging
Digital Projection A Tour Of The Menus Operating Guide E-Vision 7000 Series continued Setup menu Advance Setting submenu Notes Messaging See also Using the Menus, earlier in this guide and Menu Map, later in this guide. Picture Signal Video Setup... -
Page 47: Installation Menu
Digital Projection A Tour Of The Menus Operating Guide E-Vision 7000 Series Installation menu Notes See also Using the Menus, earlier in this guide and Menu Map, later in this guide. Language • Select a language as required. When Lamp Control is set to... -
Page 48: Advance Setting
Digital Projection A Tour Of The Menus Operating Guide E-Vision 7000 Series continued Installation menu Notes Advance Setting See also Using the Menus, earlier in this guide and Menu Map, later in this guide. Installation Picture Signal Video Setup Advance Setting... -
Page 49: Network
Digital Projection A Tour Of The Menus Operating Guide E-Vision 7000 Series continued Installation menu, Advance Setting submenu Notes Network See also Using the Menus, earlier in this guide and Menu Map, later in this guide. Installation Menu Advance Setting \ Network submenu Link •... -
Page 50: Reset
Digital Projection A Tour Of The Menus Operating Guide E-Vision 7000 Series Installation menu continued Notes Reset Do NOT do this unless you are All Reset sure that you want to restore ALL • Projector will ask for confirmation before restoring all settings to factory defaults. -
Page 51: Menu Map
Digital Projection Menu Map Operating Guide E-Vision 7000 Series Menu Map Notes Menu Submenus and controls Some of the information in this menu PICTURE map is summarised. See the actual menu on the projector for full detail. Picture Mode Standard, Game, Movie, Presentation... - Page 52 Digital Projection Menu Map Operating Guide E-Vision 7000 Series Menu Submenus and controls Notes VIDEO Overscan Some of the information in this menu On, Off map is summarised. See the actual Video System Auto, PAL, SECAM, NTSC4.43, NTSC3.58, PAL-M, PAL-N, PAL-60 menu on the projector for full detail.
- Page 53 Digital Projection Menu Map Operating Guide E-Vision 7000 Series Menu Submenus and controls Notes INSTALLATION Language Some of the information in this menu Select from list map is summarised. See the actual Lamp Control Both, Lamp 1, Lamp 2, Auto 1 menu on the projector for full detail.
- Page 54 Digital Projection OPERATING GUIDE E-Vision 7000 Series This page is intentionally left blank.
-
Page 55: Remote Communications Guide
REMOTE COMMUNICATIONS GUIDE E-Vision 7000 Series High Brightness Digital Video Projector Rev B May 2013 112-461B... - Page 56 Digital Projection IN THIS GUIDE Remote Communications Guide E-Vision 7000 Series IN THIS GUIDE Introduction ......................51 RS232 Control Commands ................52 Header code ....................... Examples ........................The commands ......................Command Group 00 ....................... Command Group 01 ....................... Command Group 02 .......................
-
Page 57: Introduction
Digital Projection Introduction Remote Communications Guide E-Vision 7000 Series Introduction Notes The projector can be controlled by using an external control system in three different ways: Details of how to connect to the projector using the LAN or • All of the projector’s features can be controlled via a serial connection, using the control strings described in this guide. -
Page 58: Rs232 Control Commands
Digital Projection RS232 Control Commands Remote Communications Guide E-Vision 7000 Series RS232 Control Commands Notes There are 2 types of command, Get commands and Set commands. The individual commands are described later in this guide. All commands consist of ascii text strings ending wit an ascii carriage return character. -
Page 59: The Commands
Digital Projection RS232 Control Commands Remote Communications Guide E-Vision 7000 Series The commands Notes The commands are divided into five groups, the group number forming the first two characters of the command. Note: spaces are shown in the examples for clarity, but are NOT... -
Page 60: Command Group 02
Digital Projection IN THIS GUIDE Remote Communications Guide E-Vision 7000 Series Notes ASCII Function Description Return String V99G0106 56 39 39 47 30 31 30 36 0D Get Color 0: Warm Pn/F Temperature 1: Standard 2: Cold Note: spaces are shown in the... -
Page 61: Command Group 04 (Remote Control Buttons)
Digital Projection IN THIS GUIDE Remote Communications Guide E-Vision 7000 Series Notes ASCII Function Description Return String V99G0302 56 39 39 47 30 33 30 32 0D Get AV Mute Pn/F V99S0302n 56 39 39 53 30 33 30 32 n 0D... - Page 62 Digital Projection IN THIS GUIDE Remote Communications Guide E-Vision 7000 Series Notes ASCII Function Description Return String V99S0411 56 39 39 53 30 34 31 31 0D LEFT V99S0412 56 39 39 53 30 34 31 32 0D RIGHT V99S0413...
-
Page 63: Pjlink
Digital Projection PJLink Remote Communications Guide E-Vision 7000 Series PJLink Notes The LAN IP Address of the projector can be set by using the Network submenu, which can be found in the Advanced Setting submenu in the Installation menu. The TCP Port number is 5450. -
Page 64: Lan Control Utility
Digital Projection LAN Control Utility Remote Communications Guide E-Vision 7000 Series LAN Control Utility Notes The LAN IP Address of the projector can be set by using the Network submenu, which can be found in the Advanced Setting submenu in the Installation menu.
Need help?
Do you have a question about the 7000 Series and is the answer not in the manual?
Questions and answers