Edimax EW-7438RPn V2 User Manual
N300 universal wi-fi extender
Hide thumbs
Also See for EW-7438RPn V2:
- Quick installation manual (19 pages) ,
- Instructions manual (11 pages) ,
- Manual (11 pages)
Table of Contents
Advertisement
Quick Links
Advertisement
Table of Contents

Related Manuals for Edimax EW-7438RPn V2


Summary of Contents for Edimax EW-7438RPn V2
- Page 1 EW-7438RPn V2 User Manual 09-2013 / v1.0...
-
Page 2: Table Of Contents
CONTENTS I. Product Information ................1 I-1. Package Contents ......................1 I-2. System Requirements ....................1 I-3. LED Status ........................1 I-4. Hardware Overview ....................... 3 I-5. Safety Information ......................4 II. Installation .................... 5 II-1. Wi-Fi Extender Mode ..................... 8 II-2. - Page 3 VI-4. WPS Settings ........................ 52 VI-5. Wireless Advanced ...................... 54 VI-5-1. Security ........................56 VI-5-1-1. Disable ......................... 57 VI-5-1-2. WEP ..........................57 VI-5-1-3. WPA pre-shared key ....................58 VI-5-1-4. WPA RADIUS ........................ 59 VI-5-2. MAC Filtering ....................... 60 VI-5-3. Administration Utility ....................62 VI-5-4.
-
Page 4: Product Information
I. Product Information I-1. Package Contents - EW-7438RPn - CD with multi-language QIG & user manual - Quick installation guide (QIG) - RJ45 Ethernet cable - Access key card I-2. System Requirements - Wi-Fi extender/Wi-Fi bridge mode: Existing 2.4GHz wireless network - Access point mode: Cable/DSL modem - Computer with 2.4GHz 802.11/b/g/n Wi-Fi adapter, and web browser for ®... - Page 5 Wi-Fi Flashing Transferring data Green Wi-Fi not active or in LED off mode Extender is on Power Resetting to factory default Green Flashing settings, or system is booting up Extender is off or in LED off mode WPS connection established (LED will remain on for 5 minutes to indicate a successful connection) WPS in progress (waiting for...
-
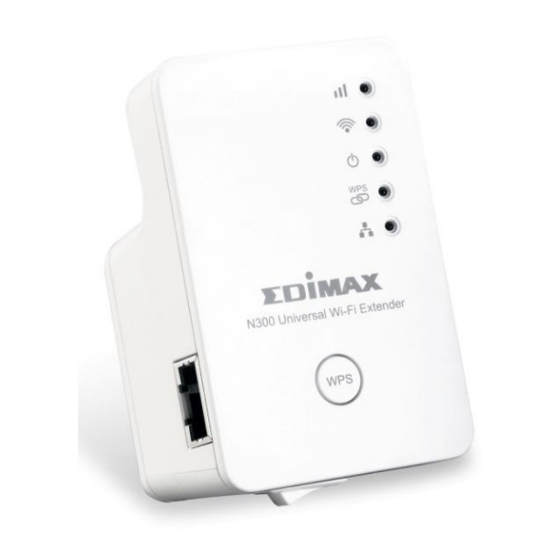
Page 6: I-4. Hardware Overview
I-4. Hardware Overview 1. Power On/Off Switch 2. Ethernet Port 3. WPS/Reset Button 4. LEDs... -
Page 7: I-5. Safety Information
I-5. Safety Information In order to ensure the safe operation of the device and its users, please read and act in accordance with the following safety instructions. 1. The device is designed for indoor use only; do not place it outdoors. 2. -
Page 8: Ii. Installation
II. Installation The EW-7438RPn has three different operating modes which you can choose depending on your network requirements. Each mode is described below: Wi-Fi Extender The device connects wirelessly to your existing network and repeats the wireless signal. Location: The best location for your extender is roughly in the middle between your existing wireless router/access point and the dead zone. - Page 9 LED displays on. Use a Wi-Fi device (e.g. computer, tablet, smartphone) to search for a Wi-Fi network with the SSID “Edimax.Setup” and connect to it. If you are using a computer, please disconnect any Ethernet cables. For mobile devices, iOS 4.3 or Android 4.x or above is required.
- Page 10 Open a web browser and if you do not automatically arrive at the “Get Started” screen shown below, enter the URL http://edimax.setup and click “Get Started” to begin the setup process. If you cannot access http://edimax.setup, please make sure your computer is set to use a dynamic IP address.
-
Page 11: Ii-1. Wi-Fi Extender Mode
II-1. Wi-Fi Extender Mode Please read the on screen instructions about selecting a good location for your wireless extender and then click “NEXT” to continue. You can check your signal strength on the next page. Select your Wi-Fi network from the list and enter the security key/password. - Page 12 Do not check “Connect to a hidden network” unless you wish to connect to a hidden SSID instead. Please wait while the EW-7438RPn tests the connection. If your Wi-Fi extender cannot obtain an IP address (below) from your existing router/access point then click the “Static IP” button to assign an IP address to the extender.
- Page 13 Please wait a moment until the extender is ready. A final congratulations screen will indicate that setup is complete. The EW-7438RPn is working and ready for use - the amber signal strength LED should display on or flash depending on your signal strength.
- Page 14 Please close the browser window. You can now connect to the extender’s new SSID on a wireless device within range such as a computer, smartphone or tablet. Do not connect to your router’s SSID instead! The password for your Wi-Fi extender’s SSID is the same as for your router’s SSID.
-
Page 15: Ii-2. Wi-Fi Adapter/Bridge Mode
II-2. Wi-Fi Adapter/Bridge Mode Select your Wi-Fi network from the list and enter the security key/password. If the Wi-Fi network you wish to connect to does not appear, try clicking “Refresh”. Do not check “Connect to a hidden network” unless you wish to connect to a hidden SSID instead. - Page 16 If your Wi-Fi extender cannot obtain an IP address (below) from your existing router/access point then click the “Static IP” button to assign an IP address to the extender. For more guidance please refer to VII-1. Configuring your IP address. When the connection test is complete, click “Apply”...
- Page 17 A final congratulations screen will indicate that setup is complete. Please close the browser window. The EW-7438RPn is working and ready for use as a wireless bridge. Use an Ethernet cable to connect the EW-7438RPn to the Ethernet port on your network device.
-
Page 18: Ii-3. Wi-Fi Access Point Mode
II-3. Wi-Fi Access Point Mode Connect the LAN port of your EW-7438RPn to the LAN port of your existing router using an Ethernet cable, and then click “Next”. Click “Next” to continue. Select “Obtain an IP address automatically” or “Use the following IP address”... - Page 19 Enter a name and password for your wireless network, then click “Next” to continue.
- Page 20 A summary of your configuration will be displayed, as shown below. Check that all of the details are correct and then click “Apply” to restart the EW-7438RPn. Please wait a moment until the EW-7438RPn is ready.
- Page 21 A final congratulations screen will indicate that setup is complete. Please close the browser window. The EW-7438RPn is working and ready for use. You can now connect to the device’s new SSID.
-
Page 22: Ii-4. Wps Setup
II-4. WPS Setup The WPS button is a quick and easy method to establish a secure connection between your EW-7438RPn and wireless router/access point. If your wireless device supports WPS (Wi-Fi Protected Setup) then you can use this method to setup the EW-7438RPn in extender or adapter/bridge mode, instead of the setup wizard described in II. - Page 23 Within two minutes, press the WPS button on the EW-7438RPn for 2 – 5 seconds to activate WPS. The green WPS LED will flash to indicate that WPS is active. Press for two seconds The devices will establish a connection. The green WPS LED on the EW-7438RPn will display on for 5 minutes to indicate a successful...
-
Page 24: Ii-5. Reset To Factory Default Settings
II-5. Reset to Factory Default Settings If you experience problems with your extender or if you want to change the extender to a different operating mode, you can reset the device back to its factory settings. This resets all settings back to default. Press and hold the WPS/Reset button for at least 10 seconds until the green... -
Page 25: Iii. Browser Based Configuration Interface
Login To access the browser based configuration interface enter http://edimax.setup into the URL bar of a browser on a network device connected to the same Wi-Fi network as the EW-7438RPn. You will be prompted for a username and password. The default... - Page 26 You will arrive at the “Status and Information” screen. Use the menu down the left side to navigate.
-
Page 27: Iii-2. Save Settings
III-2. Save Settings After you make any changes to the EW-7438RPn’s settings, please click “APPLY”. Then, select “CONTINUE” to save changes but not apply them yet, or select “APPLY” to restart the EW-7438RPn and bring the changes into effect. The EW-7438RPn needs to restart in order to apply and bring any changes into effect. -
Page 28: Iii-3. Main Menu
III-3. Main Menu The main menu displays different options depending on your device’s operating mode. Please refer to the following chapters for guidance on each mode. Wi-Fi Extender Wi-Fi Adapter/Bridge Access Point... -
Page 29: Iv. Extender Mode
IV. Extender Mode IV-1. Home The “Status” page displays basic system information about the device, arranged into three categories: system, wireless configuration & LAN configuration. Screenshots displayed are examples.The information shown on your screen will vary depending on your configuration. Uptime Displays the total time since the device was turned on. - Page 30 Mode Displays the operating mode. ESSID Displays the EW-7438RPn’s ESSID, sometimes also known as SSID. The ESSID/SSID is the name used to identify a wireless network. Channel Number Displays the current wireless channel number. Security Displays the current wireless security setting. BSSID (MAC) Displays the device’s BSSID.
-
Page 31: Iv-2. Iq Setup
IV-2. iQ Setup You can run the setup wizard again to reconfigure the basic settings of the device. Please refer to II-1. Wi-Fi Extender Mode Step 2 onwards for guidance. If you wish to change the operating mode, please reset the EW-7438RPn back to factory default settings. -
Page 32: Iv-3. Wps Settings
IV-3. WPS Settings Wi-Fi Protected Setup is a simple way to establish connections between WPS compatible devices. When WPS is activated in the correct manner and at the correct time for two compatible devices, they will automatically connect. PIN code WPS includes the use of a PIN code between the two devices for verification. -
Page 33: Iv-4. Wireless Advanced
IV-4. Wireless Advanced In “Wireless Advanced” you adjust the power output and LED operation of the EW-7438RPn. The submenu also allows you to configure security, as well as various administrative and management functions. This product should work for a long time, and provide round-the-clock Wi-Fi service. -
Page 34: Iv-4-1. Wlan 2.4Ghz Security
IV-4-1. WLAN 2.4GHz Security Broadcast SSID Enable or disable ESSID broadcast. When enabled, the ESSID will be visible to clients as an available Wi-Fi network. When disabled, the ESSID will not be visible as an available Wi-Fi network to clients – clients must manually enter the ESSID in order to connect. -
Page 35: Iv-4-2. Administration Utility
IV-4-2. Administration Utility You can change the password used to login to the browser-based configuration interface here. It is advised to do so for security purposes. You can also configure the EW-7438RPn’s IP address. Please make a note of the new password. In the event that you forget the password and are unable to login to the browser based configuration interface, see II-5. -
Page 36: Iv-4-3. Configuration Tools
IV-4-3. Configuration Tools The “Configuration Tools” menu allows you to backup the EW-7438RPn’s settings, restore the settings to a previous version or restore the EW-7438RPn back to its factory default state. You can also upgrade the firmware, reboot the device and export the system log. Backup Settings Click “Save”... - Page 37 Upgrade Firmware You can upgrade the system firmware to a more recent version. You can download the latest firmware from the Edimax website. After the upgrade, the system will restart. Do not switch off or disconnect the device during a firmware upgrade, as this could damage the device.
- Page 38 Reboot In the event that the router malfunctions or is not responding, then it is recommended that you restart the device. Rebooting the EW-7438RPn will not affect the current configuration/settings of the device. Apply Click “Apply” to reboot the device. A status bar will indicate the progress of the reboot and you will see a confirmation screen when the reboot is complete.
- Page 39 System Log You can export the system log to a separate file if you require. Export system log Click to open a new window and select a location to save the log file.
-
Page 40: Wi-Fi Adapter/Bridge Mode
V. Wi-Fi Adapter/Bridge Mode V-1. Home The “Status” page displays basic system information about the device, arranged into three categories: system, wireless configuration & LAN configuration. Screenshots displayed are examples.The information shown on your screen will vary depending on your configuration. Uptime Displays the total time since the device was turned on. - Page 41 Mode Displays the operating mode. ESSID Displays your router/access point’s ESSID, sometimes also known as SSID. The ESSID/SSID is the name used to identify a wireless network. Channel Number Displays the current wireless channel number. Security Displays the current wireless security setting. BSSID (MAC) Displays the device’s BSSID.
-
Page 42: Iq Setup
V-2. iQ Setup You can run the setup wizard again to reconfigure the basic settings of the device. Please refer to II-2. Wi-Fi Adapter/Bridge Mode for guidance. If you wish to change the operating mode, please reset the EW-7438RPn back to factory default settings. -
Page 43: Wireless Advanced
V-3. Wireless Advanced In “Wireless Advanced” you adjust the power output and LED operation of the EW-7438RPn. The submenu also allows you to configure security, as well as various administrative and management functions. Tx Power You can adjust the level of wireless output power as a percentage. -
Page 44: V-3-1. Administration Utility
V-3-1. Administration Utility You can change the password used to login to the browser-based configuration interface here. It is advised to do so for security purposes. You can also configure the EW-7438RPn’s IP address. Please make a note of the new password. In the event that you forget the password and are unable to login to the browser based configuration interface, see II-5. -
Page 45: V-3-2. Configuration Tools
V-3-2. Configuration Tools The “Configuration Tools” menu allows you to backup the EW-7438RPn’s settings, restore the settings to a previous version or restore the EW-7438RPn back to its factory default state. You can also upgrade the firmware, reboot the device and export the system log. Backup Settings Click “Save”... - Page 46 Upgrade Firmware You can upgrade the system firmware to a more recent version. You can download the latest firmware from the Edimax website. After the upgrade, the system will restart. Do not switch off or disconnect the device during a firmware upgrade, as this could damage the device.
- Page 47 Reboot In the event that the router malfunctions or is not responding, then it is recommended that you restart the device. Rebooting the EW-7438RPn will not affect the current configuration/settings of the device. Apply Click “Apply” to reboot the device. A status bar will indicate the progress of the reboot and you will see a confirmation screen when the reboot is complete.
- Page 48 System Log You can export the system log to a separate file if you require. Export system log Click to open a new window and select a location to save the log file.
-
Page 49: Vi. Access Point Mode
VI. Access Point Mode VI-1. Home The “Status” page displays basic system information about the device, arranged into three categories: system, wireless configuration & LAN configuration. Screenshots displayed are examples.The information shown on your screen will vary depending on your configuration. Uptime Displays the total time since the device was turned on. - Page 50 ESSID Displays the access point’s ESSID, sometimes also known as SSID. The ESSID/SSID is the name used to identify a wireless network. Channel Number Displays the current wireless channel number. Security Displays the current wireless security setting. BSSID (MAC) Displays the device’s BSSID. The BSSID identifies this access point in the network, and is the same as the device’s MAC address.
-
Page 51: Vi-2. Iq Setup
VI-2. iQ Setup You can run the setup wizard again to reconfigure the basic settings of the device. Please refer to II-3. Wi-Fi Access Point Mode Step 3 onwards for guidance. If you wish to change the operating mode, please reset the EW-7438RPn back to factory default settings. -
Page 52: Vi-3. Basic Settings
VI-3. Basic Settings The “Basic Settings” screen displays various settings for your wireless network. Mode The EW-7438RPn’s mode is displayed here. Band Displays the wireless standard used for the EW-7438RPn. “2.4GHz (B+G+N)” means that 802.11b, 802.11g, and 802.11n wireless clients can connect to the EW-7438RPn. MAIN ESSID This is the name of your Wi-Fi network for identification, also sometimes referred to as... - Page 53 Multiple ESSID This page allows you to configure the wireless settings for multiple ESSID’s. Identification number of each additional ESSID. Enable Check the box to enable or disable an ESSID. SSID Enter the SSID (the name used to identify this wireless access point) here.
- Page 54 or selected combinations of each. Only wireless clients of the same band(s) as you select will be able to connect. AP Isolation When “Enabled”, wireless clients will be able to access the Internet, but will not be able to communicate with each other.
-
Page 55: Vi-4. Wps Settings
VI-4. WPS Settings Wi-Fi Protected Setup is a simple way to establish connections between WPS compatible devices. When WPS is activated in the correct manner and at the correct time for two compatible devices, they will automatically connect. PIN code WPS includes the use of a PIN code between the two devices for verification. - Page 56 Configuration The configuration mode of the device’s WPS Mode setting is displayed here. “Registrar” means the device acts as an access point for a wireless client to connect to and the wireless client(s) will follow the device’s wireless settings. Configure via Push Click “Start PBC”...
-
Page 57: Vi-5. Wireless Advanced
VI-5. Wireless Advanced Using the “Wireless Advanced” menu, you can configure security, MAC filtering and various other settings. The settings on the “Wireless Advanced” page shown below are for experienced users only. Please do not change any of the values on this page unless you are already familiar with these functions. - Page 58 DTIM Period Set the DTIM period of wireless radio. The default value is 3. Data Rate Set the wireless data transfer rate. The default is set to auto. N Data Rate Set the data rate of 802.11n. The default is set to auto.
-
Page 59: Vi-5-1. Security
VI-5-1. Security The access point provides a variety of wireless security options (wireless data encryption). When data is encrypted, information transmitted wirelessly cannot be read by anyone who does not know the encryption key. The “Security” screen displays security settings for your EW-7438RPn. SSID choice Select which SSID to configure security settings for. -
Page 60: Vi-5-1-1. Disable
VI-5-1-1. Disable Encryption is disabled and no password/key is required to connect to the EW-7438RPn. Disabling wireless encryption is not recommended. When disabled, anybody within range can connect to your device’s SSID. Enable 802.1x Check the box to enable the 802.1x Authentication authentication. -
Page 61: Vi-5-1-3. Wpa Pre-Shared Key
characters from 0-9, a-f and A-F). Encryption Key Enter your encryption key/password according to the format you selected above. A complex, hard-to-guess key is recommended. Check the “Hide” box to hide your password from being displayed on-screen. Enable 802.1x Check the box to enable the 802.1x Authentication authentication. -
Page 62: Vi-5-1-4. Wpa Radius
VI-5-1-4. WPA RADIUS WPA RADIUS is a combination of WPA encryption and RADIUS user authentication. If you have a RADIUS authentication server, you can authenticate the identity of every wireless client against a user database. WPA Unicast Select from WPA (TKIP), WPA2 (AES) or WPA2 Cipher Suite Mixed. -
Page 63: Vi-5-2. Mac Filtering
VI-5-2. MAC Filtering The MAC filtering feature allows you to define a list of wireless devices permitted to connect to this access point, identified by their unique MAC address. When this feature is enabled, devices which are not on the list of permitted MAC addresses cannot connect to the access point. - Page 64 MAC address filtering table. Clear Clear all fields.
-
Page 65: Vi-5-3. Administration Utility
VI-5-3. Administration Utility You can change the password used to login to the browser-based configuration interface here. It is advised to do so for security purposes. You can also configure the EW-7438RPn’s IP address. Please make a note of the new password. In the event that you forget the password and are unable to login to the browser based configuration interface, see II-5. - Page 66 IP Address Specify an IP address here. This IP address will be assigned to yourEW-7438RPn. Subnet Mask Input the subnet mask of the new IP address. Gateway Address Input the network’s gateway IP address. Please refer to VII-1. Configuring your IP address for more information about changing the access point’s IP address.
-
Page 67: Vi-5-4. Configuration Tools
VI-5-4. Configuration Tools The “Configuration Tools” menu allows you to backup the EW-7438RPn’s settings, restore the settings to a previous version or restore the EW-7438RPn back to its factory default state. You can also upgrade the firmware, reboot the device and export the system log. Backup Settings Click “Save”... - Page 68 Upgrade Firmware You can upgrade the system firmware to a more recent version. You can download the latest firmware from the Edimax website. After the upgrade, the system will restart. Do not switch off or disconnect the device during a firmware upgrade, as this could damage the device.
- Page 69 Reboot In the event that the router malfunctions or is not responding, then it is recommended that you restart the device. Rebooting the EW-7438RPn will not affect the current configuration/settings of the device. Apply Click “Apply” to reboot the device. A status bar will indicate the progress of the reboot and you will see a confirmation screen when the reboot is complete.
- Page 70 System Log You can export the system log to a separate file if you require. Export system log Click to open a new window and select a location to save the log file.
-
Page 71: Vii. Appendix
VII. Appendix VII-1. Configuring your IP address For first time access to the URL http://Edimax.Setup please ensure your computer is set to use a dynamic IP address. This means your computer can obtain an IP address automatically from a DHCP server. You can check if your computer is set to use a dynamic IP address by following VII-1-1. -
Page 72: Vii-1-1
VII-1-1. How to check that your computer uses a dynamic IP address Please follow the instructions appropriate for your operating system. VII-1-1-1. Windows XP Click the “Start” button (it should be located in the lower-left corner of your computer), then click “Control Panel”. Double-click the “Network and Internet Connections”... -
Page 74: Vii-1-1-2. Windows Vista
VII-1-1-2. Windows Vista Click the “Start” button (it should be located in the lower-left corner of your computer), then click “Control Panel”. Click “View Network Status and Tasks”, then click “Manage Network Connections”. Right-click “Local Area Network”, then select “Properties”. The “Local Area Connection Properties” window will then appear, select “Internet Protocol Version 4 (TCP / IPv4)”, and then click “Properties”. -
Page 76: Vii-1-1-3. Windows 7
VII-1-1-3. Windows 7 Click the “Start” button (it should be located in the lower-left corner of your computer), then click “Control Panel”. Under “Network and Internet” click “View network status and tasks”. Click “Local Area Connection”. - Page 77 Click “Properties”. Select “Internet Protocol Version 4 (TCP/IPv4) and then click “Properties”.
- Page 78 Select “Obtain an IP address automatically” and “Obtain DNS server address automatically” should be selected.
-
Page 79: Vii-1-1-4. Windows 8
VII-1-1-4. Windows 8 From the Windows 8 Start screen, you need to switch to desktop mode. Move your curser to the bottom left of the screen and click. In desktop mode, click the File Explorer icon in the bottom left of the screen, as shown below. - Page 80 In the window that opens, select “Change adapter settings” from the left side. Choose your connection and right click, then select “Properties”.
- Page 81 Select “Internet Protocol Version 4 (TCP/IPv4) and then click “Properties”. Select “Obtain an IP address automatically” and “Obtain DNS server address automatically” should be selected.
-
Page 83: Vii-1-1-5. Mac Os
VII-1-1-5. Mac OS Have your Macintosh computer operate as usual, and click on “System Preferences”. In System Preferences, click on “Network”. Click on “Wi-Fi” in the left panel and then click “Advanced” in the lower right corner. Select “TCP/IP” from the top menu and “Using DHCP” in the drop down menu labeled “Configure IPv4”... -
Page 85: Vii-1-2
VII-1-2. How to modify the IP address of your computer Please follow the instructions appropriate for your operating system. In the following examples we use the IP address 192.168.9.20 though you can use any IP address in the range 192.168.9.x (x = 3 – 254) in order to access iQ Setup/browser based configuration interface. - Page 86 address, subnet mask, default gateway and DNS server addresses. IP address: 192.168.9.20 Subnet Mask: 255.255.255.0 Click ‘OK’ when finished.
-
Page 87: Vii-1-2-2
VII-1-2-2. Windows Vista Click the “Start” button (it should be located in the lower-left corner of your computer), then click “Control Panel”. Click “View Network Status and Tasks”, then click “Manage Network Connections”. Right-click “Local Area Network”, then select “Properties”. The “Local Area Connection Properties” window will then appear, select “Internet Protocol Version 4 (TCP / IPv4)”, and then click “Properties”. -
Page 88: Windows 7
VII-1-2-3. Windows 7 Click the “Start” button (it should be located in the lower-left corner of your computer), then click “Control Panel”. - Page 89 Under “Network and Internet” click “View network status and tasks”. Click “Local Area Connection”.
- Page 90 Click “Properties”. Select “Internet Protocol Version 4 (TCP/IPv4) and then click “Properties”.
- Page 91 Select “Use the following IP address”, then input the following values: Your existing static IP address will be displayed in the “IP address” field before you replace it. Please make a note of this IP address, subnet mask, default gateway and DNS server addresses.
-
Page 93: Vii-1-2-4
VII-1-2-4. Windows 8 From the Windows 8 Start screen, you need to switch to desktop mode. Move your curser to the bottom left of the screen and click. In desktop mode, click the File Explorer icon in the bottom left of the screen, as shown below. - Page 94 Right click “Network” and then select “Properties”. In the window that opens, select “Change adapter settings” from the left side.
- Page 95 Choose your connection and right click, then select “Properties”. Select “Internet Protocol Version 4 (TCP/IPv4) and then click “Properties”.
- Page 96 Select “Use the following IP address”, then input the following values: Your existing static IP address will be displayed in the “IP address” field before you replace it. Please make a note of this IP address, subnet mask, default gateway and DNS server addresses.
-
Page 97: Vii-1-2-5. Mac
VII-1-2-5. Have your Macintosh computer operate as usual, and click on “System Preferences” In System Preferences, click on “Network”. Click on “Wi-Fi” in the left panel and then click “Advanced” in the lower right corner. Select “TCP/IP” from the top menu and select “Manually” from the drop down menu labeled “Configure IPv4”, then click “OK”. - Page 98 Your existing static IP address will be displayed in the “IP address” field before you replace it. Please make a note of this IP address, subnet mask, default gateway and DNS server addresses. In the “IPv4 Address” and “Subnet Mask” field enter IP address 192.168.9.20 and subnet mask 255.255.255.0.
- Page 99 Click “Apply” to save the changes.
-
Page 100: Vii-1-3
VII-1-3. How to Find Your Network Security Key To find your network security key, please follow the instructions appropriate for your operating system. If you are using Windows XP or earlier, please contact your ISP or router manufacturer to find your network security key. VII-1-3-1. - Page 101 You should see the profile of your Wi-Fi network in the list. Right click on your Wi-Fi network and then click on “Properties”. Click on the “Security” tab, and then check the box labeled “Show characters”. This will show your network security key. Click the “Cancel” button to close the window.
-
Page 102: Vii-1-3-2. Mac
VII-1-3-2. Mac Open a new Finder window, and select “Applications” from the menu on the left side. Open the folder labeled “Utilities” and then open the application “Keychain Access”. Select “Passwords” from the sub-menu labeled “Category” on the left side, as shown below. - Page 103 Double click the SSID of your network and you will see the following window. Check the box labeled “Show password” and you will be asked to enter your administrative password, which you use to log into your Mac. Enter your password and click “Allow”.
- Page 104 Your network security password will now be displayed in the field next to the box labeled “Show password”. In the example below, the network security password is “edimax1234”. Please make a note of your network security password.
-
Page 105: Vii-1-4
VII-1-4. How to Find Your Router’s IP Address To find your router’s IP address, please follow the instructions appropriate for your operating system. VII-1-4-1. Windows XP, Vista & 7 Go to “Start”, select “Run” and type “cmd”, then press Enter or click “OK”. A new window will open, type “ipconfig”... - Page 106 Your router’s IP address will be displayed next to “Default Gateway”.
-
Page 107: Vii-1-4-2. Windows 8
VII-1-4-2. Windows 8 From the Windows 8 Start screen, move your curser to the top right corner of the screen to display the Charms bar. Click “Search” and enter “cmd” into the search bar. Click the “Command Prompt” app which be displayed on the left side. - Page 108 A new window will open, type “ipconfig” and press Enter.
- Page 109 Your router’s IP address will be displayed next to “Default Gateway”.
-
Page 110: Vii-1-4-3. Mac
VII-1-4-3. Mac Launch “System Preferences” and click on “Network”. If you are using an Ethernet cable to connect to your network, your router’s IP address will be displayed next to “Router”. If you are using Wi-Fi, click “Wi-Fi” in the left panel, and then “Advanced” in the bottom right corner. - Page 111 Click the “TCP/IP” tab and your router’s IP address will be displayed next to “Router”.
-
Page 112: Vii-2. Connecting To A Wi-Fi Network
VII-2. Connecting to a Wi-Fi network For help connecting to your device’s Edimax.Setup SSID for initial setup, or to connect to your device’s new Wi-Fi network (SSID) after setup is complete, follow the guide below: Below is an example of how to connect using Windows Vista – the process may vary slightly for other versions of Windows. - Page 113 After correctly entering your password, you will be successfully connected to the EW-7438RPn’s wireless network.
-
Page 114: Vii-3. Troubleshooting
2 minutes and try again. b. Make sure you are using the full, correct URL: http://edimax.setup c. If you are using a MAC or IP address filter, try to connect the wireless extender using a different computer. - Page 115 is extremely hot. during frequent use. If you can safely place your hand on the wireless extender, the temperature of the device is at a normal level. b. If you smell burning or see smoke coming from wireless extender then disconnect the extender immediately, as far as it is safely possible to do so.
-
Page 116: Vii-4. Glossary
VII-4. Glossary Default Gateway (Wireless bridge): Every non-access point IP device needs to configure a default gateway’s IP address. When the device sends out an IP packet, if the destination is not on the same network, the device has to send the packet to its default gateway, which will then send it out towards the destination. - Page 117 A network mask is also a 32-bit binary pattern, and consists of consecutive leading 1’s followed by consecutive trailing 0’s, such as 11111111.11111111.11111111.00000000. Therefore sometimes a network mask can also be described simply as “x” number of leading 1’s. When both are represented side by side in their binary forms, all bits in the IP address that correspond to 1’s in the network mask become part of the IP network address, and the remaining bits correspond to the host ID.
- Page 118 Application Protocol Port Number Telnet SMTP POP3 H.323 1720 SNMP SNMP Trap HTTP PPTP 1723 PC Anywhere TCP 5631 PC Anywhere UDP 5632 Access point: A access point is an intelligent network device that forwards packets between different networks based on network layer address information such as IP addresses.
- Page 119 COPYRIGHT Copyright Edimax Technology Co., Ltd. all rights reserved. No part of this publication may be reproduced, transmitted, transcribed, stored in a retrieval system, or translated into any language or computer language, in any form or by any means, electronic, mechanical, magnetic, optical, chemical, manual or otherwise, without the prior written permission from Edimax Technology Co., Ltd.
-
Page 120: Federal Communication Commission Interference Statement
Federal Communication Commission Interference Statement This equipment has been tested and found to comply with the limits for a Class B digital device, pursuant to Part 15 of FCC Rules. These limits are designed to provide reasonable protection against harmful interference in a residential installation. - Page 121 EU Declaration of Conformity English: This equipment is in compliance with the essential requirements and other relevant provisions of Directive 2006/95/EC, 2011/65/EC. Français: Cet équipement est conforme aux exigences essentielles et autres dispositions de la directive 2006/95/CE, 2011/65/CE. Čeština: Toto zařízení je v souladu se základními požadavky a ostatními příslušnými ustanoveními směrnic 2006/95/ES, 2011/65/ES.
-
Page 122: Declaration Of Conformity
Declaration of Conformity We, Edimax Technology Co., Ltd., declare under our sole responsibility, that the equipment described below complies with the requirements of the European R&TTE directive 2006/95/EC, and directive 2011/65/EC(RoHS) . Equipment: N300 Universal Wi-Fi Extender Model No.: EW-7438RPn... - Page 123 Notice According to GNU General Public License Version 2 This product includes software that is subject to the GNU General Public License version 2. The program is free software and distributed without any warranty of the author. We offer, valid for at least three years, to give you, for a charge no more than the costs of physically performing source distribution, a complete machine-readable copy of the corresponding source code.
- Page 124 intact all the notices that refer to this License and to the absence of any warranty; and give any other recipients of the Program a copy of this License along with the Program. You may charge a fee for the physical act of transferring a copy, and you may at your option offer warranty protection in exchange for a fee.
- Page 125 6. Each time you redistribute the Program (or any work based on the Program), the recipient automatically receives a license from the original licensor to copy, distribute or modify the Program subject to these terms and conditions. You may not impose any further restrictions on the recipients’...
Need help?
Do you have a question about the EW-7438RPn V2 and is the answer not in the manual?
Questions and answers