Edimax EW-7238RPD User Manual
N300+ dual-band universal wi-fi extender
Hide thumbs
Also See for EW-7238RPD:
- Quick installation manual (25 pages) ,
- Brochure & specs (4 pages)
Table of Contents
Advertisement
Quick Links
Advertisement
Table of Contents

Related Manuals for Edimax EW-7238RPD


Summary of Contents for Edimax EW-7238RPD
- Page 1 EW-7238RPD User Manual 12-2012 / v1.0...
- Page 2 COPYRIGHT Copyright Edimax Technology Co., Ltd. all rights reserved. No part of this publication may be reproduced, transmitted, transcribed, stored in a retrieval system, or translated into any language or computer language, in any form or by any means, electronic, mechanical, magnetic, optical, chemical, manual or otherwise, without the prior written permission from Edimax Technology Co., Ltd.
-
Page 3: Table Of Contents
CONTENTS PRODUCT INFORMATION ......................5 I-1. Package Contents ........................5 I-2. Hardware ..........................6 I-3. LED Status ..........................7 I-4. Safety Information ........................8 I-5. System Requirements ......................8 QUICK SETUP ..........................9 II-1. iQ Setup ........................... 9 II-2. WPS Setup ..........................18 II-3. - Page 4 IV-1-4-3. Mac ..........................79 IV-2. Troubleshooting ......................... 81 IV-3. Glossary ............................83...
-
Page 5: Product Information
I. PRODUCT INFORMATION Thank you for purchasing the Edimax EW-7238RPD N300+ Dual-Band Universal Wi-Fi Extender. Extend dual-band coverage anywhere around your home and enjoy Wi-Fi on all your devices. I-1. Package Contents Access Key Card Ethernet Cable EW-7238RPD CD with User Manual &... -
Page 6: Hardware
I-2. Hardware Reset/WPS Button ON/OFF Switch LAN Port Item Name Description Reset / WPS Button Resets the extender to factory default settings (clears all settings) or starts the WPS function. Reset: Press this button and hold for 10 seconds to restore all settings to factory defaults. -
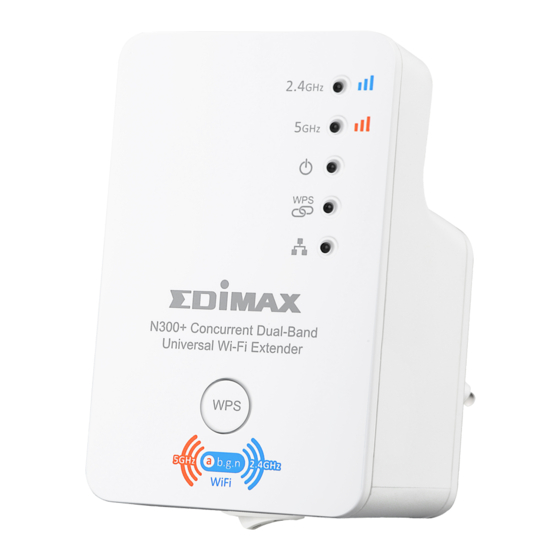
Page 7: I-3. Led Status
I-3. LED Status Color LED Status Description Excellent signal. Signal strength: 60 – 100%. Signal Strength Slow Good signal. Flashing Signal strength: 60 – 40%. Amber Quick Poor signal. Flashing Signal strength: below 40%. 2.4 GHz No signal detected or in LED off mode. -
Page 8: Safety Information
LAN port connected. LAN activity (transferring or Flashing Green receiving data). LAN port not connected. I-4. Safety Information In order to ensure the safe operation of the device and its users, please read and act in accordance with the following safety instructions. 1. -
Page 9: Ii. Quick Setup
II. QUICK SETUP There are two ways you can quickly setup the Wi-Fi extender - using browser-based iQ Setup (II-1. iQ Setup) or using the WPS button (II-2. WPS Setup). Note: It is recommended that you plug in the extender close to your router/access point for the setup process. - Page 10 Plug one end of the Ethernet cable into the Wi-Fi extender’s Ethernet port. Plug the other end of the cable into your computer’s Ethernet port. Use your Wi-Fi device (e.g. computer, tablet, smartphone) to search for a Wi-Fi network with the SSID “Edimax.Setup” and connect. SSID: Edimax.Setup 3.
- Page 11 4. iQ Setup will display all available 2.4GHz and 5GHz Wi-Fi networks, listed under “SSID”. Please select one or both root Wi-Fi networks that your extender will connect to and subsequently extend. If you don’t wish to use either the 2.4GHz or 5GHz band you must select “Disable” in order to continue.
- Page 12 36, 40, 44 & 48 (Europe) and channels 36, 40, 44, 48, 149, 153, 157, 161 & 165 (U.S.) If you do not see your 5GHz network listed, you may need to change your router/access point’s 5GHz channel. 5. If the network you wish to connect to has a hidden SSID, select “Setup extender manually”...
- Page 13 7. Click “Next” to continue and you will be prompted to add http://edimax.setup to your bookmarks (Internet Explorer and Firefox only). This is the URL to access the extender’s browser based configuration interface to further configure the settings of the extender, or to run iQ Setup again.
- Page 14 Note: If the extender cannot obtain an IP address from the router/access point then you will see the screen below. Click the “Static IP” button to assign an IP address to the extender and then click “APPLY” to restart the device.
- Page 15 Typically, this may occur for smartphone users who setup the extender via a wireless connection (as shown in II-1. iQ Setup 2.ii). It is likely that after the extender restarted, your smartphone re-connected to the Edimax.Setup SSID which is now, upon completion of setup, redundant.
- Page 16 11. After the device has restarted you will see a congratulations screen as shown below, displaying the name and security key for each of the extender’s Wi-Fi networks. 12. The extender is now functional and ready for use. If you wish to move the extender to another location, remember to switch off the extender before you unplug it.
- Page 17 14. Select the SSID which you named your extender’s Wi-Fi network in Step 5 or 6 and enter your password/security key if you set one. Note: Remember to select the SSID of your extender’s Wi-Fi network – not your existing root Wi-Fi network. Windows: Windows 8 Windows Vista / 7...
-
Page 18: Ii-2. Wps Setup
Mac: II-2. WPS Setup Note: The next section WPS Setup describes an alternative setup method to iQ Setup. If you already completed iQ Setup, it is not necessary to perform WPS Setup. Note: Please ensure the extender is ready (power LED ) on, not flashing) before activating WPS. - Page 19 1. Press and hold the WPS/Reset button on the wireless router/access point for the correct length of time (check router/access point’s user manual) to activate its WPS for 2.4GHz or 5GHz. . Within two minutes, press and hold the WPS button on the extender for two seconds to activate WPS.
-
Page 20: Ii-3. Resetting The Wireless Extender
frequency band. In step 1 please activate WPS on your router/access point for the alternate frequency 2.4GHz or 5GHz depending on which frequency you previously set up. Note: Please check the instructions for your wireless router/access point to confirm how long you need to hold down its WPS button to activate WPS for 2.4GHz or 5GHz. -
Page 21: Ii-4. Connection Problems
II-4. Connection Problems If the extender’s 2.4GHz or 5GHz Wi-Fi is disconnected from its root network, your browser will forward to the page shown below: The status of the extender will be displayed, please check your WAN connection and ensure that your router/access point is working properly. To configure the settings of the extender, click “Go to Web Control Panel”... -
Page 22: Ii-5. Choosing The Best Location For Your Extender
II-5. Choosing the Best Location for Your Extender The best location to place the Wi-Fi extender is one which is an open space, roughly in the middle between your router and the Wi-Fi dead zone, and where the Wi-Fi extender LED displays “Excellent” signal strength. Please consider that Wi-Fi performance can be affected by environmental factors such as the thickness and proximity of walls, or interference from other devices such as microwaves or wireless telephones, and choose the location of... -
Page 23: Iii. Browser Based Configuration Interface
To access the browser based configuration interface, enter http://edimax.setup into the URL bar of a web browser on a computer which is connected to the extender’s Wi-Fi network. You will be prompted for a username and password. The default username is “admin” and the default password is “1234”. - Page 24 You will arrive the at Home page, use the menu on the left side of the screen to navigate. You can also change the language using the drop down menu in the top right corner. III-1. Home III-2. iQ Setup III-3.
-
Page 25: Iii-1. Home
III-1. Home The Home page shows the basic status and information of the wireless extender. Note: Screenshots shown in this manual are examples. The information you see on your screen will be unique to your configuration. - Page 26 System Uptime Displays the total passed time since the device was turned Hardware Version Displays the hardware version. Firmware Version Displays the current firmware version. Click “Upgrade Firmware” to open a new window to upgrade to a new firmware version. Mode Displays the current wireless operating mode.
- Page 27 MAC address Displays the MAC address of the LAN interface. Active Wireless Client Table MAC Address Displays the MAC address of the wireless client. Mode Displays the transmission mode (802.11b, 802.11n or 802.11g). Tx Packet Tx (Transmission) packet counter. Rx Packet Rx (Received) packet counter.
-
Page 28: Iii-2. Iq Setup
III-2. iQ Setup To perform iQ Setup again and configure the Wi-Fi networks which the extender will connect to, select “iQ Setup”. You will see the screen below. Please refer back to II-1 iQ Setup onwards for guidance on iQ Setup. -
Page 29: Iii-3. Wps Settings
III-3. WPS Settings WPS (Wi-Fi Protected Setup) is a simple way to establish connections between WPS compatible devices. WPS devices feature a WPS function which can be activated by pushing a WPS button on the device or from within the device’s firmware/configuration interface. - Page 30 WPS Settings Select which frequency Wi-Fi (2.4GHz or 5Ghz) you wish to configure WPS settings for. 2.4G / 5G Wi-Fi Protected Setup Information 2.4G or 5G Wi-Fi Protected Setup Information will be displayed here depending on your selection for WPS Settings (above). WPS Status Displays “Configured”...
-
Page 31: Iii-4. Advanced Settings
device (refer to client device’s user manual for guidance on how to do so) in order to establish a connection. The WPS LED ( ) will display ON to indicate a successful connection, and will remain ON for 5 minutes (see I-3. -
Page 32: Iii-4-1
Click “CONTINUE” to save the changes and continue configuring other settings, or click “APPLY” to restart the system and make the changes take effect. III-4-1. WLAN 2.4GHz Security Security settings for your extender’s 2.4GHz Wi-Fi network can be configured here. If you disable the extender’s 2.4GHz band during iQ Setup then this option will not be displayed in the “Advanced Settings”... -
Page 33: Iii-4-2
access point/router. This security type will be displayed here. Security Key Enter a security key for your Wi-Fi extender’s 2.4Ghz network. This security key does not have to be the same as the root access point/router’s security key. Click “APPLY” to make changes take effect. The following message will appear: Click “CONTINUE”... - Page 34 Broadcast SSID Choose whether to broadcast the SSID for your extender’s 5GHz Wi-Fi network. Device SSID Enter the SSID for the extender’s 5GHz Wi-Fi network (this is a name used to identify the Wi-Fi network). Security Type The extender will set the same security type as the root access point/router.
-
Page 35: Iii-4-3
III-4-3. Administration Utility The Administration Utility page enables you to modify the wireless extender’s password and IP address. - Page 36 Password Settings Current Password Enter your current password. The default password is 1234. New Password Enter your desired new password here. You can use any combination of letters, numbers and symbols up to 20 characters. Re-Enter Password Confirm your new password. 2.4GHz Obtain an IP address Assign an automatic IP address to the wireless...
- Page 37 If you are unable to connect to the browser based configuration interface using “http://edimax.setup”, it is possible that you assigned an incorrect IP address to the extender. In this case you can reset the wireless extender back to its default IP address.
-
Page 38: Iii-4-4
The latest firmware can be downloaded from the Edimax website. You will see the following screen: Manage Settings Backup Settings Click “Save” to save the current settings of the extender as a config.bin file to your specified location. - Page 39 Defaults A pop-up window will appear and ask you to confirm, please click “Ok”. A status bar will indicate the progress of the reset: Note: Restoring settings to the factory default will restore all settings, configurations and passwords back to the factory default. Note: You can also reset the device to the factory default by pressing and holding the Reset/WPS button...
- Page 40 Reboot A system reboot will restart the device without affecting existing settings. In the event that the device malfunctions or is not responding, a system reboot is recommended. APPLY Click “APPLY” to reboot the system. You will be asked to confirm, and informed that the reboot may take a while.
-
Page 41: Iv. Appendix
IV. APPENDIX IV-1. Configuring your IP address Before you use the wireless extender, please make sure your computer is set to use a dynamic IP address. This means your computer can obtain an IP address automatically from a DHCP server. This is a simple procedure, which is explained step by step in IV-1-1. -
Page 42: Iv-1-1. How To Configure Your Computer To Use A Dynamic Ip Address
follow the guide appropriate for your operating system in IV-1-2. How to modify the IP address of your PC or Macintosh. Note: For guidance on how to assign a new IP address to the wireless extender, so that it is within the same IP address subnet of your network, please refer to III-4-3. - Page 43 2. Select “Obtain an IP address automatically” and “Obtain DNS server address automatically”, then click “OK”.
-
Page 44: Iv-1-1-2. Windows Vista
IV-1-1-2. Windows Vista 1. Click the “Start” button (it should be located in the lower-left corner of your computer), then click “Control Panel”. Click “View Network Status and Tasks”, then click “Manage Network Connections”. Right-click “Local Area Network”, then select “Properties”. The “Local Area Connection Properties” window will then appear, select “Internet Protocol Version 4 (TCP / IPv4)”, and then click “Properties”. -
Page 45: Iv-1-1-3. Windows 7
IV-1-1-3. Windows 7 1. Click the “Start” button (it should be located in the lower-left corner of your computer), then click “Control Panel”. - Page 46 2. Under “Network and Internet” click “View network status and tasks”. 3. Click “Local Area Connection”. 4. Click “Properties”.
- Page 47 5. Select “Internet Protocol Version 4 (TCP/IPv6) and then click “Properties”. 3. Select “Obtain an IP address automatically” and “Obtain DNS server address automatically”, then click “OK”.
-
Page 48: Iv-1-1-4. Windows 8
IV-1-1-4. Windows 8 1. From the Windows 8 Start screen, you need to switch to desktop mode. Move your curser to the bottom left of the screen and click. 2. In desktop mode, click the File Explorer icon in the bottom left of the screen, as shown below. - Page 49 3. Right click “Network” and then select “Properties”. 4. In the window that opens, select “Change adapter settings” from the left side.
- Page 50 5. Choose your connection and right click, then select “Properties”. 6. Select “Internet Protocol Version 4 (TCP/IPv6) and then click “Properties”.
- Page 51 4. Select “Obtain an IP address automatically” and “Obtain DNS server address automatically”, then click “OK”.
-
Page 52: Iv-1-1-5. Mac Os
IV-1-1-5. Mac OS Note: Please ensure that your wireless extender is switched on and connected to your Macintosh via Ethernet cable before you begin. 1. Have your Macintosh computer operate as usual, and click on “System Preferences”. 2. In System Preferences, click on “Network”. 3. -
Page 53: Iv-1-2. How To Modify The Ip Address Of Your Pc Or Macintosh
4. Click on “Ethernet” in the left panel and then click the drop down arrow for the menu labeled “Configure IPv4” in the right panel. From the drop down menu, select “Using DHCP” and then click “Apply”. IV-1-2. How to Modify the IP Address of Your PC or Macintosh Please follow the instructions appropriate for your operating system. - Page 54 2. Select “Use the following IP address”, then input the following values: Note: Your existing static IP address will be displayed in the “IP address” field before you replace it. Please make a note of this IP address, subnet mask, default gateway and DNS server addresses.
-
Page 55: Iv-1-2-2. Windows Vista
IV-1-2-2. Windows Vista 1. Click the “Start” button (it should be located in the lower-left corner of your computer), then click “Control Panel”. Click “View Network Status and Tasks”, then click “Manage Network Connections”. Right-click “Local Area Network”, then select “Properties”. The “Local Area Connection Properties” window will then appear, select “Internet Protocol Version 4 (TCP / IPv4)”, and then click “Properties”. - Page 56 Select “Use the following IP address”, then input the following values: Note: Your existing static IP address will be displayed in the “IP address” field before you replace it. Please make a note of this IP address, subnet mask, default gateway and DNS server addresses.
-
Page 57: Iv-1-2-3. Windows 7
IV-1-2-3. Windows 7 1. Click the “Start” button (it should be located in the lower-left corner of your computer), then click “Control Panel”. - Page 58 2. Under “Network and Internet” click “View network status and tasks”. 3. Click “Local Area Connection”.
- Page 59 4. Click “Properties”. 5. Select “Internet Protocol Version 4 (TCP/IPv6) and then click “Properties”.
- Page 60 6. Select “Use the following IP address”, then input the following values: Note: Your existing static IP address will be displayed in the “IP address” field before you replace it. Please make a note of this IP address, subnet mask, default gateway and DNS server addresses.
-
Page 61: Iv-1-2-4. Windows 8
IV-1-2-4. Windows 8 1. From the Windows 8 Start screen, you need to switch to desktop mode. Move your curser to the bottom left of the screen and click. 2. In desktop mode, click the File Explorer icon in the bottom left of the... - Page 62 screen, as shown below. 3. Right click “Network” and then select “Properties”.
- Page 63 4. In the window that opens, select “Change adapter settings” from the left side. 5. Choose your connection and right click, then select “Properties”.
- Page 64 6. Select “Internet Protocol Version 4 (TCP/IPv4) and then click “Properties”. 7. Select “Use the following IP address”, then input the following values: Note: Your existing static IP address will be displayed in the “IP address” field before you replace it. Please make a note of this IP address, subnet mask, default gateway and DNS server addresses.
-
Page 65: Iv-1-2-5. Mac Os
IV-1-2-5. Mac OS Note: Please ensure that your wireless extender is switched on and connected to your Macintosh via Ethernet cable before you begin. 1. Have your Macintosh computer operate as usual, and click on “System Preferences” 2. In System Preferences, click on “Network”. - Page 66 3. Here you will see all of your network connections. Network Preferences will now display an Ethernet adapter, as shown below. The status of “Ethernet” should be “Connected”. 4. Click on “Ethernet” in the left panel and then click the drop down arrow for the menu labeled “Configure IPv4”...
- Page 67 5. In the panel on the right side, enter IP address 192.168.9.20 and subnet mask 255.255.255.0. Click on “Apply”. Note: Your existing static IP address will be displayed in the “IP address” field before you replace it. Please make a note of this IP address, subnet mask, router IP and DNS server address.
-
Page 68: Iv-1-3. How To Find Your Network Security Key
IV-1-3. How to Find Your Network Security Key To find your network security key, please follow the instructions appropriate for your operating system. Note: If you are using Windows XP or earlier, please contact your ISP or router manufacturer to find your network security key. - Page 69 3. Click on “Manage wireless networks” in the left menu. 4. You should see the profile of your Wi-Fi network in the list. Right click on your Wi-Fi network and then click on “Properties”. 5. Click on the “Security” tab, and then check the box labeled “Show characters”.
-
Page 70: Iv-1-3-2. Windows 8
IV-1-3-2. Windows 8 8. From the Windows 8 Start screen, you need to switch to desktop mode. Move your curser to the bottom left of the screen and click. 9. In desktop mode, click the network icon in the bottom right corner. - Page 71 10. Select your Wi-Fi connection from the list and right click. Select “View connection properties”. 11. In the window that opens, click the “Security” tab and check the box labeled “Show characters”. Your network security key will be displayed in the field “Network security key”.
-
Page 73: Iv-1-3-3. Mac
IV-1-3-3. 1. Open a new Finder window, and select “Applications” from the menu on the left side. Open the folder labeled “Utilities” and then open the application “Keychain Access”. 2. Select “Passwords” from the sub-menu labeled “Category” on the left side, as shown below. - Page 74 3. Double click the SSID of your network and you will see the following window. 4. Check the box labeled “Show password” and you will be asked to enter your administrative password, which you use to log into your Mac. Enter your password and click “Allow”.
- Page 75 Your network security password will now be displayed in the field next to the box labeled “Show password”. In the example below, the network security password is “edimax1234”. Please make a note of your network security password.
-
Page 76: Iv-1-4. How To Find Your Router's Ip Address
IV-1-4. How to Find Your Router’s IP Address To find your router’s IP address, please follow the instructions appropriate for your operating system. IV-1-4-1. Windows XP, Vista & 7 1. Go to “Start”, select “Run” and type “cmd”, then press Enter or click “OK”. 2. -
Page 77: Iv-1-4-2. Windows 8
3. Your router’s IP address will be displayed next to “Default Gateway”. IV-1-4-2. Windows 8 1. From the Windows 8 Start screen, move your curser to the top right corner of the screen to display the Charms bar. - Page 78 12. Click “Search” and enter “cmd” into the search bar. Click the “Command Prompt” app which be displayed on the left side. 13. A new window will open, type “ipconfig” and press Enter.
- Page 79 14. Your router’s IP address will be displayed next to “Default Gateway”. IV-1-4-3. 1. Launch “System Preferences” and click on “Network”. 2. If you are using an Ethernet cable to connect to your network, your router’s IP address will be displayed next to “Router”.
- Page 80 3. If you are using Wi-Fi, click “Wi-Fi” in the left panel, and then “Advanced” in the bottom right corner. 4. Click the “TCP/IP” tab and your router’s IP address will be displayed next to “Router”.
- Page 81 2 minutes and try again. b. Make sure you are using the full, correct URL: http://edimax.setup c. If you are using a MAC or IP address filter, try to connect the wireless extender using a different computer.
- Page 82 obtain an IP address. e. Ensure that all other Wi-Fi/Ethernet adapters are disabled or disconnected. I can’t log onto the a. Password is case-sensitive. Make sure the “Caps browser-based Lock” light is not illuminated. configuration b. If you do not know your password, restore the interface: incorrect device to factory settings.
- Page 83 connected to your router/access point. My network is using a You can modify the IP address of the wireless bridge static IP address, how using the browser based configuration interface. do I assign an IP Please refer to III-4-3. Administration Utility. address to my wireless extender? My wireless extender...
- Page 84 point.com) and one or more IP addresses (such as 192.34.45.8). A DNS server keeps a database of Internet servers and their respective domain names and IP addresses, so that when a domain name is requested (as in typing "Broadbandaccess point.com" into your Internet browser), the user is sent to the proper IP address.
- Page 85 ISP Gateway Address: (see ISP for definition). The ISP Gateway Address is an IP address for the Internet access point located at the ISP's office. ISP: Internet Service Provider. An ISP is a business that provides connectivity to the Internet for individuals and other businesses or organizations. LAN: Local Area Network.
- Page 86 PC Anywhere UDP 5632 Access point: A access point is an intelligent network device that forwards packets between different networks based on network layer address information such as IP addresses. Subnet Mask: A subnet mask, which may be a part of the TCP/IP information provided by your ISP, is a set of four numbers (e.g.
- Page 87 Federal Communication Commission Interference Statement This equipment has been tested and found to comply with the limits for a Class B digital device, pursuant to Part 15 of FCC Rules. These limits are designed to provide reasonable protection against harmful interference in a residential installation.
- Page 88 This equipment is designed with the utmost care for the safety of those who install and use it. However, special attention must be paid to the dangers of electric shock and static electricity when working with electrical equipment. All guidelines of this and of the computer manufacture must therefore be allowed at all times to ensure the safe use of the equipment.
Need help?
Do you have a question about the EW-7238RPD and is the answer not in the manual?
Questions and answers