
Related Manuals for Ariston GENUS 30 Plus


Summary of Contents for Ariston GENUS 30 Plus
- Page 1 End User, Installation & Servicing Instructions Type C Boilers G.C.N: 47-116-28 LEAVE THESE INSTRUCTIONS WITH THE END USER...
-
Page 2: Table Of Contents
TABLE OF CONTENTS Gas Adjustments General Information 16.1 Changing the Type of Gas Control Panel Maintenance How to Use Servicing Instructions 18.1 Replacement of Parts Anti-Frost Device 18.2 To Gain General Access Maintenance 18.2.1 Removing the front panel 18.2.2 Removing the control panel Trouble Shooting 18.3 Access to the Control System... - Page 3 Dear Customer, Thank you for choosing an ARISTON boiler. We guarantee that your boiler is a reliable and technically sound product. The following Instructions provide detailed instructions and recommendations for proper installation, use and maintenance. Remember to keep this manual in a safe place for future reference e.g. by the gas meter.
-
Page 4: General Information
GENERAL MTS (GB) Limited support the initiative. Your installer will give you, and show you how to use, a Log Book which will give you INFORMATION important information about your boiler and heating system. Please have this Log Book to hand whenever you contact a service engineer or All CORGI Registered Installers carry a CORGI ID card, and have a registration number. -
Page 5: How To Use
HOW TO USE Switching on 1. Check that the pressure in the heating system is adequate, i.e. the pressure gauge 33 shows 1 bar minimum and 1.5 bar maximum. 2. Check that the gas service tap 39 (Fig. 3.3) is opened (Figs. -
Page 6: Anti-Frost Device
To obtain central heating only - Turn the selector switch 25 to the « » position, the green LED 29 will light. - Ensure that the time clock is on (see S 8), and that the room ECTION thermostat is calling for heat. - The control knob 27 «... -
Page 7: Trouble Shooting
TROUBLE Incorrect functions are signalled by the diagnostic indicator LED 31 display flashing. Contact your local SHOOTING authorised Servicing Centre (unless a low water fault is indicated, in which case refer to Section 7 for filling instructions). . 6.1 FILLING A method for initially filling the system and replacing lost water during servicing and initial filling (in accordance with INSTRUCTIONS... -
Page 8: Time Clock
TIME CLOCK Setting the Mechanical Clock 1. General layout The mechanical clock covers a 24 hour period. Each tappet represents 15 minutes A (Fig. 4). An override switch is located on the clock B (Fig 8.1). 2. To set the time To set the time of day, grasp the outer edge of the dial and turn slowly clockwise until the correct time is lined up with the arrow C (Fig. -
Page 9: Setting The Digital Clock
Setting the Digital Clock Manual switch Summer and winter time setting Reset Enter Enter switching the hours times Week- days flash Imput Enter time minutes Enter weekday/s Automatic Manual Continuous Operation Operation Operation = ON = ON = Continuously ON = OFF = OFF = Continuously OFF... - Page 10 Programme ON or OFF with the “ ” key: “ ”= OFF; “ ”= ON Enter the hour using “h” Enter the minutes using “m” If a switching command is to be carried out every day (1 2 3 4 5 6 7) then store using the “...
-
Page 11: General Information For The Installer
9. GENERAL INFORMATION Read the instructions and recommendations in these Installation and Servicing Instructions carefully to ensure proper installation, use and FOR THE INSTALLER maintenance of the appliance. Keep this manual in a safe place. You may need it for your own reference while Servicing Technicians or your installer may need to consult it in the future. -
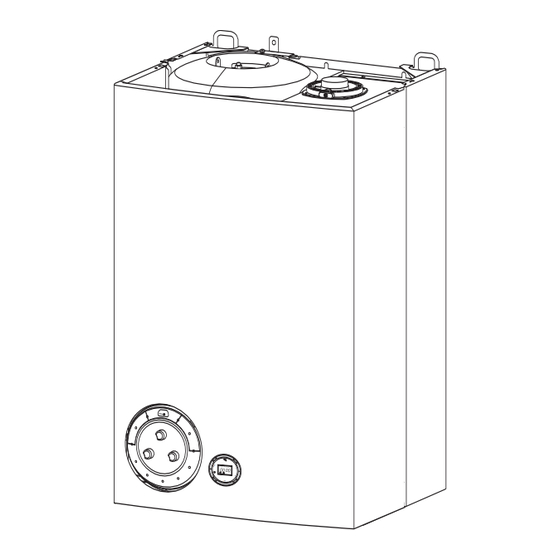
Page 12: Overall View
7 - Visual check of the primary heat exchanger: - check for overheating of the exchangers fins; - clean the exhaust side of the exchanger and fan if necessary. 8 - Regulate the gas pressure, ignition pressure, partial flame, maximum flame. -
Page 13: Installation
In GB it is necessary to comply with the Water Supply (Water Fittings) Regulations 1999, for Scotland, The Water Bylaws 2000, Scotland. The Genus 30 Plus is an approved product under the Water Regulations. To comply with the Water Regulations, your attention is drawn to The Water Regulations guide published by the Water Regulations Advisory Scheme (WRAS) gives full details of the requirements. -
Page 14: Siting The Appliance
and in the Republic of Ireland in accordance with the following Codes of Practice: I.S. 813 Domestic Gas Installations The following BS Standards give valuable information; BS 5546 Installation of hot water supplies for domestic purposes BS 5449 Forced circulation hot water systems BS 7074 Specification for expansion vessels BS 7593... -
Page 15: Clearances
The type C appliances (in which the combustion circuit, air vent intake and combustion chamber are air-tight with respect to the room in which the appliance is installed) can be installed in any type of room. Secondary ventilation is not required with this boiler. The boiler must be installed on a solid, non-combustible, permanent wall to prevent access from the rear. -
Page 16: Mounting The Appliance
10.6 Mounting the Appliance After removing the boiler from its packaging, remove the template from the separate box containing the connection kit. N : Pay particular attention to any test water that may spill from the appliance. Place the template in the position the appliance is to be mounted and after ensuring it is hanging squarely, use it to drill the holes for the hanging bracket, connection kit and flue pipe(s) NB: For further information relating to the flue... -
Page 17: Gas Connection
Warning, this appliance must be earthed. External wiring must be correctly earthed, polarised and in accordance with relevant regulations / rules. In GB this is the current I.E.E. WIRING REGULATIONS. In IE reference should be made to the current edition of the ETCI rules. This boiler is supplied for connection to a 220 - 240 V ~ 50 Hz supply. - Page 18 System Design: This boiler is suitable only for sealed systems. Drain Cocks: These must be located in accessible positions to permit the draining of the whole system. The taps must be at least 15mm nominal size an manufactured in accordance with BS 2870:1980. Safety Valve Discharge (Primary Water): The discharge should terminate facing downwards on the exterior of the building in a position where discharging (possibly boiling...
- Page 19 iii) Discharges at high level; I.e. into a metal hopper and metal down pipe with the end of the discharge pipe clearly visible (tundish visible or not). Or onto a roof capable of withstanding high temperature discharges of water 3m from any plastic guttering systems that would take such a discharge (tundish visible).
- Page 20 It can accept up to 7l (1.5 gal) of expansion water. If the heating circuit has an unusually high water content, calculate the total expansion and add an additional sealed expansion vessel with adequate capacity. Domestic Water: The domestic water must be in accordance with the relevant recommendation of BS 5546:1990.
- Page 21 Residual Head of the Boiler ∆T = 20 Operating Pressure Minimum flow (thermostatic valves closed) 1100 1000 1200 Fig. 10.5 B C D E Pressure Reducing Valve Cold Water Inlet Other Users Fig. 10.6 Drain Tap (at lowest point) Gas Inlet Cold Water Inlet Cock C.H.
-
Page 22: 11. Connecting The Flue
11. Connecting the Flue 11.1 Flue Connections Flue System The provision for satisfactory flue termination must be made as described in BS 5440-1, for IE recommendations I.S.813. The appliance must be installed so that the flue terminal is exposed to outdoor air, consideration must be given to terminal discharges onto a pathway or passageway, check that the combustion discharges will not cause a nuisance and that the terminal will not obstruct the... -
Page 23: Fitting The Coaxial Flue
The minimum acceptable spacing from the terminal to obstructions and ventilation openings are specified in Fig. 11.1 ARNING The exhaust gas ducts must not be in contact with or close to inflammable material and should not pass The boiler is designed to be connected to a coaxial flue through building structures or walls made of inflammable discharge system. -
Page 24: Fitting The Telescopic Flue
e.g. X = 508mm + 22mm = 530mm 860 - 530 = 330mm (Length to be cut from the plain end of the flue). Once cut to the required length, ensure that the flue is free from burrs and reassemble the flue. If fitting the flue from inside of the building attach the grey outer wall seal to the flue terminal and push through the flue through the hole, once the wall seal has passed through the hole, pull the flue back until the seal is... -
Page 25: Fitting The Coaxial Flue (Ø 60/100 Mm - Vertical)
ONTENTS 11.4 Fitting the coaxial flue (Ø 60/100 (60mm) ILICONE Vertical) (60/100mm : 80/125mm) ONICAL DAPTOR (80/125mm) ERTICAL CREWS The vertical flue kit is supplied with a specially designed weather proof terminal fitted, it can be used either with a flat roof or a pitched roof. -
Page 26: Fitting The Twin Pipe (Ø 80/80 Mm)
Where it is not possible to terminate the flue within the distance 11.5 Fitting the twin pipe (Ø80/80) permitted for coaxial flues, the twin flue pipe can be used by fitting a special adaptor to the flue connector and using the aperture for the air intake located on top of the combustion chamber. - Page 27 : Vertical twin flue installations must have a trap on the exhaust. MTS supply a suitable condense trap Part No. 705774 and recommend that this be used in the event that the flue may form condense. When siting the twin flue pipe, the air intake and exhaust terminals must terminate on the same wall, the centres of the terminals must be a minimum of 280 mm apart and the air intake must not be sited above the exhaust terminal (refer to...
- Page 28 Concentric outlet Restrictor 60/100 ø 88.5 Without restrictor Max. length 30 kW L min. = 0.3 m L min. = 1 m (Type 1, Type 2, Type 3) L max. = 1 m L max. = 3 m L = total length of gas intake and exhaust ducts. Twin flue outlet Restrictor Without...
-
Page 29: Electrical Connections
Electrical Connections The 220-240 V and earth connection are made by using the lead provided C (Fig. 12.1) MPORTANT ONNECTION SHOULD BE MADE VIA A FUSED DOUBLE POLE ISOLATING SWITCH WITH CONTACT SEPERATION OF AT LEAST MM ON BOTH POLES LTERNATIVELY A FUSED PIN PLUG AND UNSWITCHED SOCKET MAY BE... -
Page 30: Electrical System Diagrams
. 12.4 Electrical/System Diagrams Ear th Air pressure Swi tch Ear th... -
Page 31: Water Circuit Diagrams
Water circuit Diagrams LEGEND : 20. - Heating safety valve 21. - Pressure gauge 1. - Main heat exchanger 22. - Electrical box 2. - Burner 23. - Overheating safety device 3. - Ignition electrodes 24. - Air pressure switch 4. -
Page 32: Commissioning
MTS (GB) Limited support the initiative. Within the information COMMISSIONING pack you will find a copy of the Log Book. It is important that this is completed in the presence of your customer, they are shown how to use it, and it is signed by them. Please instruct your customer that they must have their Log Book with them whenever they contact a service engineer or us. -
Page 33: Completion
When the installation and filling are completed, flush the system while cold, refill, turn on the Central Heating system (S 3) and run it ECTION until the temperature has reached the boiler operating temperature. The system must then be immediately flushed through. The flushing procedure must be in line with BS 7593:1992 code of practice for treatment of water in domestic hot water central heating systems. -
Page 34: Removal And Fitting Of The Case - Servicing
15.3 Removal and fitting of the case - Servicing Removal of the case - undo the 4 case retaining screws (Fig. 15.1) - disengage the clips - remove the case . 15.2 Fitting the case detail Remove the protective film from the front and rear of the case - position the case (Fig. -
Page 35: Control Panel
15.4 Control Panel Legend: 25 - Selector Knob : Central Heating and Hot Water Hot Water Only Stand-by Central Heating Only 26 - D.H.W. temperature control knob 27 - C.H. temperatre control knob 28 - Heating temperature indicator and diagnostic indicator 29 - Green indicator - Power ON 30 - Orange indicator - Burner ON... -
Page 36: Sequence Of Operation
To obtain central heating only - Turn the selector switch 25 to the « » position, the green LED 29 will light. - Ensure that the time clock is on (see Section 4), and if fitted that the room thermostat is calling for heat. - The control knob 27 «... - Page 37 By comparing the actual temperature in relation to the set point on the thermostat control knob. The thermostat control knob regulates the temperature to between approximately 40 C to 85 Once the maximum set temperature has been achieved the burner switches off.
-
Page 38: Operational Adjustments
15.7 Operational Adjustments SETTINGS The boiler is delivered with all dip switches set to the OFF position with the exception of B2 which is set to the ON position (Fig. 15.6). The maximum heating power can be adjusted by turning the potentiometer (P1) between the Min and Max position. To do this it is first necessary to open the electrical box and proceed as follows: Switch off the external power supply, remove the front panel (Section 18.2.1 and 18.2.2), Open the box by pressing the tab P (Fig. -
Page 39: Combustion Analysis
15.8 Combustion Analysis The boiler is designed to make it easy to analyse the combustion by-products. Using the specially designed test points, readings can be taken on the temperature of the combustion by-products and of the combustion air, as well as of the concentrations of O and CO , etc. - Page 40 Gas Adjustments When converting to a gas different from the one for which the boiler is equipped, you should replace the parts delivered with the conversion kit, and make the gas valve adjustments as described below: Setting the minimum and the maximum power of the boiler Check that the supply pressure and dynamic pressure to the gas valve .
- Page 41 NB.: It may be necessary to reset the flame failure reset a number of times during this operation. Genus 30 Plus Remove the pipe from the test point and tighten the screw “C” to the pressure test point in order to seal off Maximum Heating Circuit Power the gas.
- Page 42 Maintenance It is recommended that the following checks be made on the boiler at least once a year: 1 - Check the seals for the water connections; replacement of any faulty seals. 2 - Check the gas seals; replacement of any faulty gas seals. 3 - Visual check of the entire unit.
- Page 43 18. Servicing Instructions To ensure efficient safe operation, it is recommended that the boiler is serviced annually by a competent person. Before starting any servicing work, ensure both the gas and electrical supplies to the boiler are isolated and the boiler is cool.
- Page 44 18.3 Access to the Control System 18.3.1 Removing the main P.C.B. 18.3.2 Removing the display P.C.B. 1. Isolate electricity and carry out step 18.2.1 ; 1. Isolate electricity; 2. Open the control box by pushing on the 2 right clips “B” (see 2.
-
Page 45: Time Clock 18
18.3.3 Removing the fuses 18.3.4 Removing the time clock 1. Carry out step 18.2.1 ; 1. Carry out step 18.2.1 ; 2. Open the electrical box as in step 18.3.1 Fig.18. 6 2. Open the electrical box as in step 18.3.1 Fig. 18.6; 3. - Page 46 18.4 Access to the Sealed Chamber 18.4.1 Removing the sealed chamber front panel 18.4.3 Removing the burner 1. Carry out step 18.2.1; 1. Carry out steps 18.2.1, 18.4.1 and 18.4.2 as above; 2. Unscrew the six self tapping screws “D” to release the 2.
- Page 47 18.4.4 Removing the electrodes 18.4.5 Removing the burner manifold 1. Carry out steps 18.2.1, 18.4.1 and 18.4.2 as above; 1. Carry out steps 18.2.1, 18.2.2, 18.4.1 and 18.4.2; 2. Disconnect the electrode wires (see Fig. 18.20, Fig 18.21 & 2. Remove the burner as in step 18.4.3; 18.22);...
- Page 48 18.4.6 Removing the main heat exchanger 1. Carry out steps 18.2.1, and 18.4.1 as above; 2. Drain the boiler (only heating circuit) as in step 18.6.1; 3. Remove the NTC clips “J1” and overheat sensor clip “J2” (see Fig. 18.30 and 18.31); 4.
- Page 49 18.4.7 Removing the air pressure switch 18.4.8 Removing the fan 1. Carry out steps 18.2.1 and 18.4.1; 1. Carry out steps 18.2.1 and 18.4.1; 2. Disconnect the wire connectors “K1” (see Fig. 18.33); 2. Disconnect the wire connectors “L1” and the earth wire 3.
- Page 50 18.5 Access to the Gas Valve 18.5.2 Removing the gas valve Important. ensure gas supply to boiler is turned off 18.5.1 Removing the spark generator 1. Carry out step 18.2.1 ; 2. Remove the spark generator by only removing the screw 1.
- Page 51 18.6 Access to the Water Circuit Important ! Before any component is removed (except the 3 18.6.2 Removing the 3 way valve way valve motor), the boiler must be drained of all water. 1. Carry out steps 18.2.1 and 18.2.2 ; 18.6.1 Drain down 2.
- Page 52 18.6.3 Removing the heating return filter 18.6.5 Removing the pressure relief valve (3 bar) 1. Unscrew 1/4 ball screw “R” (see Fig. 18.58); 1. Carry out steps 18.2.1 and 18.2.2; 2. Pull it down (see Fig. 18.59); 2. Remove the clip securing the valve and disconnect the 3.
- Page 53 18.6.8 Removing the pump 18.6.9 Removing the expansion vessel 1. Carry out step 18.2.1; 1. Carry out step 18.2.1; 2. Open the electrical box cover as in step 18.3.1 Fig. 18.6 2. Remove the screw “U1” (see Fig. 18.70); 3. Remove the pump plug from the control board and earth 3.
- Page 54 18.6.10. Removing the overheat thermostat 18.6.13 Removing the flow switch 1. Remove the casing as in step 18.2.1 ; 1. Remove the casing as in step 18.2.1 ; 2. Remove electrical connection and the two clips fixing the 2. Pull off the thermostat connections. Then remove the flow switch (see Fig.
- Page 55 18.6.14 Removing the D.H.W. expansion vessel 18.6.15 Removing the flow limiter 1. Remove the casing as in step 18.2.1 ; 1. Carry out steps 18.2.1 and 18.2.2; 2. Remove the clip (see Fig. 18.79 & 18.80); 2. Remove the two clips and remove the pipe (see Fig. 18.82); 3.
- Page 56 18.6.16 Removing the tank 1. Remove the casing as in steps 18.2.1 and 18.2.2; 2. Remove all clips, nuts (No. 30 spanner) and eletrical connections (NTC) from the tank (see Fig. 18.86 & 18.87); 3. Remove the clip on the bottom of the boiler to disengage the pipe between the chassis and the thermal valve (see Fig. 18.88); 4.
- Page 57 19. FAULT FINDING GUIDE (Flow-chart) It is possible to detect and correct defects by using the standard fault finding diagrams described in this chapter. HESE CHECKS ARE NOT EXHAUSTIVE PRELIMARY CHECKS MAKE SURE THAT: 1 - There is sufficient water in the system 2 - The gas is turned on 3 - The electrical supply is...
- Page 58 IS THE PUMP RUNNING? POWER TO THE PUMP? 1 - Check DHW flowswitch 2 - Check pump cable 3 - Check/replace P.C.B. 1 - Check that the pump is not stuck 2 - Release/replace pump IS THE FAN RUNNING? 1 - Check Air Pressure POWER TO Switch FAN ?
- Page 59 IS THE AIR PRESSURE SWITCH ACTIVATED? CHECK ∆P > 70 pa ∆P ON TEST 1 - Check A.P. switch cable 2 - Check/replace A.P. switch PRESSURE INTAKE ∆P ≤ 70 pa 1 - Check exhaust discharge 2 - Check pipes 3 - Check fan efficiency 1 - Check/replace ignition IS SPARK...
- Page 60 FAULTS POSSIBILE CAUSES Drawing D.H.W: THERE STILL - check temperature probes When you turn on a tap A PROBLEM? - faulty D.H.W. flow switch burner switches off Drawing D.H.W: - faulty 3-way valve radiators heat up in summer mode Drawing D.H.W: - check temperature probes insufficient hot water NORMAL...
- Page 61 Short Spares List Manf. date Key N° Description G.C N° Manf. Pt. N° Type from 277783 61010572 OVERHEAT THERMOSTAT 100°C 990686 THERMISTOR 61305840 IGNITION ELECTRODE 61303302 DETECTION ELECTRODE 61307665 61307665 AIR PRESSURE SWITCH (30kW) 61314591 GAS VALVE (NAT) 61311269 SPARK GENERATOR 61302483 MOTOR (3-WAY VALVE) 61303330...
- Page 64 Technical Information GENUS 30 PLUS 1312BN3612 CE Certification 29.8/12.0 Thermal Capacity max/min kW 30/7.8 Thermal Power max/min kW 90.7 Efficiency of Nominal Thermal Capacity 84.4 Efficiency at 30% of Nominal Thermal Capacity Residual Discharge Head mbar 3.16 Consumption at Nominal Capacity (G20-G25) 2.35/2.32...
Need help?
Do you have a question about the GENUS 30 Plus and is the answer not in the manual?
Questions and answers