Table of Contents
Advertisement
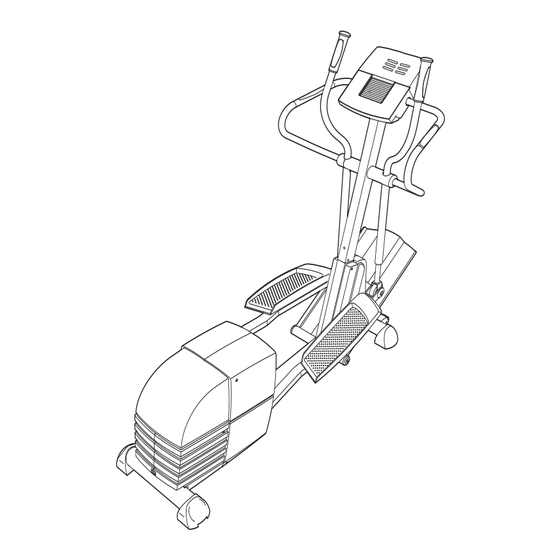
Model No. EPEL7975.1
Serial No.
Serial Number Decal
(beneath the frame)
QUESTIONS?
As a manufacturer, we are com-
mitted to providing complete
customer satisfaction. If you
have questions, or if parts are
damaged or missing, PLEASE
CONTACT OUR CUSTOMER
SERVICE DEPARTMENT
DIRECTLY.
CALL TOLL FREE:
1-866-997-6999
Mon.–Fri., 6 a.m.–6 p.m. MST
ON THE WEB:
www.iconservice.com
CAUTION
Read all precautions and instruc-
tions in this manual before using
this equipment. Keep this manual
for future reference.
_
USER'S MANUAL
Advertisement
Table of Contents

Subscribe to Our Youtube Channel
Related Manuals for Epic Fitness E 760


Summary of Contents for Epic Fitness E 760
- Page 1 Model No. EPEL7975.1 USER’S MANUAL Serial No. Serial Number Decal (beneath the frame) QUESTIONS? As a manufacturer, we are com- mitted to providing complete customer satisfaction. If you have questions, or if parts are damaged or missing, PLEASE CONTACT OUR CUSTOMER SERVICE DEPARTMENT DIRECTLY.
-
Page 2: Table Of Contents
TABLE OF CONTENTS IMPORTANT PRECAUTIONS ..............3 BEFORE YOU BEGIN . -
Page 3: Important Precautions
IMPORTANT PRECAUTIONS WARNING: To reduce the risk of serious injury, read the following important precau- tions before using the elliptical exerciser. 1. Read all instructions in this manual and all 9. Keep your back straight when using the ellip- warnings on the elliptical exerciser before tical exerciser;... -
Page 4: Before You Begin
(see the front cover of this manual and ankles. And the E 760 offers an impressive selec- for the location of the decal). tion of features designed to make your workouts at home more effective and enjoyable. -
Page 5: Assembly
ASSEMBLY To hire an authorized technician to assemble the elliptical exerciser, call toll-free 1-800-445-2480. Assembly requires two persons. Place all parts of the elliptical exerciser in a cleared area and remove the packing materials. Do not dispose of the packing materials until assembly is completed. In addition to the included allen wrenches, assembly requires a phillips screwdriver , two adjustable wrenches... - Page 6 2. While another person lifts the rear of the Frame (1), attach the Rear Stabilizer (30) to the Frame with two M10 x 105mm Button Screws (89). 3. Identify the Ramp Axle (39), which is the longest axle. Next, identify the Ramp Axle Covers (41), which are smaller than the Wheel Covers (not shown).
- Page 7 5. Hold a Ramp Wheel (50) inside of the bracket on one of the Chrome Tubes (45). Hold the Chrome Tube and the Ramp Wheel inside of the bracket on the Left Pedal Leg (46). Slide a Wheel Cover (51) onto the long part of a Bolt Set (101), and insert the Bolt Set into the Left Pedal Leg, the Chrome Tube, and the Ramp Wheel.
- Page 8 8. Apply a small amount of the included high-temperature lubricant to a paper towel. Rub a thin film of the lubri- cant onto each Chrome Tube (45). Identify the Left Upper Body Arm (9), which is marked with an “L.” Slide the Left Upper Body Arm onto the left Chrome Tube (45).
- Page 9 10.Attach the Bookrack (4) to the Console (3) with two M4 x 25mm Round Head Screws (115). 11. Have another person hold the Console (3) near the Upright (2). Do not pinch Connect the Upper Wire Harness (18) to the wire har- the wires ness on the Console (3).
-
Page 10: How To Operate The Elliptical Exerciser
HOW TO OPERATE THE ELLIPTICAL EXERCISER HOW TO PLUG IN THE POWER CORD The green-colored rigid ear, lug, or the like extending from the adapter must be connected to a permanent This product ground such as a properly grounded outlet box cover. must be Whenever the adapter is used, it must be held in Grounded Outlet Box... - Page 11 Note: If there is a sheet of clear plastic on the face of the console, remove the plastic. FEATURES OF THE CONSOLE als and prompts you to increase or decrease your pace as it guides you through an effective workout. The advanced console offers a selection of features designed to make your workouts more enjoyable and In addition, the console features two heart rate pro-...
- Page 12 As you exercise, the indicators around the track HOW TO USE THE MANUAL MODE will light in succession until the entire track is lit. The track will then darken and the indicators will again begin to light in succession. Begin pedaling to activate the console. The upper To activate the console, begin pedaling or push display—The...
- Page 13 If your heart rate is not shown, make sure that Measure your heart rate if desired. your hands are positioned as described. Avoid moving your hands excessively or squeezing the If there are metal contacts too tightly. For optimal performance, sheets of periodically clean the metal contacts using a soft clear plastic...
- Page 14 Segment column of the matrix and no time HOW TO USE A PRESET PROGRAM remains in the program. Note: During the program, you can override the Begin pedaling to activate the console. resistance setting for the current segment by pressing the Resistance buttons. However, when See step 1 on page 12.
- Page 15 Enter a target heart rate. HOW TO USE A HEART RATE PROGRAM If heart rate pro- gram 1 is select- Begin pedaling to activate the console. ed, the letters “PLS” and a target See step 1 on page 12. heart rate will flash in the lower dis- Select one of the heart rate programs.
- Page 16 Note: If the resistance is too high or too low, you Note: If you stop pedaling for several seconds, a can adjust the resistance by pressing the tone will sound and the program will pause. To Resistance buttons. However, when the console restart the program, simply resume pedaling.
-
Page 17: Maintenance And Troubleshooting
MAINTENANCE AND TROUBLESHOOTING Inspect and properly tighten all parts of the elliptical HOW TO MOVE THE ELLIPTICAL EXERCISER exerciser regularly. Replace any worn parts immedi- ately. Stand in front of the elliptical exerciser, hold the han- dlebars firmly, and place one foot against the ramp in For smooth the location shown below. -
Page 18: Exercise Guidelines
EXERCISE GUIDELINES During the first few minutes of exercise, your body WARNING: uses easily accessible carbohydrate calories for ener- gy. Only after the first few minutes of exercise does Before beginning this or any exercise pro- your body begin to use stored fat calories for energy. If your goal is to burn fat, adjust the intensity of your gram, consult your physician. - Page 19 SUGGESTED STRETCHES The correct form for several basic stretches is shown at the right. Move slowly as you stretch—never bounce. 1. Toe Touch Stretch Stand with your knees bent slightly and slowly bend forward from your hips. Allow your back and shoulders to relax as you reach down toward your toes as far as possible.
-
Page 20: Part List
PART LIST—Model No. EPEL7975.1 R1005A Key No. Qty. Description Key No. Qty. Description Frame Lower Wire Harness Upright Foot Console Rear Side Shield Bracket Bookrack Front Side Shield Bracket Upper Handlebar Cover Upper Side Shield Bracket Hand Grip Left Inner Shield Left Handlebar Right Inner Shield Right Handlebar... - Page 21 Key No. Qty. Description Key No. Qty. Description Plastic Bushing M10 x 25mm Button Screw M6 x 18mm Button Bolt M10 x 92mm Carriage Bolt M6 x 38mm Bolt M4 x 16mm Round Head Screw M6 Nut M5 x 16mm Screw M8 Nylon Locknut M4 x 12mm Screw #8 x 9.5mm Screw...
-
Page 22: Exploded Drawing
EXPLODED DRAWING A—Model No. EPEL7975.1 R1005A 99 121... - Page 23 EXPLODED DRAWING B—Model No. EPEL7975.1 R1005A...
-
Page 24: How To Order Replacement Parts
• the MODEL NUMBER of the product (EPEL7975.1) • the NAME of the product (EPIC E 760 elliptical exerciser) • the SERIAL NUMBER of the product (see the front cover of this manual) • the KEY NUMBER and DESCRIPTION of the part(s) (see pages 20 through 23) LIMITED WARRANTY ICON Health &...
Need help?
Do you have a question about the E 760 and is the answer not in the manual?
Questions and answers