Fluke 345 User Manual
Fe powerlog users manual
Hide thumbs
Also See for 345:
- User manual (80 pages) ,
- Calibration manual (36 pages) ,
- Technical data manual (12 pages)

Related Manuals for Fluke 345


Summary of Contents for Fluke 345
- Page 1 ® Power Log PC Application Software Users Manual May 2007 © 2007 Fluke Corporation, All rights reserved. All product names are trademarks of their respective companies.
- Page 2 Product, even if Fluke has been advised of the possibility of such damages.
-
Page 3: Table Of Contents
Introduction......................1 Logging Parainstruments................1 System Requirements ..................2 Installing Power Log..................2 Installing from CD..................2 Installing from Fluke Website ............... 2 Available Language Support ................. 2 Using Power Log ....................3 Starting Power Log..................3 Main Menu Options..................4 Opening a Data File .................. - Page 4 Power Log Users Manual...
-
Page 5: List Of Tables
List of Tables Table Title Page System Requirements....................2... - Page 6 Power Log Users Manual...
-
Page 7: List Of Figures
List of Figures Figure Title Page Power Log Welcome Screen ..................3 Summary Display for User Input ................7 Spreadsheet for Saved Data..................8 RMS Time Plot with Selected Channels Visible............9 Statistics with Channel A Selected................10 Harmonics Time Plot with Selected Channels ............11 Histogram........................ - Page 8 Power Log Users Manual...
-
Page 9: Introduction
Power Log Introduction Power Log is the PC software for Fluke models 345, 435, and 1735. The Fluke 434 also uses Power Log if the 434 logger function is installed. These models are referred to throughout this manual as “the instrument”. Power Log accepts data downloaded from an instrument and is compatible with MS Windows NT, 2000, and XP. -
Page 10: System Requirements
Available Language Support Power Log installs site support in all available languages. Users can view the Fluke website in the language of their choice based on their computer’s operating system (OS) settings. -
Page 11: Using Power Log
2. Start Power Log by selecting the Power Log program icon from the menu: Start | Programs | Fluke | Power Log | Power Log Alternatively, double-click Power Log icon shortcut on your PC desktop. 3. If you are using a 1735, turn on the instrument before you connect the serial cable. -
Page 12: Main Menu Options
Power Log Users Manual Main Menu Options The initial menu presents options for the following: Download Open Print Setup Once you have downloaded data into Power Log, more menu options become available to export and manage data. If there is an active, powered-up instrument attached to the PC, you have the option to download data immediately. -
Page 13: Uninstalling Power Log
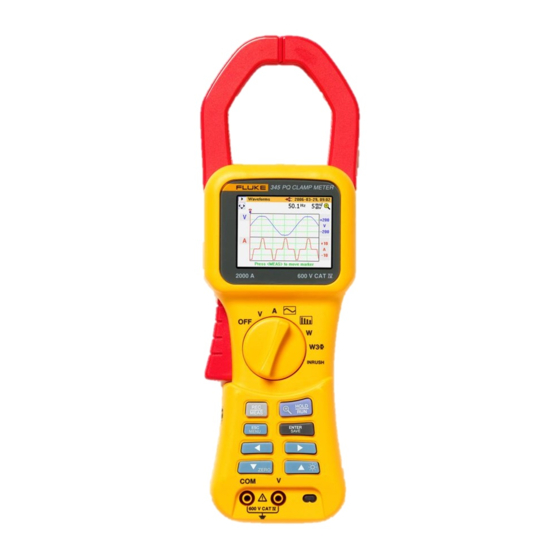
Refer to the manual provided with your instrument for any questions not answered in this manual. Connecting a 345 Connect a 345 to the PC using a standard USB cable supplied with the instrument. The USB port is located on the right side of the instrument. Connecting a 435 Use the optical RS232 interface for connecting the 435 to a PC or printer. -
Page 14: Downloading And Using Data
After the welcome screen and reminders have displayed, the menu offers limited options. Select File | Open, and navigate to the DataFiles folder in the Fluke > Power Log folder. Or, if your data files are at another location on the PC, browse to the location. -
Page 15: Analyzing Data
PC Application Software Analyzing Data Analyzing Data Data can be viewed and printed, or exported for use in other software, such as MS Excel and database programs. Whether downloaded from a connected instrument, or opened from files, the same tabs and window options are visible. Summary Spreadsheet Statistics... -
Page 16: Spreadsheet Tab
Power Log Users Manual Spreadsheet Tab The Spreadsheet tab allows you to view the recorded dates and time, and additionally allows you to filter the data by de-selecting the checkboxes in the top line. Figure 3 shows the Duration checkbox unselected, and only the selected channels and options are visible. -
Page 17: Rms Tab
PC Application Software Analyzing Data RMS Tab The RMS tab displays a timeplot showing the recorded voltages for the selected channels shown in the in Figure 4. eto006.bmp Figure 4. RMS Time Plot with Selected Channels Visible... -
Page 18: Statistics Tab
Power Log Users Manual Statistics Tab Selecting the statistics tab allows you to filter by Maximum, Average, and Minimum values, as well as Selected Channel for the recorded or saved data. Statistical information to support the image is provided in addition to the graphic display of the recorded data (see Figure 5). - Page 19 PC Application Software Analyzing Data eto008.bmp Figure 6. Harmonics Time Plot with Selected Channels This tab is visible only if you captured relevant harmonics data. Figure 7 shows another way of looking at harmonics data. powerloghisto.eps Figure 7. Histogram Note With either the histogram or Time evolution display, filters may be selected and un-selected as needed using the radio buttons at the top of the display window.
-
Page 20: Frequency/Unbalance Tab
Power Log Users Manual Select the Time evolution radio button to change the display to a graph displaying the time along the X (vertical) axis, as shown in the example data in Figure 6. Frequency/Unbalance Tab Unbalance displays the voltage unbalance (%) in a system. This is an important measurement in the case of electric motors, which will run hotter when voltage is not balanced. -
Page 21: Screens Tab
SAVE button on the Instrument. In the example in Figure 10, the power logger in use was the Fluke 1735, and the recording mode set to Harmonics. Use the right and left arrowhead buttons on the top... -
Page 22: Energy Tab
Power Log Users Manual eto011.bmp Figure 10. Screens Pane with Instrument Display Image Energy Tab This mode displays energy cumulatively or in running averages. For example, the Y axis in Figure 11 displays Total energy and energy by phase. The X axis displays the time. The checkboxes allow you to select Active energy (in kWh), Reactive Energy (in kVAh), and to view cumulative energy. -
Page 23: Printing Reports And Exporting Data
PC Application Software Printing Reports and Exporting Data Printing Reports and Exporting Data In addition to viewing recorded and saved data, users have the option of printing reports for review, and exporting data for use in other software programs. Printing Reports Print a report of saved data with these steps: 1. -
Page 24: Exporting Data
Power Log Users Manual Exporting Data Set up data for export from the Spreadsheet window. For interval data, select the measurement rows to be exported, as well as the month, date, and year intervals. If items are invisible, no related measurement data exists. Figure 13 shows the Export Dialog screen. - Page 25 PC Application Software Printing Reports and Exporting Data Each exported file can be opened in other software programs, for example, Microsoft Excel or Word . Each file can contain measurement data from only one of the export types. If you wish to export measurement data of all types, you have to create different files.
- Page 26 Power Log Users Manual...
Need help?
Do you have a question about the 345 and is the answer not in the manual?
Questions and answers