Swann DVR4-950 Operating Instructions Manual
4 channel digital video recorder
Hide thumbs
Also See for DVR4-950:
- Operating instructions manual (72 pages) ,
- Easy setup manual (4 pages) ,
- Speci?cations (2 pages)
Table of Contents
Advertisement
Swann Technical Support
All Countries E-mail: tech@swannsecurity.com
Telephone Helpdesk
USA toll free
1-800-627-2799
(Su, 2pm-10pm US PT)
(M-Th, 6am-10pm US PT)
(F 6am-2pm US PT)
USA Exchange & Repairs
1-800-627-2799 (option 1)
(M-F, 9am-5pm US PT)
See http://www.worldtimeserver.com for information on time zones and the
current time in Melbourne, Australia compared to your local time.
© Swann Communications 2009
24
24
AUSTRALIA toll free
1300 138 324
(M 9am-5pm AUS ET)
(Tu-F 1am-5pm AUS ET)
(Sa 1am-9am AUS ET)
NEW ZEALAND toll free
0800 479 266
INTERNATIONAL
+61 3 8412 4610
Advanced security made easy
DVR4-950™
4 Channel Digital Video Recorder
Operating Instructions
SW341-DNF / SW343-DP2 / SW343-DPM / SW344-DPS
www.swannsecurity.com
SR341-DNF-60010-200709
1 1
plug&playsecurity
Advertisement
Table of Contents

Related Manuals for Swann DVR4-950


Summary of Contents for Swann DVR4-950
-
Page 1: Hdd Interface: Sata Hdd X
(M-F, 9am-5pm US PT) INTERNATIONAL +61 3 8412 4610 See http://www.worldtimeserver.com for information on time zones and the current time in Melbourne, Australia compared to your local time. Operating Instructions SW341-DNF / SW343-DP2 / SW343-DPM / SW344-DPS www.swannsecurity.com © Swann Communications 2009 SR341-DNF-60010-200709... -
Page 2: Before You Begin
· Consult the dealer or an experienced radio/TV technician for help for parts or labour or replaced at the sole discretion of Swann. The end user is responsible for all freight charges incurred to send the product to Swann’s repair These devices comply with part 15 of the FCC Rules. -
Page 3: Table Of Contents
Technical Specifications Contents Video/Audio Before You Begin Video Format: NTSC / PAL depending on region Contents Package Contents Operating System: Embedded RTOS DVR Layout Video Input: RCA x 4 Front Panel & Removable Remote Audio Input: RCA x 1, Line-In Rear Panel Video Output: BNC x 1... -
Page 4: Package Contents
Solution: Analog wireless cameras suffer from interference. The DVR interprets the change of image as motion and records. Swann recommends the use of wired cameras or digital wireless cameras such as the ADW-300 for DVR recording. -
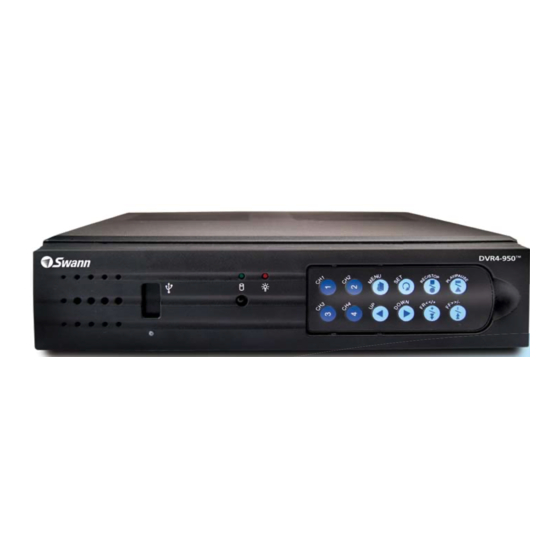
Page 5: Dvr Layout
Viewing Backup Footage on a PC (cont) DVR Layout Extract footage from a larger video clip Front Panel & Removable Remote When dealing with larger backup fi les it may be necessary to extract smaller clips. The following describes how to extract footage and export to a new .VVF fi le. 1. -
Page 6: Rear Panel
Using the VVFPlayer software Removing the Remote Control View backed up footage from the DVR4-950™ with the included VVFPlayer soft- ware located on the CD. 1. Put the CD in the CD drive. If it does not open automatically, click START open MY COMPUTER and Double click the CD drive. -
Page 7: Connecting Cameras And Power Adapter
Backing Up Footage to PC Connecting Cameras and Power Adapter The DVR4-950™ has a backup feature via the USB port on the back of the DVR. Cameras and accessories optional The DVR accepts most fl ash drives or thumbdrives. The fl ash drive / thumb- drive must be formatted to the FAT32 fi... -
Page 8: Connecting The Dvr To A Tv Monitor
Secure the hard drive before re- to unplug the cable from the hard moving the 4 screws to avoid damaging If the DVR will not be in use for extended periods of time Swann recommends drive. Unplug the power cable (2 unplugging the unit. -
Page 9: Menu Operation
Load Setup Default: Reset all settings on the DVR to factory defaults. Starting the DVR With a New Hard Drive When starting the DVR4-950™ for the fi rst time or starting the DVR after chang- Main Setup Menu ing to a new hard drive, the DVR will confi gure the hard drive for use. Follow the on screen prompts to confi... -
Page 10: Image Display
MUTE 7. No Camera Signal Icon ware is updating as it may damage the DVR. Only use updates authorized by Swann. When complete, remove the Flash Drive and restart the DVR. Time Search Multi Camera View Time Search allows you to quickly jump to a specifi... -
Page 11: Camera Menu
Note: The default password is “111111”. If you have lost or forgotten your password contact Swann Communications Technical Support for assistance. -
Page 12: Motion Detection Menu
Record Menu (cont) Motion Detection Menu (cont) Record Quality: Set the image quality of the recordings from Normal, High or Motion Area: Select the area of the Camera to detect motion. Motion Highest. Note: higher image quality settings use more hard drive space. occurring outside this designated area will not trigger a recording.
Need help?
Do you have a question about the DVR4-950 and is the answer not in the manual?
Questions and answers