Table of Contents
Advertisement
Available languages
Available languages
Quick Links
TM
M18
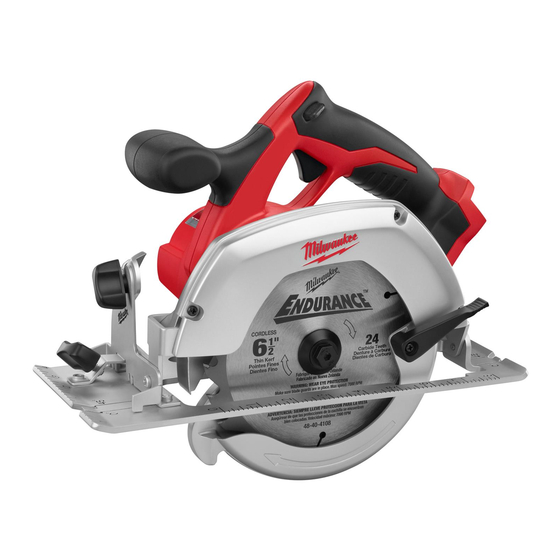
CORDLESS CIRCULAR SAW
SCIE CIRCULAIRE DE M18
SIERRA CIRCULAR DE M18
TO REDUCE THE RISK OF INJURY, USER MUST READ AND UNDERSTAND OPERATOR'S
MANUAL.
AFIN DE RÉDUIRE LE RISQUE DE BLESSURES, L'UTILISATEUR DOIT LIRE ET BIEN
COMPRENDRE LE MANUEL DE L'UTILISATEUR.
PARA REDUCIR EL RIESGO DE LESIONES, EL USUARIO DEBE LEER Y ENTENDER EL
MANUAL DEL OPERADOR.
OPERATOR'S MANUAL
MANUEL de L'UTILISATEUR
MANUAL del OPERADOR
Cat. No.
No de cat.
2630-20
TM
TM
Advertisement
Table of Contents

Summary of Contents for Milwaukee 2630-20
- Page 1 OPERATOR'S MANUAL MANUEL de L'UTILISATEUR MANUAL del OPERADOR Cat. No. No de cat. 2630-20 CORDLESS CIRCULAR SAW SCIE CIRCULAIRE DE M18 SIERRA CIRCULAR DE M18 TO REDUCE THE RISK OF INJURY, USER MUST READ AND UNDERSTAND OPERATOR'S MANUAL. AFIN DE RÉDUIRE LE RISQUE DE BLESSURES, L'UTILISATEUR DOIT LIRE ET BIEN COMPRENDRE LE MANUEL DE L'UTILISATEUR.
-
Page 2: Work Area Safety
• When battery pack is not in use, keep it away the cut, the teeth at the back edge of the blade GENERAL POWER TOOL SAFETY WARNINGS from other metal objects like paper clips, can dig into the top surface of the wood causing WARNING READ ALL SAFETY WARNINGS AND ALL INSTRUCTIONS. -
Page 3: Functional Description
Inserting/Removing the Battery important information. If unreadable or missing, To remove the battery, push in the release buttons contact a MILWAUKEE service facility for a free and pull the battery pack away from the tool. replacement. To insert the battery, slide the pack into the body of •... -
Page 4: Operation
Fig. 5 The shoe has been adjusted at the factory to a 90 correcting direction, allow the blade to come to rized MILWAUKEE service facility. The brake is not adjustment degree setting. Inspect the saw regularly to make a complete stop. To resume cutting, center the... -
Page 5: Maintenance
MILWAUKEE to be defective in material or workmanship for a period of fi ve (5) years* after the jig saw or small hand saw to fi nish the corners performing any maintenance. -
Page 6: Entretien
outils électriques sont dangereux dans les mains protection en-dessous de la pièce à couper. RÈGLES DE SÉCURITÉ GÉNÉRALES RELATIVES AUX d’utilisateurs non formés à leur usage. •Ajuster la profondeur de coupe à l’épaisseur OUTILS ÉLECTRIQUES • Entretien des outils électriques. S’assurer de de la pièce à... -
Page 7: Montage De L'outil
étroit, causant le pincement de la lame et le MILWAUKEE pour un remplacement gratuit. pour cet outil peut comporter des risques. rebond. • AVERTISSEMENT! Certaines poussières gé- •Les leviers de réglage de profondeur et d’angle... - Page 8 4. Pour installer une lame, la placer sur l’axe avec MANIEMENT Fig. 4 les dents pointant dans la même direction que la •Ne pas utiliser de lames émoussées ou fl èche sur le garant inférieur. Relâcher le levier endommagées. lame émoussée AVERTISSEMENT du garant inférieur.
- Page 9 égoïne pour fi nir les coins s’ils selon l’utilisation, renvoyez l’outil, la batterie et le • La pièce de travail n’est pas correctement sup- chargeur à un centre de service MILWAUKEE ac- ne sont pas complètement coupés. portée crédité...
-
Page 10: Seguridad En El Área De Trabajo
ADVERTENCIAS DE SEGURIDAD GENERALES PARA LA HERRAMIENTA ELÉCTRICA Chaque outil électrique MILWAUKEE (y compris les produits sans fi l [outils, piles, chargeur de piles, lampe de travail]; consulter les énoncés de la GARANTIE LIMITÉE DES BLOCS-PILES SANS FIL) est garanti à l’acheteur d’origine ADVERTENCIA être exempt de vice de matériau et de fabrication. -
Page 11: Mantenimiento
USO Y CUIDADO DE LAS la probabilidad de que la hoja se amarre. pandearse con su propio peso. Deben colocarse un centro de servicio MILWAUKEE para obtener HERRAMIENTAS CON BATERÍA • Siempre use hojas del tamaño y forma soportes debajo del panel a ambos lados, cerca un repuesto gratuito. - Page 12 Ajuste del ángulo del bisel NOTA: No retire la brida interna. Le plus grand FUNCTIONAL DESCRIPTION SIMBOLOGÍA 1. Extraiga la batería diamètre de la brida interna doit appuyer sur la lame (Fig. 1). 2. Para ajustar el ángulo de corte, sujete la sierra Volts por su asidero y afl...
- Page 13 • No se está usando una guía para cortar al hilo o uso de otros puede resultar peligroso. cambia durante el corte, puede causar amarre y MILWAUKEE. El freno no es un sustituto de la una guía contragolpe. guarda, y siempre debe esperar hasta que la Si la cuchilla se atasca, echa humo o se pone azul Causas y prevención por parte del operario...
- Page 14 En un plazo de cinco (5) años* a partir de la fecha de compra y sujeto a ciertas excepciones, MILWAUKEE apoyo, baje gradualmente la parte posterior de reparará...
- Page 15 Central Time tailers or consult “Where to buy” on our Web site or visit our website at www.milwaukeetool.com www.milwaukeetool.com MILWAUKEE est fi er de proposer un produit de For service information, use the 'Service Center ® première qualité N . Votre...


Need help?
Do you have a question about the 2630-20 and is the answer not in the manual?
Questions and answers