Daikin FTXG09HVJU Operation Manual
Room air conditioner
Hide thumbs
Also See for FTXG09HVJU:
- Service manual (252 pages) ,
- Engineering data (80 pages) ,
- Operation manual (34 pages)

Related Manuals for Daikin FTXG09HVJU


Summary of Contents for Daikin FTXG09HVJU
-
Page 1: Operation Manual
DAIKIN ROOM AIR CONDITIONER OPERATION MANUAL MODELS FTXG09HVJU FTXG12HVJU FTXG15HVJU... -
Page 2: Table Of Contents
CONTENTS READ BEFORE OPERATION Safety Precautions ..............2 Name of Parts ................4 Preparation Before Operation ...........8 OPERATION COOLING · “SARARA” DRYING Operation ......10 HEATING Operation ...............11 AUTO Operation ..............12 FLASH STREAMER AIR PURIFYING · POWERFUL Operation ............13 ADJUSTING AIRFLOW DIRECTION · AIRFLOW RATE ..14 COMFORT AIRFLOW ·... -
Page 3: Safety Precautions
Do not attempt to repair, relocate, modify or reinstall the air conditioner by yourself. Incorrect work or modifi cations could cause electric shocks, fi re or other damage. For repairs and reinstallation, consult your Daikin dealer for advice and information. •... - Page 4 Arrange the drain hose to ensure smooth drainage. Improper drainage may cause water damage to the building, or it’s furnishing. • Depending on the usage environment, water may leak from the air conditioner. If this happens, contact your Daikin Dealer. •...
-
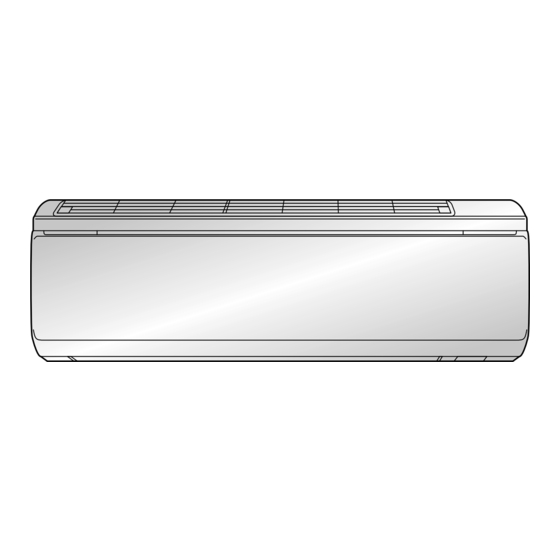
Page 5: Name Of Parts
Name of Parts Indoor Unit Air inlet Upper panel Front panel Room temperature Air outlet sensor • It senses the air temperature Vertical louver around the indoor unit. • In the air outlet. Room humidity sensor Page 14 • It senses the air humidity Horizontal louver around the indoor unit. - Page 6 Open the front panel Streamer unit Page 24-27 Deodorizing fi lter for streamer (Black) Air fi lter (Light blue) Page 23 Titanium apatite photocatalytic air-purifying fi lter (Black) Page 24-27 Outdoor Unit Refrigerant piping and inter-unit cable Drain hose • Drains water coming from the indoor unit.
- Page 7 Name of Parts Remote Controller: ARC447A3 Transmitter / Receiver DISPLAY (LCD) • It displays the current settings. • To use the remote controller, aim the (In this illustration, each section is transmitter at the indoor unit. If there shown with all its displays ON for the is anything to block signals between purpose of explanation.) the unit and the remote controller,...
-
Page 8: Comfort Airflow
Open the lid COOLING BREEZE button FAN setting button • COOLING BREEZE operation. • It selects the airfl ow rate setting. Page 15 Page 14, 15 SWING button • Adjusts air direction. Page 14 SELECT button • It changes the TIMER and COMFORT SLEEP operation and SET UP. -
Page 9: Preparation Before Operation
Preparation Before Operation To set the batteries Position + and – correctly! Press with a fi nger and slide the cover to take it off. Set two dry batteries AAA.LR03 (alkaline). Set the cover as before. • Characters on the display will blink. Set the present time. Page 9 Change the temperature display. -
Page 10: To Set The Clock
To set the clock * Time cannot be set during unit operation. Press Do not hold the button. is displayed. blinks. Press • Holding the button changes the time faster. Press blinks. is displayed. • Setting is complete. ATTENTION If other messages than time appear on the display with the step operation, do not operate the button for about 60 seconds. -
Page 11: Cooling · "Sarara" Drying Operation
COOLING · “SARARA” DRYING Operation COOLING operation To lower temperture Press • The multi-monitor lamp of the unit will turn on GREEN. To lower temperture and humidity Press • The multi-monitor lamp of the unit will turn on YELLOW. * It is recommended to switch to COOLING operation if you want to lower temperature preferentially during DRY COOLING operation. -
Page 12: Heating Operation
HEATING Operation HEATING operation To raise temperature Press • The multi-monitor lamp of the unit will turn on RED. To stop operation Press • The multi-monitor lamp of the unit will go off. To change the temperature HEATING 50°F – 86°F (10°C – 30°C) NOTE Note on HEATING operation •... -
Page 13: Auto Operation
AUTO Operation After pressing the AUTO button, the air conditioner will operate according to room conditions in an automatic mode. Press • HEATING : The multi-monitor lamp of the unit will turn on RED. • COOLING : The multi-monitor lamp of the unit will turn on GREEN. •... -
Page 14: Flash Streamer Air Purifying · Powerful Operation
FLASH STREAMER AIR PURIFYING · POWERFUL Operation The absorption power of the Titanium apatite photocatalytic air-purifying fi lter and air supply fi lter and the resolving power of the streamer discharge reduce bad odors and viruses, cleaning the room air. Press (Can be used together with heating or cooling, or on its own.) •... -
Page 15: Adjusting Airflow Direction · Airflow Rate
ADJUSTING AIRFLOW DIRECTION · AIRFLOW RATE More comfortable airfl ow is provided with airfl ow direction and airfl ow rate adjustment. To change vertical and horizontal airfl ow directions Press during operation. • The airfl ow direction indication will display. (In case of vertical direction) •... -
Page 16: Comfort Airflow · Cooling Breeze Operation
COMFORT AIRFLOW · COOLING BREEZE Operation COMFORT AIRFLOW operation Press COMFORT AIRFLOW MODE operation • The airfl ow direction and airfl ow rate are adjusted so that the air from the unit does not blow directly on the occupants of the room. •... -
Page 17: Timer Operation
TIMER Operation Timer functions are useful for automatically switching the air conditioner on or off at night or in the morning. The timer operates only one time. Set the timer for each use. COUNTDOWN OFF TIMER operation Set the time to stop. Press •... -
Page 18: Comfort Sleep Operation
COMFORT SLEEP Operation Controlling the room temperature supports comfort sleep and pleasant wake-up. • Check that the clock is correct. If not, set the clock to the present time. Page 9 • The present time display disappears when the COMFORT SLEEP operation is set. Press during operation. -
Page 19: Set Up · Child Proof Lock
SET UP · CHILD PROOF LOCK SET UP Sets the unit operation and remote controller display according to your preference. Press • The setup mode will be activated. The item will change every time is pressed. The settings will change every time pressed respectively. -
Page 20: Information Display
INFORMATION DISPLAY Displays the room temperature and humidity and outdoor temperature. Press • After pressing , point the remote controller at the air conditioner unit for 2 seconds. Return to normal display Set temperature Indoor temperature Outdoor Indoor humidity temperature The display changes every time is pressed. -
Page 21: Care And Cleaning
Care and Cleaning Quick reference for cleaning • Before cleaning, be sure to stop the operation and turn the breaker OFF. CAUTION • Do not touch the metal parts in the indoor unit. Doing so may cause injury. Upper panel Wipe off if it gets dirty. - Page 22 • Only open the front panel after turning the unit off. CAUTION Opening the panel during operation may cause the panel to fall off. Attaching and removing the front pane Open the front panel. • Placing a fi nger on the panel tab on either side of the front panel. Front panel Remove the front panel.
- Page 23 Care and Cleaning Attaching and removing the upper pane Remove the front panel and pull out the air fi lter. Page 23 Remove the upper panel. Hold the 2 tabs on either side of the upper panel and pull forward to remove. Remove the tab in the center and lift.
- Page 24 Cleaning the air fi lter is displayed on the remote controller) Open the front panel. • Open the front panel by placing a fi nger on the panel tab on either side of the front panel and then secure it using the supporting plate on the right.
- Page 25 Care and Cleaning Attaching and removing the deodorizing fi lter for streamer, Titanium apatite photocatalytic air-purifying fi lter, streamer unit Titanium apatite photocatalytic air-purifying fi lter Removing Open the front panel and pull out the air fi lter. Page 23 Remove the deodorizing fi...
- Page 26 Streamer unit Deodorizing fi lter for streamer Attaching Replace the streamer unit to its original position. Attach the deodorizing fi lter for streamer. • Insert the deodorizing fi lter for streamer until it clicks. Attach the Titanium apatite photocatalytic air-purifying fi lter. •...
- Page 27 Care and Cleaning Cleaning the deodorizing fi lter for streamer, Titanium apatite photocatalytic air-purifying fi lter and streamer unit is displayed on the remote controller) Attaching and removing each part Page 25 Deodorizing fi lter for streamer / Titanium apatite photocatalytic air-purifying fi lter •...
-
Page 28: How To Disassemble
How to replace Deodorizing fi lter for streamer Titanium apatite photocatalytic airpurifying fi lter (Once in about 3 years) (Once in about 3 years) • Remove from the fi lter frame and replace the fi lter with a new one. •... -
Page 29: Before A Long Idle Period
NOTE The deodorizing fi lter for stream and the titanium apatite photocatalytic air-purifying fi lter should be cleaned regularly. We recommend replacing the fi lter in the following situations. • If it is damaged during cleaning because it is made of paper. •... -
Page 30: Trouble Shooting
Trouble Shooting These cases are not troubles. The following cases are not air conditioner troubles but have some reasons. You may just continue using it. Case Explanation Operation does not start soon. • When ON/OFF button was pressed soon • This is to protect the air conditioner. - Page 31 Check again. Please check again before calling a repair person. Case Check • Hasn’t a breaker turned OFF or a fuse blown? The air conditioner does not • Isn’t it a power failure? operate. • Are batteries set in the remote controller? (Multi-monitor lamp is off.) •...
-
Page 32: Call The Service Shop Immediately
Trouble Shooting Call the service shop immediately. CAUTION When an abnormality (such as a burning smell) occurs, stop operation and turn the breaker OFF. Continued operation in an abnormal condition may result in troubles, electric shocks or fi re. Consult the service shop where you bought the air conditioner. Do not attempt to repair or modify the air conditioner by yourself. - Page 33 Trouble Shooting FAULT DIAGNOSIS BY REMOTE CONTROLLER In the ARC447A3, the temperature display sections on the main unit indicate corresponding codes. Hold the timer cancel button down for 5 seconds, with the remote controller set toward the indoor unit. CANCEL button It cancels the timer setting.
- Page 34 Two-dimensional bar code is a code for manufacturing. 3P226009-1 M07B240 (0810) HT...
Need help?
Do you have a question about the FTXG09HVJU and is the answer not in the manual?
Questions and answers