Advertisement
Quick Links
Advertisement

Related Manuals for Kicker SS56.2


Summary of Contents for Kicker SS56.2
- Page 2 It is also a good idea system to ever leave the Kicker to attach the original sales receipt or a Livin’ Loud Laboratories. Your copy of it to this page for future...
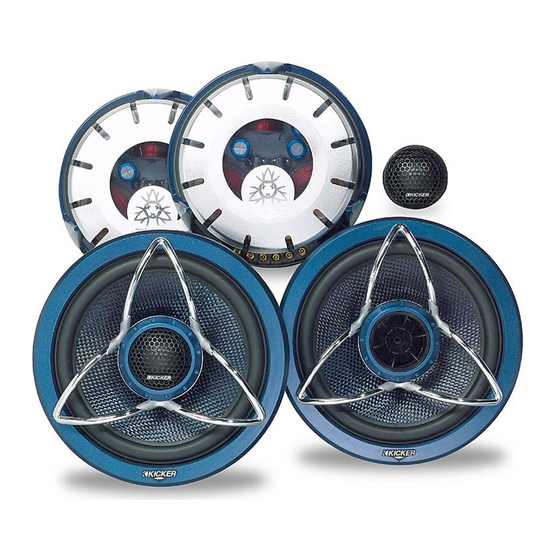
- Page 3 The SS Component Speaker Systems are mounting locations. absolutely the best sounding full-range speakers to ever leave the KICKER Livin’ • Zobel Impedance Compensation Loud Labs. We dare to say (and we tested Provides more linear response across the...
- Page 4 • Edgewound Copper Clad Aluminum • Sealed and Tuned Tweeter Enclosure Ribbon Voice Coil Very efficient coil Provides awesome control as well as design that provides high coil winding smooth and extended upper mid/lower density and increases thermal transfer tweeter response from driver. from voice coil to the motor structure for higher power handling and decreased •...
-
Page 5: Parts List
Parts List PARTS LIST BACK ANGLE RING Used on the back Here is a breakdown of the different side of your mounting parts and accessories you will find in the panel to allow SS Components System pack. Has Inset on Mounting Nut to seat this side properly. - Page 6 MIDRANGE DRIVER BOOT Protects the TINNERMAN CLIPS Steel spring anchor magnet and motor used as anchor point for assembly of the screws if required. Midrange Driver. (Already attached to the midrange and is removable.) MIDRANGE GRILL Grill used to protect BUTT CONNECTORS Insulated crimp the driver when doing a connectors to connect a 16...
-
Page 7: Mounting Options
Mounting Options Your Kicker SS Series Components can COAXIAL MOUNT WITHOUT GRILL be mounted in either a separates or Here you are coaxial mounting scheme. mounting the midrange and You can also choose to mount the tweeter coaxially Midrange Driver with or without a grill. - Page 8 SEPARATES WITHOUT GRILL Prepare The Tweeter You will need to have the Tweeter Prepare The Midrange mounted to the Black Tweeter Flush Mount You will need to have the Phase Plug Ring. Get a tweeter and the ring from the mounted in the Midrange.
- Page 9 SEPARATES WITH GRILL Prepare The Tweeter You will need to have the Tweeter Prepare The Midrange mounted to the Black Tweeter Flush Mount You will need to have the Grill Mount Ring. Get a tweeter and the ring from the Post in the Midrange.
- Page 10 COAXIAL MOUNT WITHOUT GRILL You should now have a tweeter assembly that Prepare The Midrange looks like this to insert Remove any posts or into your Midrange. plugs in the Midrange. It should look like the pic shown here. Insert the tweeter assembly into the Next you will need to midrange while feeding...
- Page 11 COAXIAL MOUNT WITH GRILL You should now have a tweeter assembly that Prepare The Midrange looks like this to insert Remove any posts or into your Midrange. plugs in the Midrange. It should look like the pic shown here. Insert the tweeter assembly into the Next you will need to midrange while feeding...
-
Page 12: Tweeter Mounting
Tweeter Mounting Your tweeter can be flush mounted into WITH ANGLE RINGS your panel with or without the 15° angle rings. Back Place the Tweeter Angle Mounting Tweeter Ring tweeter through the Cut a 1-15/16” (4.9 cm) hole in Front Angle Ring your panel for the tweeter. - Page 13 When mounting to a door panel it is best to get the tweeter as high up on the door as possible and as far forward as possible without interference from the dashboard. Be sure the chosen place is flat and space behind the door panel allows the use of the Tweeter Mounting Nut.
- Page 14 Midrange Mounting Your KICKER drivers are specifically designed for mounting in free-air applications. While the speakers do not need a sealed box for optimum performance, it is important to isolate the sound coming off the front of the driver from the sound radiating from the back of the driver.
- Page 15 Coaxial Mounting If using the Coaxial mounting method for the tweeter and midrange you can mount the drivers under a factory speaker panel for protection. Factory Mounting Location Factory Mounting Location Mount Coax with hardware Mount Coax with hardware If custom mounting locations are desired for your drivers, check for interference from other mechanical systems in the vehicle.
- Page 16 Separates Mounting If using the Separates mounting method for the tweeter and midrange you can mount the midrange under a factory speaker panel for protection and mount the tweeter separately. 2.50 inch clearance hole Secure with tweeter mount nut Place tweeter into cutout 1.95 inch hole Mount midrange with hardware...
- Page 17 Crossover Mounting When choosing a location for your crossover keep in mind you will need access to it so you can connect your wiring and adjust the tweeter attenuator. Also, DO NOT place the crossover in any location where it will get wet or be in standing water.
- Page 18 Wiring There are three sets of high quality 16 Gauge speaker wire supplied with the Kicker SS Component Systems. The longest set of wires is for connecting your amplifier or source unit to the crossover network. One of the shorter pairs is to connect the midrange output of the crossover to the spring loaded binding posts on the Midrange Driver.
- Page 19 When installing the speaker wire into your car be sure to avoid sharp edges and the possibility of it getting pinched. Be careful to keep it out of the path of moving mechanical parts such as the steering column, brake pedal, gas pedal, clutch pedal, emergency brake, heater or AC control linkage and any other moving mechanical systems.
- Page 20 To change the output level simply slide the switch to the desired position. After reading this manual, if you have any questions about the installation of your Kicker components, visit your local Authorized KICKER Dealer. You may also contact Kicker Technical Services directly by visiting the Support Section of our website at www.kicker.com.
- Page 21 Performance MODEL SS56.2 SS65.2 Midrange/Midbass (in., cm) Outside Diameter 6-1/16” 15.4 6-7/16” 16.5 Mounting Hole 5-1/16” 12.8 5-7/16” 13.8 Mounting Depth 2-11/16” 6.8 2-13/16” 7.1 Tweeter (in., cm) Outside Diameter 2-5/16” 6.0 2-5/16” 6.0 Mounting Hole 1-15/16” 4.9 1-15/16” 4.9 Mounting Depth 1-1/8”...
- Page 22 Failure to follow these steps may void your warranty. Any Kicker warrants this product to be free from defects in material questions can be directed to the Kicker Customer Service and workmanship under normal use for a period of THREE (3) MONTHS from date of original purchase with receipt.
- Page 23 Earl’s Thoughts SS Component Systems...
Need help?
Do you have a question about the SS56.2 and is the answer not in the manual?
Questions and answers