Table of Contents
Advertisement
Quick Links
For Your Records and
Warranty Assistance
For reference, also attach your receipt or a copy
of your receipt to the manual.
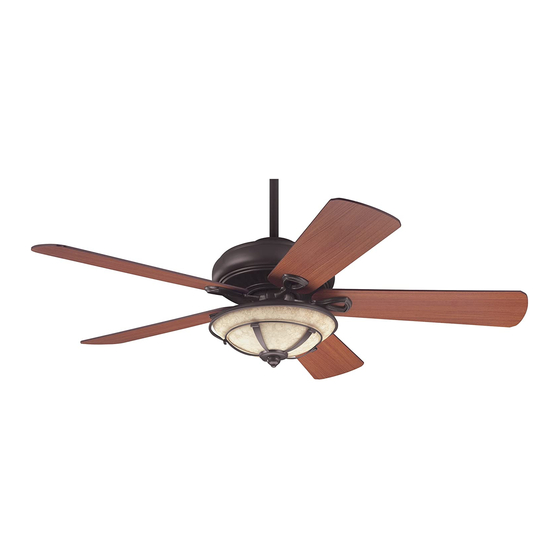
Grandview
__________________________________________
Model Name
23923, 23930
__________________________________________
Model No.
__________________________________________
Date Purchased
__________________________________________
Where Purchased
Form# 42773-01
20090618
©2009 Hunter Fan Co.
Type 5 Models
Type 5 Models
Type 5 Models
Owner's Guide and Installation Manual
Advertisement
Table of Contents

Related Manuals for Hunter Grandview 23923


Summary of Contents for Hunter Grandview 23923
- Page 1 For reference, also attach your receipt or a copy of your receipt to the manual. Owner’s Guide and Installation Manual Grandview __________________________________________ Model Name 23923, 23930 __________________________________________ Model No. __________________________________________ Date Purchased __________________________________________ Where Purchased Form# 42773-01 20090618 ©2009 Hunter Fan Co.
-
Page 2: Table Of Contents
Never insert foreign objects between rotating fan blades. • To reduce the risk of fire, electrical shock, or motor damage, do not use a solid-state speed control with this fan. Use only Hunter speed controls. © 2009 Hunter Fan Company... - Page 3 Support Brace Hunter’s patented 2-position mounting system provides you maximum installation flexibility and ease. You can install your Hunter fan in one of two ways, depending on ceiling height and your preference: Standard or Angled mounting. The steps in this manual include instructions for Ceiling both Installer’s Choice mounting methods.
-
Page 4: Getting Ready
• Drill holes for and install wood screws. • Identify and connect electrical wires. • Lift 40 pounds. If you need help installing the fan, your Hunter fan dealer can direct you to a licensed installer or electrician. Gathering the Tools You will need the following tools for installing the fan: •... -
Page 5: Installing The Ceiling Plate
Do not over tighten. Flat Washer 3” Wood Screw For Angled Ceilings: Be sure to orient the ceiling plate so that the arrows printed on the ceiling plate are pointing toward the ceiling peak. 42773-01 • 06/18/09 • Hunter Fan Company... -
Page 6: Assembling And Hanging The Fan
U-shaped unscrewing. Once assembled, do not remove the downrod. Hole 3-5. Raise the fan and place the hook on the ceiling plate through the U-shaped hole in the rim. 42773-01 • 06/18/09 • Hunter Fan Company... -
Page 7: Wiring The Fan
4-7. Spread the wires apart, with the grounded wires on one side of the outlet box and the ungrounded wires on the other side of the outlet box. 42773-01 • 06/18/09 • Hunter Fan Company... -
Page 8: Installing The Canopy
2. Press firmly on opposite sides of the ring toward the canopy. The tabs will flex out releasing the trim ring from Step 5-3 the canopy. Steps 5-4 – 5-5 Ceiling Plate Canopy Hanger Screw Ball Canopy Screw 42773-01 • 06/18/09 • Hunter Fan Company... -
Page 9: Assembling The Blades
6 • Assembling the Blades Hunter fans use several styles of fan blade irons (brackets that hold the blade to the fan). 6-1. Your fan may include blade grommets. If your fan has grommets, Step 6-1 (Detail) insert them by hand into the holes on the blades. -
Page 10: Completing Your Installation With A Bowl Light Fixture
7 • Completing Your Installation With a Bowl Light Fixture Your Hunter fan comes with an integrated light fixture assembly. WARNING: Use only the light fixture supplied with this fan model. The switch housing assembly is made up of three sections: the switch housing gas- ket, the upper switch housing, and the lower switch housing/light assembly. - Page 11 7-8. 7-11. Turn the lower switch housing clockwise until the housing assembly screws are firmly situated in the narrow end of the keyhole slots. 7-12. Tighten all housing screws. 42773-01 • 06/18/09 • Hunter Fan Company...
- Page 12 Note: In compliance with US federal energy regulations, this ceiling fan contains a device that restricts the light kit to a maximum of 190 Watts. Exceeding that limit or the marked limit on this product may result in fire hazard or improper operation. 42773-01 • 12/17/07 • Hunter Fan Company...
-
Page 13: Fan
In cold weather, use upward air flow pattern To Change Airflow Direction Turn the fan off and let it come to a complete stop. Reversing Pull the reversing switch chain. Pull Chain Switch Light Chain 42773-01 • 06/18/09 • Hunter Fan Company... -
Page 14: Troubleshooting
If you need parts or service assistance, please call 888-830-1326 or visit us at our Web site at http://www.hunterfan.com. Hunter Fan Company 7130 Goodlett Farms Pkwy. #400 Memphis, Tennessee 38016 42773-01 • 06/18/09 • Hunter Fan Company...
Need help?
Do you have a question about the Grandview 23923 and is the answer not in the manual?
Questions and answers