Table of Contents
Advertisement
Quick Links
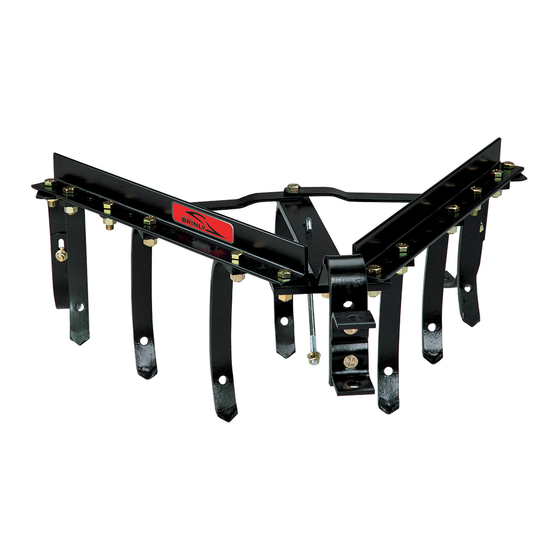
CULTIVATOR
MODEL:
CC-560
•
•
•
Repair Parts
For use with Garden Tractors. A Sleeve Hitch
Accessory is required for operation. Wheel
weights and chains are also recommended.
For the latest product updates and setup tips:
Visit us on the web!
www.brinly.com
Owner's Manual
This manual contains information for the safety
IMPORTANT
of persons and property. Read it carefully before
assembly and operation of the equipment!
1007076 Rev. A
Advertisement
Table of Contents

Subscribe to Our Youtube Channel
Related Manuals for Brinly CC-560


Summary of Contents for Brinly CC-560
- Page 1 Owner's Manual CULTIVATOR MODEL: CC-560 • Assembly • Operation • Repair Parts For use with Garden Tractors. A Sleeve Hitch Accessory is required for operation. Wheel weights and chains are also recommended. This manual contains information for the safety IMPORTANT of persons and property. Read it carefully before...
- Page 2 INTRODUCTION CONGRATULATIONS on the purchase of your new Brinly-Hardy Cultivator! Your cultivator is designed, engineered and manufactured to give you the best possible dependability and performance. CUSTOMER RESPONSIBILITIES Please read and retain this manual. The instructions enables you to assemble and maintain your lawn aerator properly. And please, always observe the “Safety” instructions. TABLE OF CONTENTS SAFETY/OPERATION/MAINTENANCE ........2-3 PARTS BREAKDOWN ..............4 ASSEMBLY ................... 5-7 WARRANTY ..................8 PRODUCT COMPATIBILITY This cultivator is designed for use with garden tractors equipped with a sleeve hitch. It may be used to cultivate a wide range of garden vegetables or field crops. It can be set up for straddle-row and/or between-row cultivation. RECORD PURCHASE INFORMATION Record your purchase information in the spaces provided below: DATE OF PURCHASE: COMPANY NAME: COMPANY PHONE: SERIAL NUMBER: SAFETY/OPERATION/MAINTENANCE SAFETY TO HELP PREVENT BODILY INJURY DUE TO LOSS...
- Page 3 SAFETY/OPERATION/MAINTENANCE OPERATE SAFELY KEEP BODY PARTS FROM UNDER TOW BAR • Use this machine for intended purpose only. Before disconnecting this machine from towing vehicle hitch: • Speed should always be slow enough to maintain control. • Stop on level ground. Travel slowly over rough ground. • Stop towing vehicle engine. • Lock towing vehicle park brake. • Do not let children or an untrained person operate • Block wheels of the machine. machine. • Make sure body parts are not under tow bar. • Do not let anyone, especially children, ride on this machine OPERATION or the towing vehicle. • Cultivate at a slow tractor speed. • Check towing vehicle brake action before you operate. Adjust or service brakes as necessary. • Additional weight is not normally required for cultivating light soil. However, it is necessary when soil is heavy, • Keep all parts in good condition and properly installed. Fix crusted, and/or thickly weeded, in order to improve the damaged parts immediately. Replace worn or broken parts. cultivator's penetration and stability. Replace all worn or damaged safety and instruction decals. • See Figure 6 for instructions on attaching concrete block • Do not modify the machine or safety devices. Unauthorized as additional weight. modifications to the towing vehicle or machine may impair its function and safety, and void the warranty. • Cultivating depth can be controlled by use of the adjustable Gauge Shoes (7).
- Page 4 PARTS BREAKDOWN Installation Questions? Missing Parts? Replacement Parts? STOP DON’T GO BACK TO THE STORE! Please call Customer Service Department Toll Free 877.728.8224 or customerservice@brinly.com ITEM NO. DESCRIPTION PART NO. QTY. ITEM NO. DESCRIPTION PART NO. QTY. Brinly Decal B-5922 Plow Bolt 7/16" x 1-3/4"...
- Page 5 ASSEMBLY Figure 1 HITCH BRACKET AND TIE STRAP ASSEMBLY TOOLS REQUIRED: 9/16" Wrench (1) 3/4" Wrench (2) 11/16" Wrench (1) 1a. Loosely assemble Hitch Bracket (2) to Pull Bar (3) using Plow Bolts (13), 7/16" Lockwashers (18), and 7/16" Nuts (16) as shown. DO NOT TIGHTEN. NOTE: It is important to orient Plow Bolts in direction shown. (13) (18) (15) Plow Bolt, 7/16" x 1-3/4" Lockwasher, 7/16" Nut, 7/16" Qty. 2 Qty. 2 Qty. 2 1b. Assemble Tie Strap (9) to Pull Bar (3) using 1/2" x 1-1/2" Bolts (10), 1/2" Lockwashers (19), and 1/2" Nuts (15).
- Page 6 ASSEMBLY Figure 3 FRAME TIE BAR ASSEMBLY 3a. Assemble Tie Bars (5) to Frame Angles (4) using 1/2" x 1-1/2" Bolts (10), 1/2" Lockwashers (19), and 1/2" Nuts (15). 3b. Assemble Tie Bars (5) to Pull Bar (3) using 1/2" x 2" Bolt (11), 1/2" Lockwasher (19), and 1/2" Nut (15). 3c. Tighten hardware from Step 2a. (10) (19) (15) (11) Bolt, 1/2" x 1-1/2" Lockwasher, 1/2" Nut, 1/2" Bolt, 1/2" x 2" Qty. 2 Qty. 3 Qty. 3 Qty. 1 Figure 4 SPRING SHANK ASSEMBLY 4a. Assemble Spring Shanks (6) to Frame Angles (4) using 1/2" x 1-1/2" Bolts (10), Special Spacers (21), 1/2" Lockwashers (19), and 1/2" Nuts (15). Ensure Spring Shanks are set to run straight in the direction of travel. 4b. When assembling for in-between row cultivation, the extra Spring Shank will be mounted in the center of the cultivator, using the same hole and hardware used to fasten Tie Bars (5) to Pull Bar (3), reference location (A) in illustration.
- Page 7 ASSEMBLY Figure 5 GAUGE SHOE ASSEMBLY 5a. Assemble one of the Gauge Shoe halves (7) to Frame Angle (4) using 1/2" x 1-1/2" Bolts (10), 1/2" Lockwashers (19), and 1/2" Nuts (15). Note slot orientation in illustration. 5b. Attach Gauge Shoe halves (7) together using 3/8" x 1" Carriage Bolt (12), 3/8" Washer (20), 3/8" Lockwasher (17), and 3/8" Nut (14). (10) (19) (15) Bolt, 1/2" x 1-1/2" Lockwasher, 1/2" Nut, 1/2" Qty. 2 Qty. 2 Qty. 2 (12) (20) (17) (14) Carriage Bolt, 3/8" x 1" Lockwasher, 3/8" Flat Washer, 3/8" Nut, 3/8" Qty. 2 Qty. 2 Qty. 2 Qty. 2 Figure 6 MOUNTING ADJUSTMENT 6a. Attach Cultivator to your Tractor Hitch in lowered position.
- Page 8 The provisions as set forth in this warranty provide Company with respect to new merchandise purchased and the sole and exclusive remedy arising from the sale. used in the United States, its possessions and territories. Brinly-Hardy Co. shall not be liable for incidental or consequential loss or damage including, without Brinly-Hardy Company warrants the products listed below limitation, expenses incurred for substitute or...
Need help?
Do you have a question about the CC-560 and is the answer not in the manual?
Questions and answers