Table of Contents
Advertisement
Quick Links
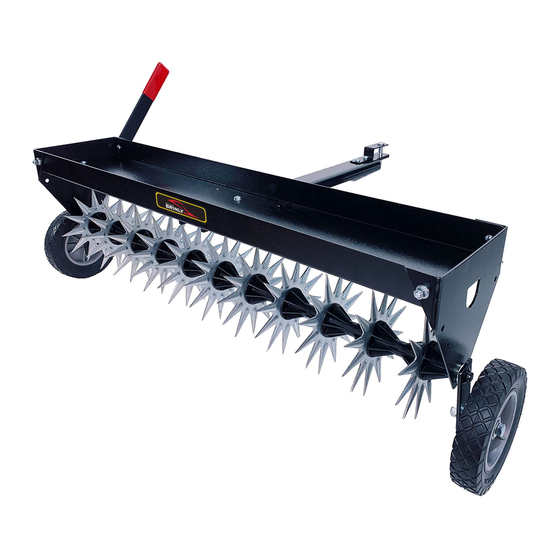
OWNER'S MANUAL
4 0 " L A W N A E R A T O R
MODEL:
S AT - 4 0 1 B H
S AT - 4 0 1 B H - A
• Assembly
• Installation
• Operation
• Repair Parts
Scan this QR
code for additional
info on our website.
Visit us on the web!
www.brinly.com
Call Customer Service, Toll-Free: 877-728-8224
Important: This manual contains information for the safety
of persons and property. Read it carefully before
assembly and operation of the equipment!
1
English, Spanish &
French Manual
1020088-A
Advertisement
Table of Contents

Summary of Contents for Brinly SAT-401BH
- Page 1 Call Customer Service, Toll-Free: 877-728-8224 Important: This manual contains information for the safety Visit us on the web! of persons and property. Read it carefully before www.brinly.com assembly and operation of the equipment! 1020088-A...
-
Page 2: Table Of Contents
INTRODUCTION AND SAFETY ================================================================================================ CONGRATULATIONS on the purchase of your new Brinly-Hardy Aerator! Your Aerator has been designed, engineered and manufactured to give you the best possible dependability and performance. Should you experience any problem you cannot easily remedy, please do not hesitate to contact our knowledgeable customer service department toll-free at 1-877-728-8224. -
Page 3: Safety
SAFETY ================================================================================================ GENERAL NOTES - Stop on level ground, disengage drives, set the (Operation) parking brake, and shut off engine before leaving the operator’s position for any reason including emptying the attachment. Caution should be taken when towing and/or using any at- - Use this attachment for intended purpose only. -
Page 4: Parts
DON’T GO BACK Bearing B-5425 B-5425 TO THE STORE! Handle Assembly B-4888-10 B-4888-10 Please call our Customer Wheel R-891 R-891 Service Department, Toll Free: 877-728-8224 or customerservice@brinly.com The SAT-401BH-A drawbar (3) has a slightly different appearance, illustrated here: English Manual 1020088-A... - Page 5 PARTS Detail 1 ================================================================================================ Detail 2 Detail 2 Detail 2 Detail 2 Detail 2 Detail 3 Detail 3 Detail 3 12 + 19 Detail 2 Detail 3 See Detail 1 Hardware Bag Z-1653 17 45M1111P Washer; Flat, 5/16” Hardware Bag Z-1653 18 45M1717P Washer;...
- Page 6 HARDWARE IDENTIFIER ================================================================================================ DO NOT RETURN PRODUCT IF YOU ARE MISSING PARTS. Illustrations on this page Please Call: 1 (877) 728-8224 are to scale for faster identification of hardware during assembly. Nut; Hex 5/16”-18 (x11) ..30M1000P Machine Bushing;...
-
Page 7: Assembly
For faster identification of hardware during assembly, simply lay the hardware on top of the illustration. Additional info and videos are available on our website: brinly.com This QR code links directly to the product page. Step 1 STARTING WITH THE... - Page 8 ASSEMBLY ================================================================================================ Step 2 1. Install drawbar (3) to the tray (4) using the following as illustrated: - x2 Round Head Screws (10) 5/16” x 3/4” - x2 Lock Washers, 5/16" (15) 5/16” - x2 Hex Nuts, 5/16" (13) 2. At the other end of the drawbar (3): Attach the clevis (25) using the...
- Page 9 ASSEMBLY ================================================================================================ Step 3 CAUTION: Gloves are REQUIRED when handling aerator tines. Tines have extremely sharp points. Use caution when handling. 1. Place a 5/8” thick machine bushing (22) on the axle assembly (2). As illustrated, next slide the axle assembly (2) through the hole in the right side end panel (1).
- Page 10 ASSEMBLY ================================================================================================ Step 4 1. Slide the handle assembly (7) over the end the of the axle assembly (2) Secure by inserting one 1/4” x 1-1/4” hex bolt (12) though the hole in the end of the axle (2) and secure with a 1/4” Hex Lock Nut (19), as shown.
- Page 11 ASSEMBLY ================================================================================================ Step 5 CAUTION: GLOVES ARE RECOMMENDED Carefully rotate the Spike Aerator for this step. 1. Attach one Wheel (9) to the Handle Assembly (8) and the other wheel to the wheel bar mount on the Axle (6). Secure to each side using hardware in the following order: •...
- Page 12 ASSEMBLY ================================================================================================ Step 6 1. Attach Aerator to your towing vehicle using the supplied drawbar pin (21) and hairpin cotter (24). 2. To place in TRANSPORT POSITION: • Pull FORWARD on the handle assembly (7). • Pull out slightly and position over transport lock pin (24).
-
Page 13: Use And Care
USE AND CARE ================================================================================================ MODEL: S A T - 4 0 1 B H S A T - 4 0 1 B H - A U S E & C A R E S E C T I O N SPECIFICATIONS CAUTION: Avoid injury while installing &... -
Page 14: Use And Maintenance
USE AND CARE ================================================================================================ USAGE USING THE WEIGHT TRAY The following maximum loaded weight capacity is the weight of the aerator plus the weight loaded in the tray: CAUTION: AVOID INjURY! Avoid damage to tines. Do not tow the aerator across concrete or asphalt WeIghT CApACITy driveways and walkways. -
Page 15: Storage
For rust Toll-Free: 877-728-8224 appearing on painted surfaces, sand lightly and coat with enamel. Chat online: www.brinly.com - Periodically remove debris that builds up Email: customerservice@brinly.com between tines. - Apply lubricating oil at each tine and bearing before use. -
Page 16: Warranty
Brinly- Hardy Co. During the period of the warranty, the exclusive remedy is repair or replacement of the product as set forth above. Brinly-Hardy Company • 3230 Industrial Parkway • Jeffersonville, IN 47130 • (877) 728-8224 • brinly.com 1020088-A...


Need help?
Do you have a question about the SAT-401BH and is the answer not in the manual?
Questions and answers