Advertisement
Quick Links
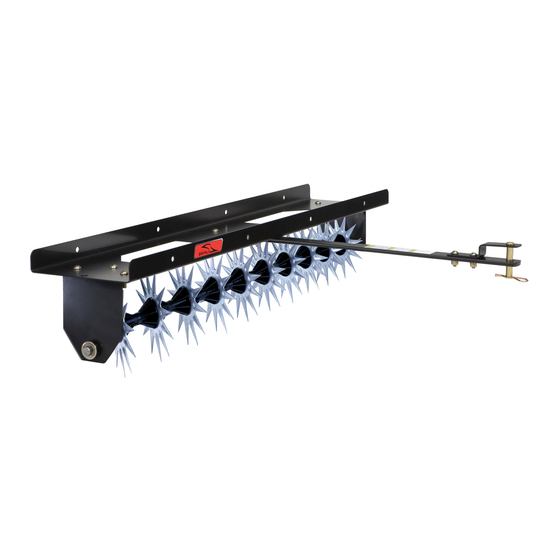
OWNER'S MANUAL
4 0 " L A W N A E R A T O R
MODEL:
S A - 4 0 1 B H
S A - 4 0 1 B H - A
• Assembly
• Installation
• Operation
• Repair Parts
Visit us on the web!
www.brinly.com
Scan this QR
code for additional
info on our website.
Call Customer Service, Toll-Free: 877-728-8224
Important: This manual contains information for the safety
of persons and property. Read it carefully before
assembly and operation of the equipment!
1
1020084-A
Advertisement

Related Manuals for Brinly SA-401BH


Summary of Contents for Brinly SA-401BH
- Page 1 Call Customer Service, Toll-Free: 877-728-8224 Important: This manual contains information for the safety Visit us on the web! of persons and property. Read it carefully before www.brinly.com assembly and operation of the equipment! 1020084-A...
-
Page 2: Table Of Contents
INTRODUCTION AND SAFETY ================================================================================================== CONGRATULATIONS on the purchase of your new Brinly-Hardy Aerator! Your Aerator has been designed, engineered and manufactured to give you the best possible dependability and performance. Should you experience any problem you cannot easily remedy, please do not hesitate to contact our knowledgeable customer service department toll-free at 1-877-728-8224. -
Page 3: Safety
SAFETY ================================================================================================== GENERAL NOTES TOWING VEHICLE AND TOWING SAFELY (Operation) - Use this attachment for intended purpose only. - Read the safety operating precautions in your towing vehicle operator’s manual for additional safety information. - Before you operate any feature of this attachment or towing vehicle, observe your surroundings and look for bystanders. - Page 4 HARDWARE IDENTIFIER ================================================================================================== DO NOT RETURN PRODUCT IF YOU ARE MISSING PARTS. Illustrations on this page Please Call: 1 (877) 728-8224 are to scale for faster identification of hardware during assembly. Exterior circumferences of washers can vary. Washer; Washer; Washer; Nut;...
-
Page 5: Parts
The SA-401BH-A drawbar (3) has a slightly different appearance, illustrated here: 16 R-821-10 DrawBar, Clevis Installation Questions? Missing Parts? Replacement Parts? STOP DON’T GO BACK TO THE STORE! Please call our Customer Service Department, Toll Free: 877-728-8224 or customerservice@brinly.com English Manual 1020084-A... -
Page 6: Assembly
For faster identification of hardware during assembly, simply lay the hardware on top of the illustration. Additional info and videos are available on our website: brinly.com This QR code links directly to the product page. Steps 1 & 2 1. Align the drawbar (3) - Page 7 ASSEMBLY ================================================================================================== Step 3 3. Install the two end panels (1) on each end of the tray (5) using: - x6 5/16” x 3/4” Round Head Screws (7) - x6 5/16” Flat Washers (11) - x6 5/16” Lock Washers (10) - x6 5/16”...
- Page 8 ASSEMBLY ================================================================================================== Steps 6 & 7 CAUTION: GLOVES ARE REQUIRED WHEN HANDLING AERATOR TINES. Tines have extremely sharp points. Use caution when handling. NOTE: The Bearings (6) have two small openings and extensions. These are designed to sandwich the Tines (5), sliding through and connecting. 6.
- Page 9 ASSEMBLY ================================================================================================== Steps 8 & 9 CAUTION: GLOVES ARE REQUIRED WHEN HANDLING AERATOR TINES. Tines have extremely sharp points. Use caution when handling. 8. Push the End Panels (1) toward the Tines (5) until there is no free play along the Tine Shaft and tighten the nuts (A) on the End Panels.
- Page 10 ASSEMBLY ================================================================================================== Step 10 10. From below, install a hitch pin (13) through the clevis (16) and tow bar (3), as illustrated. Secure with the last hairpin cotter (15). Assembly is Complete! NOTES English Manual 1020084-A...
-
Page 11: Use And Care
USE AND CARE ================================================================================================== MODEL: S A - 4 0 0 B H U S E & C A R E S E C T I O N SPECIFICATIONS CAUTION: Avoid injury while installing and removing! Make sure feet and hands are clear of Tine Tips. -
Page 12: Storage
USE AND CARE ================================================================================================== USAGE TINES CAUTION: AVOID INjURY! CAUTION: AVOID INjURY! Avoid damage to tines. Do not tow Openings in Tray allow access to Tines for the aerator across concrete or asphalt cleaning and service. Excercise caution driveways and walkways. when working around Tray openings and avoid placing body parts into the openings. -
Page 13: Service
Striking objects effect. The Aerator may be used in an independent can cause Tines to curl or break. Contact Brinly- operation or may be used when mowing your lawn. Hardy customer service department to purchase replacement Tines. -
Page 14: Warranty
Brinly- Hardy Co. During the period of the warranty, the exclusive remedy is repair or replacement of the product as set forth above. Brinly-Hardy Company • 3230 Industrial Parkway • Jeffersonville, IN 47130 • (877) 728-8224 • brinly.com 1020084-A...
Need help?
Do you have a question about the SA-401BH and is the answer not in the manual?
Questions and answers