Advertisement
Advertisement
Table of Contents

Related Manuals for ProForm 920 S EKG 831.280170


Summary of Contents for ProForm 920 S EKG 831.280170
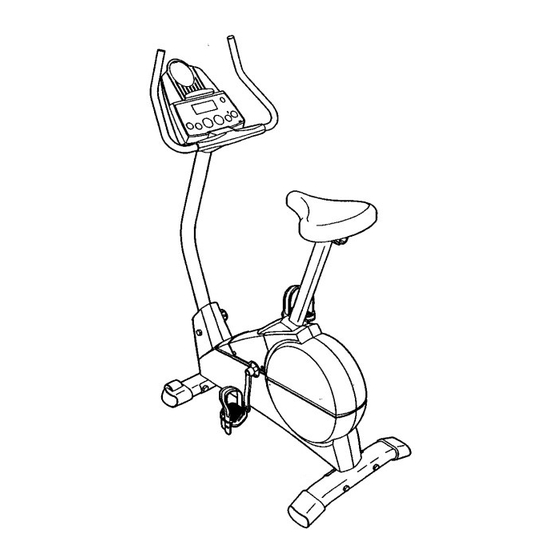
- Page 1 USER'S MANUAL Model No. 831.280170 Serial No. Sedal EQUIPMENT HELPLINE! 1-800-736-6879 Patent Pending SEARS, ROEBUCK AND CO., HOFFMAN ESTATES, IL 60179 www.proform.com new products, prizes, fitness tips, and much morel...
-
Page 2: Table Of Contents
TABLE OF CONTENTS IMPORTANT PRECAUTIONS ............. BEFORE YOU BEGIN ..............ASSEMBLY ................HOW TO OPERATE THE EXERCISE CYCLE ..........MAINTENANCE AND TROUBLE-SHOOTING ..........CONDITIONING GUIDELINES ............PART LIST ................EXPLODED DRAWING ..............HOW TO ORDER REPLACEMENT PARTS ........... Back Cover FULL 90 DAY WARRANTY ............ -
Page 3: Before You Begin
The model number is 831.280170. The sedal number The PROFORM" 920 S EKG offers an impressive can be found on a decal attached to the exercise cycle array of features to let you enjoy this healthful exer- (see the front cover of this manual). -
Page 4: Assembly
ASSEMBLY Assembly requires two persons. Place all parts of the exercise cycle in a cleared area and remove the packing materials. Do not dispose of the packing materials until assembly is completed. and Phillips screw- Assembly requires the included tools and your own adjustable wrench _ driver _. - Page 5 1. Identify the Front Stabilizer (2), which has Wheels (30) on the ends. While another person lifts the front of the Frame (1) slightly, attach the Front Stabilizer to the Frame with two M10 x 112mm Carriage Bolts (65) and two M10 Black Nylon Locknuts (63).
- Page 6 5. Connect the wire harness on the Handgdp Pulse Sensor (15) to the indicated wire harness on the Console (16). Insert both wire hamesses into the open- ing in the bottom of the Console. Then, insert the metal tube on the Handgrip Pulse Sensor into the opening in the bottom of the console.
- Page 7 Identify the Left Pedal (24), which is marked with an "L." Using an adjustable wrench, firmly tlg_ Left Pedal counterclockwise into the Left Crank Arm (42). Tighten the Right Pedal (not shown) clockwise into the Right Crank Arm. Important: Tighten both Pedals as firmly as possible.
-
Page 8: How To Operate The Exercise Cycle
HOW TO OPERATE THE EXERCISE CYCLE HOW TO ADJUST THE SEAT POST HOW TO ADJUST THE UPRIGHT For effective exer- The upright can be cise, the seat adjusted to the should be at the height that is the most comfortable for proper height. -
Page 9: Features Of The Console
° :°'/! FEATURES OF THE CONSOLE selected. When the batteries are replaced, it may be necessary to reeelect the desired unit of mea- surement. The easy-to-use console offers a selection of features designed to help you get the most from your workouts. When the manual mode of the console is selected, the B. - Page 10 sonal trainer program is selected, the display will show the time remaining in the program instead of the elapsed time. If desired, you Tum on the console. can select a sin- Note: The console requires four "D" batteries (not gle mode for included).
- Page 11 Dudng the program, the resistance of the exer- cise cycle will automatically change as shown by the applicable profile on the console. If the cur- rant resistance level is too high or too low, you can change the resistance level by pressing the + and - buttons.
-
Page 12: Maintenance And Trouble-Shooting
MAINTENANCE AND TROUBLESHOOTING • For the most accurate heart rate reading, hold the Inspect and tighten all parts of the exemise cycle reg- metal contacts for about 15 seconds. ularly. Replace any worn parts immediately. To clean the exercise cycle, use a damp cloth and a •... -
Page 13: Conditioning Guidelines
CONDITIONING GUIDELINES The following guidelines will help you to plan your During the first few minutes of exercise, your body exercise program. Remember that proper nutrition uses easily accessible carbohydrate calories for ener- and adequate rest are essential for successful results. gy. -
Page 14: Exploded Drawing
EXPLODED DRAWINGmModel NO. 831.280170 Rt2OlA Key No. Qty. Description Key No, Qty. Description Frame Flywheel Axle Front Stabilizer Flywheel Beadng Rear Stabilizer =C" Magnet Rear Endcap Left Crank Arm Seat Post Reed Switch/Wire Seat Bracket Crank Beadng Handlebar Endcap M5 Nut Foam Grip •... -
Page 15: Exploded Drawing
EXPLODED DRAWING---Model No. 831.280170 R12OlA... -
Page 16: Full 90 Day Warranty
• The MODEL NUMBER of the product (831 280170) • you need help assembling or operating the PROFORM" 920 S • The NAME of the product (PROFORM e 920 S EKG exercise cycle) • a part Is missing • or you need to schedule repair •...
Need help?
Do you have a question about the 920 S EKG 831.280170 and is the answer not in the manual?
Questions and answers
Where do I plug in a power cord for the Pro Form 920 S EKG?