
Subscribe to Our Youtube Channel
Related Manuals for Fisher & Paykel EB60DSXB


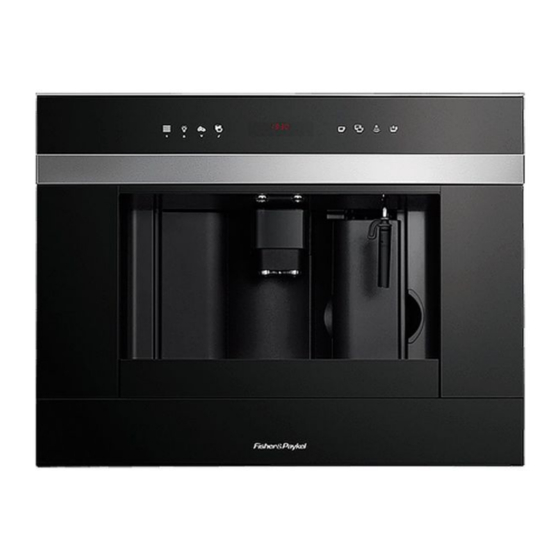
Summary of Contents for Fisher & Paykel EB60DSXB
- Page 1 Built-in coff ee maker Installation instructions User guide EB60DSXB model NZ AU GB IE CN...
-
Page 3: Table Of Contents
Contents Safety and warnings Electrical connection (GB IE only) Installation instructions Introduction Using the appliance for the first time Turning on and heating up Making coffee using coffee beans Making espresso coffee with pre-ground coffee Making cappuccino (using the steam function) Cleaning Changing and setting menu parameters Displayed messages... -
Page 4: Safety And Warnings
Safety and warnings Your safety is important to us. Please read this information before using your coffee maker. WARNING! Cut Hazard Take care – panel edges are sharp. Failure to use caution could result in injury or cuts. Important safety instructions! This is a household appliance only. - Page 5 Safety and warnings Important safety instructions! If the appliance is faulty, do not attempt to repair. Turn it off using the main switch, unplug from the mains socket and contact Customer Care. Keep all packaging (plastic bags, polystyrene foam) away from children. Children of less than 8 years old must be kept away from the appliance unless continuously supervised.
- Page 6 Safety and warnings Important safety instructions! Do not use the appliance when extracted. Make sure the appliance is inactive before extracting it. The only exception is adjusting the coffee mill which must be done with the machine out (see the section “Adjusting the coffee mill”). Use original or manufacturer recommended accessories and spare parts only.
-
Page 7: Electrical Connection (Gb Ie Only)
Electrical connection (GB IE only) For Great Britain only Fuse cover Important! Fuse This appliance must be earthed. Fuse replacement The mains lead of this appliance is fitted with a BS 1363A 13 A fused plug. To change a fuse in this type of plug, use an ASTA approved fuse to BS 1362 type and proceed as follows: Remove the fuse cover and fuse. -
Page 8: Installation Instructions
Installation instructions Checking for transport damage After removing the packaging, make sure the product is complete and undamaged and that all accessories are present. Do not use the appliance if it is visibly damaged. Contact Customer Care. Installing and connecting the appliance Important! Installation must be performed by a qualified professional in compliance with legislation in force in the country of installation (see Built-in installation). - Page 9 Installation instructions Built-in installation Verify the minimum measurements required for correct installation of the appliance. The coffee maker must be installed in a column and the column must be firmly fixed to the wall with commercially available brackets. Important! All installation or maintenance operations must be performed with the appliance disconnected from the mains electricity supply.
- Page 10 Installation instructions Installation option A: Coffee maker by itself Installation option B: Coffee maker with lower grill kit - this is to match the height of adjacent appliances The lower grill kit can be purchased as a separate accessory from Customer Care.
- Page 11 Installation instructions Important! If you choose Installation option B, you will need to install the lower grill kit BEFORE you install the coffee maker. Refer to the instructions packed with the lower grill kit. x 16 Position the rails on the sides of the cabinet as shown in the figure.
-
Page 12: Introduction
Introduction Product overview Touch controls overview... - Page 13 Introduction Product Overview descriptions Description of the control panel A1. Cup tray Only the icons available in the function A2. Service door currently being used will be lit on the touch A3. Coffee guide screen. A4. Waste coffee container A light touch is enough to activate the icon. A5.
- Page 14 Introduction fig. fig. fig. fig. fig. fig. fig. fig. fig. fig. fig. fig. fig. fig. fig. fig.
- Page 15 Introduction fig. fig. fig. fig. fig. fig. fig. fig. fig. fig. fig. fig. fig. fig. fig.
-
Page 16: Using The Appliance For The First Time
Using the appliance for the fi rst time Coffee has been used to factory test the appliance and it is therefore completely normal for there to be traces of coffee in the mill. Customise water hardness as soon as possible following the instructions in section ‘Changing and setting menu parameters’... - Page 17 Using the appliance for the fi rst time Installing the filter Some models are fitted with a water softener filter to improve the quality of the water used and extend the working life of the appliance. To install, proceed as follows: Remove the filter from the packaging;...
- Page 18 Using the appliance for the fi rst time Replacing the filter (“FILTER RESET”) When “REPLACE FILTER” is displayed or after 2 months of use (see date indicator), the filter must be replaced: Remove the exhausted filter; Remove the new filter from the packaging. Slide the pointer of the date indicator (see fig.
-
Page 19: Turning On And Heating Up
Turning on and heating up Each time the appliance is turned on, it performs an automatic preheat and rinse cycle which cannot be interrupted. The appliance is ready for use only after completion of this cycle. Important! Be careful. During rinsing, a little hot water flows from the coffee spouts. To turn the appliance on, press the ON/OFF/stand-by button (A7) (fig. -
Page 20: Making Coffee Using Coffee Beans
Making coff ee using coff ee beans The appliance is preset to make coffee with a normal taste. You can also choose coffee with an extramild, mild, strong or extra-strong taste. There is also a pre-ground coffee option. To choose the required taste, press the icon (B4) (fig. - Page 21 Making coff ee using coff ee beans Never extract the water tank while the machine is delivering coffee. If it is removed, it will not be possible to make the coffee and the appliance will display “GROUND TOO FINE ADJUST MILL AND PRESS OK”...
-
Page 22: Making Espresso Coffee With Pre-Ground Coffee
Making coff ee using pre-ground coff ee Press the icon (B4) (fig. 7) and select the pre-ground coffee function. Extract the machine by pulling it outwards using the handles. Lift the central lid, place one measure of preground coffee in the funnel (fig. 19), push the appliance in then proceed as described in the section “Making coffee using coffee beans”. -
Page 23: Making Cappuccino (Using The Steam Function)
Making cappuccino (using the steam function) Turn the cappuccino maker towards the centre (fig. 5). Take a container, fill it with about 100 g of milk for each cappuccino to be made and place it under the cappuccino maker. In choosing the size of the receptacle, bear in mind that the milk doubles or triples in volume. -
Page 24: Cleaning
Cleaning Important! Before performing any cleaning operations, the machine must be turned off by pressing the main switch (A23) and unplugged from the mains power supply. Never immerse the coffee maker in water. Cleaning the coffee maker Do not use solvents or abrasive detergents to clean the coffee maker. A soft damp cloth will suffice. - Page 25 Cleaning Cleaning the water tank Clean the water tank (A12) regularly (about once a month) with a damp cloth and a little mild washing up liquid. Remove all traces of washing up liquid. Cleaning the spouts Clean the nozzles periodically using a sponge (fig. 28). Check regularly that the holes in the coffee spout are not blocked.
- Page 26 Cleaning Cleaning the brewing unit cont. If the brewing unit is difficult to insert, you must first adapt it to the right dimensions by pressing it forcefully from the bottom and top as shown in the figure. Once inserted, make sure the two red buttons have snapped out. Replace the drip tray and waste coffee container.
-
Page 27: Changing And Setting Menu Parameters
Changing and setting menu parameters When the appliance is ready, you can use the internal menu to modify the following parameters and functions: Choose language Rinsing Shut-off time Set clock Start time Auto-start Temperature Water hardness Coffee quantity Water quantity Descale Reset to default Statistics... - Page 28 Changing and setting menu parameters Rinsing This function enables you to obtain hotter coffee. Proceed as follows: When you turn the appliance on, if you want to make a small cup of coffee (less than 60 cc), preheat the cup by rinsing it with hot water. If on the other hand more than 2/3 minutes have passed since the last coffee was made, before requesting another coffee, you must preheat the brewing unit by: first pressing the...
- Page 29 Changing and setting menu parameters Changing coffee temperature To change coffee temperature, proceed as follows: Press the icon (B2) to enter the menu and then the icons (B7) and (B8) until “TEMPERATURE” is displayed. Press the OK icon (B9). Press the icons (B7) and (B8) to select the required coffee temperature from low, medium and high.
- Page 30 Changing and setting menu parameters Descaling Important! Failure to descale the appliance regularly voids the warranty. Descaler contains acids. Respect the safety warnings provided by the manufacturer and given on the descaler pack. Use the descaler recommended by the manufacturer only. Use of other descalers voids the warranty.
- Page 31 Changing and setting menu parameters Statistics This displays statistics relating to the machine. To display, proceed as follows: Press the icon (B2) to enter the menu and then the icons (B7) and (B8) until “STATISTICS” is displayed. Press the OK icon (B9). Press the icons (B7) and (B8) to verify: - How many coffees have been made.
-
Page 32: Displayed Messages
Displayed messages Displayed message Possible causes What to do FILL TANK The water tank is empty or Fill the tank with water and/or positioned incorrectly. insert it correctly, pushing it as far as it will go. GROUND TOO FINE The grinding is too fine and Turn the grinding ADJUST MILL AND the coffee is delivered too... - Page 33 Displayed messages Displayed message Possible causes What to do PLEASE DESCALE! The descaling procedure The machine must be descaled. described in the “Descaling” section needs to be performed as soon as possible. LESS COFFEE Too much coffee has been used. Select a milder taste or reduce the quantity of preground coffee, then make the coffee...
-
Page 34: Troubleshooting
Troubleshooting Problem Possible causes What to do The coffee is not hot. The cups were not preheated. Warm the cups by rinsing The brewing unit has cooled them with hot water. down because 2/3 minutes Before making coffee, have elapsed since the last preheat the brewing unit coffee was made. - Page 35 Troubleshooting Problem Possible causes What to do The coffee does not come The holes in the spouts are If necessary, remove coffee out of the spouts, but clogged with dry coffee dust. deposits with a toothpick, from around the service The coffee guide (A3) inside sponge or stiff bristled door (A2).
- Page 36 Warranty and service Before you call for service or assistance ... Check the things you can do yourself. Refer to the installation instructions and your user guide and check that: your product is correctly installed you are familiar with its normal operation. If after checking these points you still need assistance or parts, please refer to the Service &...
-
Page 37: Warranty And Service
Warranty and service This appliance has been designed and constructed in accordance with the following codes and specifications: In New Zealand and Australia: AS/NZS 60335-1 General Requirements for Domestic electrical appliances AS/NZS 60335-2-14 Particular Requirements for kitchen machines AS/NZS 60335-2-15 Particular Requirements for appliances for heating liquids In China: IEC60335-2-14 IEC60335-2-15... - Page 42 0°C 0°C...
- Page 43 65°C...
- Page 45 x 16...
- Page 48 fig. fig. fig. fig. fig. fig. fig. fig. fig. fig. fig. fig. fig. fig. fig. fig.
- Page 49 fig. fig. fig. fig. fig. fig. fig. fig. fig. fig. fig. fig. fig. fig. fig.
- Page 76 www.fi sherpaykel.com Copyright © Fisher & Paykel 2013. All rights reserved. The product specifications in this booklet apply to the specific products and models described at the date of issue. Under our policy of continuous product improvement, these specifications may change at any time. You should therefore check with your Dealer to ensure this booklet correctly describes the product currently available.
Need help?
Do you have a question about the EB60DSXB and is the answer not in the manual?
Questions and answers