Clarity C4210 User Manual
2.4 ghz cordless telephone with caller id featuring digital clarity power technology
Hide thumbs
Also See for C4210:
- Brochure (2 pages) ,
- User manual (47 pages) ,
- Quick start manual (2 pages)

Subscribe to Our Youtube Channel
Related Manuals for Clarity C4210


Summary of Contents for Clarity C4210
- Page 1 C4210 User Guide ™ 2.4 GHz Cordless Telephone with Caller ID Featuring Digital Clarity Power Technology Ç...
-
Page 3: Table Of Contents
Battery Life............15 Headset Jack............15 Belt Clip ..............15 Hearing Aid Compatibility.........15 Feature Set Up............16 Handset Features ..........16 Set Up Mode..........16 Digital Clarity Power ........19 Boost Clarity Power On/Off......19 Volume Control..........19 Tone Switch ............19 Handset Ringer ..........20 Pulse/Tone ............20 Flash..............20 Mute ..............20 Redial/Pause ...........20... - Page 4 TABLE OF CONTENTS Telephone Operations ..........24 Placing a Call ............24 Answering a Call..........24 Last Number Redial..........24 Pause Feature............25 Temporary Tone...........25 Lighted Key Pad...........25 Page/Handset Locator........25 Channel Operation..........26 Security Code............26 Memory Storage............26 Review Phonebook Information ......26 Adding a Phonebook Number......27 Dialing a Phonebook Entry .......28 Deleting a Stored Number .......28 Deleting All Stored Numbers......28 Changing a Stored Number......29...
- Page 5 IMPORTANT SAFETY INSTRUCTIONS When using your telephone equipment, basic safety precautions should always be followed to reduce the risk of fire, electric shock and injury to persons including the following: 1. Read and understand all instructions. 2. Follow all warnings and instructions marked on the telephone.
-
Page 6: Important Safety Instructions
IMPORTANT SAFETY INSTRUCTIONS 10. Do not place anything on the power cord. Install the telephone where no one will step or trip on the cord. 11. Do not overload wall outlets or extension cords as this can increase the risk of fire or electrical shock. - Page 7 IMPORTANT SAFETY INSTRUCTIONS E. If the telephone has been dropped or the case has been damaged. F. If the telephone exhibits a distinct change in performance. 15. Never install telephone wiring during a lightning storm. 16. Never install telephone jacks in wet locations unless the jack is specifically designed for wet locations.
-
Page 8: Safety Instructions For Batteries
IMPORTANT SAFETY INSTRUCTIONS SAFETY INSTRUCTIONS FOR BATTERIES Caution: Risk of explosion if battery is replaced by an incorrect type. Dispose of used batteries according to the instructions. 1. Use only the approved battery pack in the handset of your cordless phone. For Handset Unit: 3.6V 600mAHr NiMH Rechargeable Battery Sanik Battery Co. -
Page 9: Features
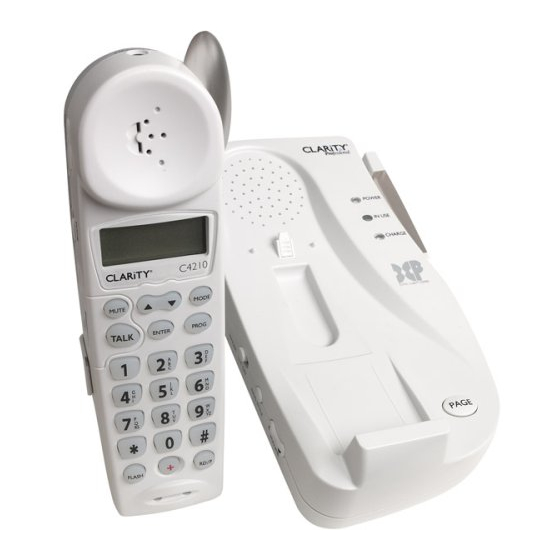
FEATURES Telephone Base 1. Handset Page 2. Ringer Volume 3. Ringer Style 4. Ringer On/Off 5. Antenna/Visual Ringer 6. Pulse/Tone 7. Boost On/Off... - Page 10 FEATURES Handset 11. Program 1. Neckloop Jack 12. Enter 2. Handset Tone 13. Flash 3. Boost 14. Emergency Button 4. Handset Volume 15. Redial/Pause 5. Mute 16. Visual Ringer 6. Talk 17. Handset Ringer Off/Vibe/On 7. Dial Pad 18. Delete/Channel 8.
-
Page 11: Getting Started
GETTING STARTED CHOOSING A LOCATION 1. This phone requires a modular phone jack (RJ11C) and a standard 120V AC wall outlet. 2. Plug the AC Adapter directly into outlet. 3. Do not plug other appliances into the same outlet or have outlet controlled by a wall switch. - Page 12 GETTING STARTED TABLE/DESK TOP INSTALLATION CAUTION: Disconnect the telephone line cord before connecting or disconnecting the battery backup in the wall mount bracket. 1. Plug one end of the supplied modular tele- phone line cord into the jack marked TEL located on the back of the telephone base as shown in the diagram.
- Page 13 GETTING STARTED 1. Plug one end of the supplied short modular telephone line cord into the TEL jack located on the back of the base of the phone. 2. Insert the plug of the AC adapter into the jack marked DC 9V 400mA located on the back of the telephone base.
-
Page 14: Battery Installation
GETTING STARTED HANDSET BATTERY INSTALLATION The C4210 uses a 3.6Volt 600mAh NiMH recharge- able 3 cell (AAA Type) battery that is included with your unit. Handset Battery must be connected before beginning initial charging. To Install a New Battery 1. Remove battery cover 2. -
Page 15: Battery Life
Ordering a Headset In the event you wish to purchase a headset for your C4210, please contact Plantronics at 1-800-544-4660 for a location near you.We recommend using the Plantronics M110 or M130 headset. Belt Clip You may choose to use the optional belt clip with your handset. -
Page 16: Feature Set Up
FEATURE SET UP TELEPHONE HANDSET Set-up Mode The C4210 handset goes into setup mode automati- cally when the battery is connected. Or press and hold MODE button for 3 seconds to enter setup mode. If there is no input within 30 seconds, the language will be set to the last selected one and go back to standby mode. -
Page 17: Setting Area Code
FEATURE SET UP 3. Enter the area code number using the numeric keys on the handset. 4. Press the UP ( ) or DOWN ( ) button to go ▲ ▼ to the next menu. Setting Area Code 2 1. After setting Area Code 1, press UP ( ▲... - Page 18 FEATURE SET UP Setting Voicemail Number 1. After setting Easy Mode, press UP ( ) button ▲ to set VOICEMAIL Number. 2. The LCD display will show VOICEMAIL NO and XXX-XXX-XXXX with the last digit blinking. 3. Enter the voicemail number using the numeric keys on the handset.
-
Page 19: Digital Clarity Power
15 dB of volume before the CLARITY POWER button is activated. Once the CLARITY POWER button is pressed, the C4210 will provide up to 40 dB of amplification. Tone Switch The C4210 has three (3) TONE settings. Adjusting the TONE switch changes the style of amplification... -
Page 20: Handset Ringer
FEATURE SET UP Handset Ringer Set the switch marked Ringer OFF/VIBE/ON located on the side of the handset.When VIBE is selected the handset will ring and vibrate when receiving and incoming call. The ringer switch must be set to ON or VIBE for the handset to ring. -
Page 21: Ringer Volume
ON, the Boost function will be ON every time a call starts, and will default to ON every time the phone hangs up. During a call, the BOOST Clarity Power button can toggle the Clarity Power ON or OFF according to the user’s needs. -
Page 22: Battery Backup
OFF, the Boost function will be OFF every time a call starts, and the user will need to press the BOOST Clarity Power button in order to gain the extra level of amplification. If the phone hangs up, the Clarity Power will reset to OFF. - Page 23 FEATURE SET UP To Replace Battery Backup Batteries 1. Disconnect telephone line cord and remove desk/wall mount bracket from telephone base. 2. Disconnect battery back-up connector from the telephone base. 3. Remove batteries from desk/wall mount bracket. 4. Install four (4) AA Alkaline batteries with negative (-) end of battery touching the spring.
-
Page 24: Telephone Operations
If the handset is in the cradle with AutoConnect mode OFF, lift the handset.The handset will be in standby mode. Press TALK button to receive the call. Refer to BOOST Clarity Power and Volume Control for information on adjusting volume controls on Page 19. Last Number Redial The last number dialed (up to 32 digits) is stored in the redial memory until another number is dialed. -
Page 25: Pause Feature
TELEPHONE OPERATIONS Pause Feature Programming in a pause will cause the phone to wait four (4) seconds before dialing additional numbers. This feature may be used when it is necessary to dial an access code (9, for example) and wait for a sec- ond dial tone before you can dial an outside number. -
Page 26: Channel Operation
TELEPHONE OPERATIONS Channel Operation The C4210 cordless telephone automatically searches and selects the clearest of 40 channels when it is being used. If interference develops on the line, pressing this button will move to another channel. Security Code The security code prevents your cordless phone conversations from being accessed by a phone on a different line. -
Page 27: Adding A Phonebook Number
TELEPHONE OPERATIONS Adding a Phonebook Number 1. Unit must be in standby mode only. 2. Press MODE key twice.The display will show PHONEBOOK for 1 second and then display the first available record. 3. Press PROG key to add new phone record. 4. -
Page 28: Dialing A Phonebook Entry
TELEPHONE OPERATIONS Dialing a Phonebook Entry 1. Locate the phonebook record you wish to call. 2. Press TALK or ENTER button to dial the displayed number. Deleting a Stored Number 1. Unit must be in standby mode and display is showing a phonebook record. 2. -
Page 29: Changing A Stored Number
TELEPHONE OPERATIONS Changing a Stored Number 1. Unit must be in standby mode only. 2. Press MODE key twice.The display will show PHONEBOOK for 1 second and then display the first available record. 3. Press the UP ( ) or DOWN ( ) button to go ▲... -
Page 30: Dialing The Emergency Number
TELEPHONE OPERATIONS 3. Press the UP ( ) or DOWN ( ) button ▲ ▼ to go to the record to be stored to the EMERGENCY key. 4. Press and hold the EMERGENCY key for 2 seconds. 5. The phone number is copied to the EMERGENCY key.The LCD will display MEM STORING for one (1) second and the handset will give a success keynote. -
Page 31: Caller Id Operations
Visual Message Waiting Indicator (VMWI) Note:This is a service that is provided through your local telephone company. If the C4210 finds that there is voice message to be retrieved, it will turn on the Message Waiting Indica- tor (the ENTER key). -
Page 32: Caller Id Review
TELEPHONE OPERATIONS If you access the call waiting call, the Caller ID information will disappear and the Time/Day screen will appear. If you do not access the call waiting call, the Caller ID information will be transferred into the Caller log. This caller information is considered “old”. -
Page 33: Saving Caller Id Information To Phonebook
TELEPHONE OPERATIONS If the Caller ID list is empty, the display will show - NO CALLS -. • At anytime, the user can press FLASH button one time to go back to standby mode. • It will go back to standby automatically at 30 seconds time out if there is no action. -
Page 34: Callback From Caller Id Information
TELEPHONE OPERATIONS • At anytime, the user can press FLASH button one time to go back to standby mode. • It will go back to standby automatically at 30 seconds time out if there is no action. Callback from CALLER ID Information To callback from incoming call information, the base T/P switch should be set at T. - Page 35 TELEPHONE OPERATIONS Example 1: Stored Long Distance Service code: 1. Stored area code: 770. Stored incoming call number 770-123-4567. 1. Pressing the ENTER key will show blinking 123-4567. 2. Pressing the TALK or ENTER key again will dial out 1234567. 3.
-
Page 36: Delete Caller Id Information
• It will go back to standby automatically at 30 seconds time out if there is no action. The C4210 has been designed to give you years of dependable service with a minimum of care.To ensure the utmost in performance, follow these guidelines in caring for the unit: 1. -
Page 37: Maintenance And Care
MAINTENANCE AND CARE 3. Do not use detergents and avoid excess moisture. 4. The C4210 is an electrical device.Avoid electric shock by keeping the phone away from water (i.e. bathroom, kitchen sink, etc.). The unit will not operate/no dial tone: •... -
Page 38: Troubleshooting
TROUBLESHOOTING Noise, Static, Interference or Other Calls Heard while Using the Handset: • Try changing channels. • Make sure the base antenna is in an upright position. • Make sure you are in the usable range of the base station. •... - Page 39 TROUBLESHOOTING Difficulty in Placing or Receiving Calls: • Move closer to the base and try again. • If moving closer does not work, you may have lost the security code. • Reset code by placing the handset back on the base for 5-10 seconds. (See Security Code Section) •...
-
Page 40: Regulatory Compliance
REGULATORY COMPLIANCE Part 68 of FCC Rules Information a) This equipment complies with Part 68 of the FCC rules and the requirements adopted by the ACTA. On the bottom of this equipment is a label that contains, among other information, a product identifier in the format US:AAAEQ##TXXXX. - Page 41 If trouble is experienced with this telephone equipment, for repair or warranty information, please contact Clarity, 1-800-552-3368. If the equipment is causing harm to the telephone network, the tele- phone company may request that you disconnect the equipment until the problem is resolved.
- Page 42 REGULATORY COMPLIANCE Customer-Owned Coin/Credit Card Phones: To comply with state tariffs, the telephone company must be given notification prior to connection. In some states, the state public utility commission, pub- lic service commission or corporation commission must give prior approval of connection. Part 15 of FCC Rules Information This device complies with Part 15 of the FCC Rules.
- Page 43 REGULATORY COMPLIANCE 3. Connect the telephone equipment into an outlet on a circuit different from that to which the television, radio, or other receiver is connected. 4. Consult the dealer or an experienced Radio/ TV Technician for help. CAUTION: Changes or modifications not ex- pressly approved by the manufacturer responsible for compliance could void the user’s authority to oper- ate the equipment.
- Page 44 five. (The term “IC:” before the certification/ registration number only signifies that the Industry Canada technical specifications were met.) The party responsible for regulatory compliance: Clarity,A Division of Plantronics, Inc. 4289 Bonny Oaks Drive, Suite 106 Chattanooga,TN 37406 Phone: 1-800-552-3368...
-
Page 45: Warranty And Service
(1) year from the date of original purchase (“Warranty Period”).The obligation of Clarity under this warranty shall be at Clarity‘s option, without charge, of any part or unit that proves to be defective in material or workman- ship during the Warranty Period. - Page 46 Incidental or Consequential Damages Neither Clarity nor your retail dealer or selling distributors has any responsibility for any incidental or consequential damages including without limita- tion, commercial loss or profit, or for any incidental expenses, expenses, loss of time, or inconvenience.
- Page 47 WARRANTY & SERVICE In Canada Plantronics Service Center 8112 Trans-Canada Hwy. Ville St. Laurent. Que. Canada H4S 1M5 Tel: (800) 540-8363 (514) 956-8363 Fax: (514) 956-1825 Please use the original container, or pack the unit(s) in a sturdy carton with sufficient packing material to prevent damage.
- Page 49 Guía del Usuario de Clarity Professional C4210 ™ Teléfono inalámbrico de 2,4 GHz con identificador de llamadas Con Tecnología Digital Clarity Power...
- Page 50 Compatibilidad con dispositivos de ayuda auditiva ............7 Configuración de funciones ........8 Receptor inalámbrico..........8 Modo de configuración..........8 Digital Clarity Power ..........10 Realce Clarity Power On/Off (activado / desactivado) ...........10 Control de volumen ..........10 Interruptor de tonos ..........10 Timbre del receptor ..........10...
- Page 51 TABLA DE CONTENIDOS Batería de reserva.............12 Hacer una llamada ...........13 Recibir una llamada...........13 Remarcado del último número ......14 Función Pausa.............14 Tono temporal ............14 Teclado iluminado............14 Page/Localizador del receptor inalámbrico ..14 Operación en canales..........15 Código de seguridad..........15 Almacenamiento en memoria ........15 Revisar información de la lista de teléfonos..15 Agregar número a la lista de teléfonos....15 Marcar una entrada de la lista de teléfonos ..16...
-
Page 52: Instrucciones Importantes De Seguridad
INSTRUCCIONES IMPORTANTES DE SEGURIDAD Cuando utilice su equipo de teléfono, se deben seguir siempre las siguientes precauciones de seguridad básicas para reducir el riesgo de incendio, choque eléctrico y lesiones a personas incluyendo lo siguiente: 1. Leer y comprender todas las instrucciones. 2. - Page 53 INSTRUCCIONES IMPORTANTES DE SEGURIDAD 9. Opere este teléfono usando el voltaje eléctrico como se establece en la unidad de base o en el manual del usuario. Si no está seguro del voltaje de su hogar, consulte al distribuidor del producto o a su compañía eléctrica local.
- Page 54 INSTRUCCIONES IMPORTANTES DE SEGURIDAD D. Si el teléfono no funciona normalmente siguiendo las instrucciones de operación. Ajuste solo aquellos controles que están cubiertos en las instrucciones de operación: El ajuste inapropiado puede requerir trabajo extensivo por un técnico calificado para restaurar el teléfono a su operación normal.
-
Page 55: Instrucciones De Seguridad
INSTRUCCIONES IMPORTANTES DE SEGURIDAD INSTRUCCIONES DE SEGURIDAD PARA LAS BATERÍAS Precaución: Existe riesgo de explosión si la batería es reemplazada con el tipo incorrecto. Deshágase de las baterías usadas de acuerdo a las instrucciones. 1. Use solamente el paquete de baterías aprobado en el auricular de su teléfono inalámbrico. - Page 56 CARACTERÍSTICAS Base del teléfono 1. Localizador del receptor inalámbrico 2. Volumen del timbre 3. Estilo de timbre 4. Timbre On/Off (activado/desactivado) 5. Antena/Timbre visual 6. Pulso/Tono 7. Boost On/Off (realce activado/desactivado)
-
Page 58: Preparación
PREPARACIÓN Elección de una ubicación 1. Este teléfono requiere de un conector telefónico modular (RJ11C) y un enchufe de pared están dar de 120V AC. 2. Conecte el adaptador AC directamente en el enchufe. 3. No conecte otros artefactos en el mismo enchufe o controle el mismo por medio de un 9V DC 400 mA... - Page 59 PREPARACIÓN INSTALACIÓN EN MESA / ESCRITORIO PRECAUCIÓN: Desconecte el cable de línea telefónica antes de conectar o desconectar la batería de reserva en el soporte de montaje a la pared. 1. Conecte un extremo del cable de línea telefónica modular que se suministra en el conector que posee la marca TEL ubicada en la base del teléfono, como se indica en el diagrama.
- Page 60 PREPARACIÓN La base puede montarse sobre una placa de pared estándar. 1. Conecte un extremo del cable corto de línea telefónica modular en el conector TEL ubicado en la parte posterior de la base del teléfono. 2. Inserte el enchufe del adaptador AC en el conector marcado de 9V 400mA DC, ubicado en la parte posterior de la base del teléfono.
-
Page 61: Instalación De La Batería
Nota: Recuerde, debe cargar el teléfono durante al menos 12 horas antes de utilizarlo por primera vez. INSTALACIÓN DE LA BATERÍA El modelo C4210 utiliza una batería recargable de 3 células (Tipo AAA) de 3,6 voltios, 600mAh NiMH, que se incluye en la unidad. -
Page 62: Batería Baja
PREPARACIÓN Batería baja Cuando la batería esté baja, se escucharán dos (2) avisos sonoros cada treinta (30) segundos y la pantalla de LCD indicará que la batería está baja. Si la batería está baja durante una llamada, la misma se desconectará luego de aproximadamente dos (2) minutos. -
Page 63: Conexión Para Audífonos
Para ordenar un audífono. En caso de que desee adquirir un audífono para el teléfono C4210, comuníquese con Plantronics al 1-800-544-4660 para determinar la ubicación más cercana a su domicilio. Recomendamos el uso de los audífonos Plantronics M110 o M130. -
Page 64: Configuración De Funciones
CONFIGURACIÓN DE FUNCIONES RECEPTOR INALÁMBRICO DEL TELÉFONO Modo de configuración El receptor inalámbrico C4210 ingresa en el modo de configuración de forma automática al conectar la batería. O presione y mantenga presionado el botón MODE (modo) durante 3 segundos para ingresar en el modo de configuración. - Page 65 CONFIGURACIÓN DE FUNCIONES Configuración del Código de Área 1 1. Luego de configurar el contraste presione el botón UP ( ) para configurar el Código de ▲ área 1. 2. La pantalla de LCD indicará AREA CODE 1 (código de área 1) y XYZ con el dígito X parpadeando.
-
Page 66: Correo De Voz
CONFIGURACIÓN DE FUNCIONES Configuración de Easy Mode (Modo Fácil) 1. Luego de configurar el código LDS, presione el botón UP ( ) para configurar Easy Mode. ▲ 2. La pantalla de LCD indicará EASY MODE (modo fácil) y 1.ON (activado) 2.OFF (desactivado). 3. -
Page 67: Digital Clarity Power
REALCE Clarity Power On/Off (activado / desactivado) El teléfono C4210 tiene un botón que controla el volumen del receptor. Una vez que está presionado el botón BOOST, se agrega un nivel adicional de amplificación por sobre el rango total del control de volumen. -
Page 68: Control De Volumen
El dial de volu- men proporciona hasta 15 dB de volumen antes de activar el botón CLARITY POWER. Una vez presio- nado el botón CLARITY POWER, el teléfono C4210 proporcionará hasta 40 dB de amplificación. Interruptor de tonos El teléfono C4210 tiene tres (3) configuraciones... -
Page 69: Flash
CONFIGURACIÓN DE FUNCIONES Flash El botón FLASH se activa para utilizar servicios personalizados de llamadas tales como Llamada en espera o Llamada tripartita. Comuníquese con su compañía telefónica local para obtener información acerca de estos servicios. Silencio (mute) El botón MUTE (silencio) le permite al usuario llevar una conversación privada que no desea que escuche la persona que se encuentra del otro lado de la línea. -
Page 70: Estilo De Timbre
Interruptor BOOST ON/OFF (realce activado / desactivado) Este interruptor deshabilitará la función de reini- cio del botón BOOST (realce) Clarity Power de la siguiente manera: ON – Cuando el interruptor BOOST ON/OFF (re- alce activado/desactivado) está configurado en ON, la función Realce estará... -
Page 71: Pulso/Tono
CONFIGURACIÓN DE FUNCIONES el teléfono, Clarity Power se reiniciará a la posición OFF. Durante una llamada, el botón BOOST (realce) puede alternar la función Clarity Power en posición ON (activado) u OFF (desactivado) de acuerdo con las necesidades del usuario. -
Page 72: Hacer Una Llamada
CONFIGURACIÓN DE FUNCIONES Para reemplazar las baterías de reserva 1. Desconecte el cable de línea telefónica y retire el soporte de montaje a escritorio/pared de la base del teléfono. 2. Desconecte el conector de batería de reserva de la base del teléfono. 3. -
Page 73: Operaciones Del Teléfono
OFF (desactivado), levántelo. El receptor inalámbrico estará en el modo de espera. Presione el botón TALK (hablar) para recibir la llamada. Consulte BOOST (realce) Clarity Power y control de volumen para obtener información acerca del ajuste de los controles de volumen en la página 70. -
Page 74: Función Pausa
OPERACIONES DEL TELÉFONO Función Pausa La programación durante una pausa originará que el teléfono espere cuatro (4) segundos antes de marcar números adicionales. Esta función puede utilizarse cuando sea necesario marcar un código de acceso (por ejemplo, 9) y esperar un segundo tono de mar- cado antes de marcar un número externo. -
Page 75: Operación En Canales
Operación en canales Cuando se encuentra en uso, el teléfono inalámbrico C4210 busca y selecciona automáticamente el canal de mayor claridad entre los 40 que posee. Si se pre- sentaran interferencias en la línea, se cambiará a otro canal al presionar este botón. -
Page 76: Agregar Número A La Lista De Teléfonos
OPERACIONES DEL TELÉFONO 3. Si la lista de teléfonos está vacía, la pantalla indicará - NO RECORDS – (sin registros) luego de 1 segundo. 4. De lo contrario la pantalla indicará el primer registro alfabético con el número de registro sobre la línea del ícono superior. -
Page 77: Marcar Una Entrada De La Lista De Teléfonos
OPERACIONES DEL TELÉFONO como Pausa, contado como un dígito, indicado como P). Presione DEL/CH para borrar cualquier error. 7. Presione ENTER para confirmar el número. La pantalla de LCD indicará ENTER NAME (ingresar número) y luego la segunda línea estará en blanco. 8. -
Page 78: Borrar Todos Los Números Almacenados
OPERACIONES DEL TELÉFONO 3. Presione DEL/CH para confirmar. 4. La pantalla indicará MEM DELETED (memoria borrada) durante 3 segundos junto con un mensaje satisfactorio. 5. La pantalla indicará el siguiente registro disponible o NO RECORDS (sin registros). • Si la ubicación en la memoria se encontrara vacía, al presionar la tecla DEL no habrá... -
Page 79: Agregar Número De Emergencia
OPERACIONES DEL TELÉFONO 4. Presione la tecla # para modificar el registro telefónico. 5. La pantalla indicará ENTER TO END (ingresar al final) y el número almacenado 567 con el cursor parpadeante luego del dígito 7. 6. Presione cualquier tecla numérica para agregar números adicionales. -
Page 80: Marcar Número De Emergencia
OPERACIONES DEL TELÉFONO 3. Presione los botones UP ( ) o DOWN ( ) para ▲ ▼ desplazarse al registro a almacenar en la tecla EMERGENCY (emergencia). 4. Presione y mantenga presionada la tecla EMERGENCY durante 2 segundos. 5. El número telefónico se copia a la tecla EMERGENCY. -
Page 81: Operaciones Del Identificador De Llamadas
NOTA: Este es un servicio que se proporciona a través de su compañía telefónica local. Si el teléfono C4210 encuentra un mensaje de voz para recuperar, se encenderá el indicador de mensaje en espera (tecla ENTER). - Page 82 OPERACIONES DEL TELÉFONO segunda fila indica la información del identificador de llamadas, o está en blanco de no haber información. La tercera fila muestra el número telefónico entran- te. Si el número es más largo de doce (12) dígitos, la pantalla de LCD alternará...
-
Page 83: Guardar Información Del Identificador De Llamadas En La Lista De Teléfonos
OPERACIONES DEL TELÉFONO Revisar el identificador de llamadas Si hubiera información sobre llamadas nuevas, el botón MODE (modo) destellará de color ROJO. Durante el modo en espera, presione una vez el botón MODE (modo). El display de LCD indicará CID MODE (modo identificador de llamadas) y luego la última información sobre el identificador de llamadas. - Page 84 OPERACIONES DEL TELÉFONO ENTER TO END (ingresar al final) y el número de la persona que llama estará sobre la tercera línea con el cursor parpadeante al final del número. 3. Utilice una tecla numérica para agregar números adicionales. Presione DEL/CH para borrar c alquier error.
-
Page 85: Rellamada A Partir De La Información Del
OPERACIONES DEL TELÉFONO Rellamada a partir de la información del identificador de llamadas Para realizar una rellamada a partir de información de una llamada entrante, el interruptor T/P de la base debe estar configurado en T. Mientras revisa la lista de llamadas entrantes, pre- sione ENTER y las teclas UP ( ) o DOWN ( ) le... - Page 86 OPERACIONES DEL TELÉFONO Al revisar la información del identificador de llama- das, presione ENTER para visualizar la información del identificador de llamadas en un formato diferente. Ejemplo 1: Código de Servicio de Larga Distancia almacenado: 1. Código de área almacenado: 770. Número de llamada entrante almacenado 770-123-4567.
-
Page 87: Borrar Información Del Identificador De Llamadas
OPERACIONES DEL TELÉFONO 1. Al presionar la tecla ENTER aparecerá parpadeando 413-456-7890. 2. Presionando nuevamente las teclas TALK o ENTER, se marcará 4134567890. 3. Al presionar la tecla UP ( ) aparecerá ▲ parpadeando 1-4134567890. Presionando nuevamente las teclas TALK o ENTER, se marcará... - Page 88 OPERACIONES DEL TELÉFONO Borrar toda la información del identifica- dor de llamadas Mientras revisa el identificador de llamadas, presione y mantenga presionado el botón DEL/CH durante dos segundos. En la pantalla de LCD destellará DELETE ALL? (¿borrar todos?) Presione DEL/CH para confirmar.
-
Page 89: Mantenimiento Y Cuidados
MANTENIMIENTO Y CUIDADOS El teléfono C4210 ha sido diseñado para ofrecerle años de servicio confiable con un mínimo de cuida- dos. Para asegurar el máximo rendimiento, siga estos lineamientos para el cuidado de la unidad: 1. Evite hacer caer o golpear la unidad. -
Page 90: Resolución De Problemas
RESOLUCIÓN DE PROBLEMAS La unidad no funciona/no hay tono de marcado: • Verifique que el botón TALK esté encendido. • Verifique que el adaptador AC esté conectado con seguridad a un enchufe AC, a la base y al teléfono. • Verifique que el cable de la línea telefónica esté conectado con seguridad al conector de pared y al teléfono. - Page 91 RESOLUCIÓN DE PROBLEMAS • Asegúrese de que se encuentra dentro del rango de alcance de la estación de base. • Puede tener demasiadas extensiones en su línea. Intente desconectar algunos dispositivos. Hay ruidos, estática, interferencias o se oyen otras llamadas mientras se utiliza el receptor inalámbrico: •...
- Page 92 RESOLUCIÓN DE PROBLEMAS Dificultad para hacer o recibir llamadas: • Acérquese a la base e intente nuevamente. • Si no funciona de esa forma, puede haber perdido el código de seguridad. • Reinicie el código colocando el receptor inalámbrico sobre la base durante 5-10 segundos. (Consulte la sección Códigos de seguridad).
- Page 93 CUMPLIMIENTO CON LOS REGLAMENTOS Información sobre la Parte 68 de las Reglas FCC (Comisión Federal de Comunicaciones de EE.UU. por sus siglas en inglés) a) Este equipo cumple con la Parte 68 de las reglas FCC y con los requerimientos adoptados por la ACTA (Asociación Americana de Prestadores de Servicios de Telecomunicaciones por sus siglas en inglés) En la parte de abajo de este equipo hay una...
- Page 94 Si se experimentan problemas con este equipo telefónico, para información sobre la reparación o garantía, por favor póngase en contacto con Clarity, al 1-800-552-3368. Si el equipo está causando daños a la red telefónica, la compañía de teléfonos puede solicitar que usted desconecte el equipo hasta que el problema sea resuelto.
- Page 95 CUMPLIMIENTO CON LOS REGLAMENTOS h) La conexión a servicios de línea colectiva está sujeta a tarifas estatales. Póngase en contacto con la comisión de servicios públicos estatales, la comisión del servicio público o la comisión corporativa para información. i) Si su casa tiene un equipo de alarma especialmente cableado conectado a la línea de teléfono, asegúrese que la instalación de este equipo telefónico no in- habilite su equipo de alarma.
- Page 96 CUMPLIMIENTO CON LOS REGLAMENTOS Su equipo fue probado y se comprobó que cumple con los límites para un dispositivo digital Clase B, de acuerdo con la Parte 15 de las normas de la FCC (Comisión Federal de Comunicaciones). Estos límites están diseñados para ofrecer una protección razonable contra la interferencia perjudicial en una instalación residencial.
-
Page 97: Industry Canada
CUMPLIMIENTO CON LOS REGLAMENTOS PRECAUCIÓN: Los cambios o modificaciones no aprobados expresamente por el fabricante respon- sable del cumplimiento pudieran anular la autoridad del usuario de operar el equipo. Especificaciones Técnicas de Industry Canada Este producto cumple con las especificaciones técnicas aplicables de Industry Canada Antes de instalar este equipo, los usuarios deben asegurarse de que está... - Page 98 (El término “IC”: antes del número de certificación/ registro solo significa que las especificaciones técni- cas de Industry Canada fueron cubiertas.) La parte responsable para el cumplimiento reglamentario: Clarity, Una División de Plantronics, Inc. 4289 Bonny Oaks Drive, Suite 106 Chattanooga,TN 37406 Teléfono: 1-800-552-3368...
-
Page 99: Garantía Y Servicio
(1) año de la fecha de la com- pra original (“Período de Garantía”). La obligación de Clarity bajo esta garantía deberá ser a la opción de Clarity, sin cargo, de cualquier parte o unidad que pruebe ser defectuosa en material o mano de obra durante el Período de Garantía. - Page 100 Daños Incidentales o Consecuenciales Ni Clarity ni su vendedor de menudeo o distri- buidor de ventas tienen responsabilidad alguna por cualesquier daños incidentales o consecuenciales incluyendo sin limitación, pérdida o ganancia comer- cial, o por cualesquier gastos, pérdida de tiempo o...
- Page 101 GARANTÍA Y SERVICIO En Canadá Plantronics Service Center 8112 Trans-Canada Hwy. Ville St. Laurent, Que. H4S 1M5 Canada Tel: (800) 540-8363 (514) 956-8363 Fax: (514) 956-1825 Por favor use el contenedor original, o empaque la(s) unidad(es) en un cartón firme con suficiente material de empaque para prevenir daño.
- Page 103 Guide de l’utilisateur du Clarity Professional C4210 ™ Téléphone sans fil de 2.4 GHz avec afficheur présentant la technologie Digital Clarity Power...
- Page 104 Compatibilité avec prothèse auditive...... 8 Réglage des fonctions ..........9 Combiné................ 9 Réglage de mode ............9 Clarity Power numérique ........10 Boost Clarity Power On/Off ........10 Contrôle de volume ..........11 Commutateur de tonalité ........11 Sonnerie du combiné ..........11 Clignotant (Flash) ............12 Mise en sourdine ............12...
- Page 105 TABLE DES MATIÈRES Faire un appel ............13 Répondre à un appel..........14 Recomposition du dernier numéro.......14 Fonction de pause .............14 Tonalité temporaire ..........14 Clavier lumineux............14 Téléappel/Repérage du combiné......14 Fonctionnement des canaux ........15 Code de sécurité............15 Entreposage en mémoire.........15 Réviser les numéros en mémoire......15 Ajouter un numéro en mémoire ......15 Composer un numéro en mémoire ......16 Effacer un numéro en mémoire......16...
-
Page 106: Consignes De Sécurité
CONSIGNES DE SÉCURITÉ Lorsque vous utilisez votre appareil téléphonique, observez ces quelques mesures de base afin de réduire les risques d’incendie,d’électrocution et de blessures corporelles : 1. Lisez et comprenez bien toutes les instructions. 2. Vous devez respecter les avertissements et instructions inscrits sur l’appareil. - Page 107 CONSIGNES DE SÉCURITÉ ou dans le guide d’utilisation. Si vous n’êtes pas certain du type de tension de votre maison, communiquez avec votre marchand ou le fournisseur en électricité de votre région. 10. Vous devez acheminer les fils d’alimentation de façon à...
- Page 108 CONSIGNES DE SÉCURITÉ inaccessibles peut endommager l’appareil, ce qui demanderait un travail plus substantiel de la part du technicien qui devra remettre l’appareil à l’état neuf. E. Si l’appareil a été échappé ou le boîtier, endommagé. F. Si l’appareil démontre une nette diminution de sa performance.
- Page 109 CONSIGNES DE SÉCURITÉ Consignes de sécurité des piles Mise en garde : Risque d’explosion si la pile est remplacée par un type de pile inapproprié se débarrasser des piles usagées selon les consignes. 1.N’utiliser que la pile approuvée dans le combiné...
- Page 110 DISPOSITIFS Base du Téléphone 1. Appel du Combiné 2. Volume de la Sonnerie 3. Style de Sonnerie 4. Sonnerie On/Off 5. Antenne/Sonnerie Visuelle 6. Impulsion/Tonalité 7. Amplification On/Off...
- Page 111 DISPOSITIFS...
-
Page 112: Démarrage
DÉMARRAGE Choisir un emplacement 1. Ce téléphone demande une prise de téléphone modulaire (RJ11C) et une prise murale standard 120V CA. 2. Brancher l’adaptateur CA directement dans la prise. 3. Ne pas brancher d’autres appareils électriques dans la même prise ou avoir la prise contrôlée 9V DC 400 mA par un commutateur mural. -
Page 113: Installation
INSTALLATION INSTALLATION SUR TABLE/DESSUS DE BUREAU ATTENTION: Débrancher le fil de téléphone avant de connecter ou déconnecter les piles de sec- ours dans le support de montage mural. 1. Brancher une extrémité du fil de téléphone modulaire fourni dans la prise marquée TEL située à... - Page 114 INSTALLATION MONTAGE MURAL ATTENTION: Débrancher le fil de téléphone avant de connecter ou déconnecter la batterie de secours dans le support de montage mural.. Le socle peut être monté sur une plaque murale standard. 1. Brancher une extrémité du fil court de téléphone modulaire fourni dans la prise TEL située à...
-
Page 115: Installation Du Bloc-Piles
12 heures avant de l’utiliser pour la première fois. INSTALLATION DU BLOC-PILES Le C4210 utilise un bloc de 3 piles (Type AAA) 3.6Volts 600mAh NiMH rechargeables qui est inclus avec votre socle. Le bloc-piles du combiné doit être branché avant de... -
Page 116: Piles Faibles
INSTALLATION 2. Après que les piles seront complètement chargées, vérifier en pressant la touche TALK sur le combiné pour confirmer la tonalité. Piles faibles Quand le bloc-piles du combiné s’affaiblit, deux (2) bips se font entendre toutes les trente (30) secondes et l’écran ACL affiche les piles faibles. -
Page 117: Pince De Ceinture
Commander des écouteurs Si vous désirez acheter des écouteurs pour votre C4210, contacter Plantronics à 1-800-544-4660 pour un magasin près de chez-vous. Nous recommandons d’utiliser des écouteurs Plantronics M110 ou M130. Pince à ceinture Vous pouvez choisir d’utiliser la pince à... -
Page 118: Réglage Des Fonctions
T/bobines en T. COMBINÉ DU TÉLÉPHONE Réglage du mode Le combiné C4210 va au réglage du mode automa- tiquement quand le bloc-pile est branché. Ou presser et tenir le bouton MODE pendant 3 secondes pour passer au réglage de mode. S’il n’y a pas de courant en-dedans de 30 secondes, la langue sera ajustée à... - Page 119 RÉGLAGE DES FONCTIONS 3. Presser les touches 1, 2 ou 3 pour changer le niveau. Le niveau choisi en cours s’illuminera. 4. Presser la touche HAUT ( ) ou BAS ( ) pour ▲ ▼ aller au prochain menu. Réglage du code régional 1 1.
- Page 120 RÉGLAGE DES FONCTIONS 1. Après réglage du code SI, presser le bouton HAUT ( ) pour régler le mode facile. ▲ 2. L’écran ACL indiquera EASY MODE et 1.ON 2.OFF. 3. Presser 1 ou 2 pour changer le mode. La coche se déplacera contre le mode choisi.
-
Page 121: Clarity Power Numérique
Boost Clarity Power On/Off Le C4210 a un bouton qui contrôle la force du son du récepteur. Une fois la touche BOOST pressé, un niveau plus fort d’amplification est ajouté au-dessus de toute la gamme du contrôle du volume . -
Page 122: Commutateur De Tonalité
CLARITY POWER pressé, le C4210 fournira jusqu’à 40 dB d’amplification. Commutateur de tonalité Le C4210 a trois (3) ajustements de TONALITÉ. Ajuster le commutateur de TONE change le style d’amplification et vous permet de personnaliser votre expérience auditive. Nous avons tous dif- férentes préférences auditives. -
Page 123: Recomposition/Pause
RÉGLAGE DES FONCTIONS le microphone dans le combiné est désactivé. Presser de nouveau la touche MUTE désengagera la fonction MUTE. Recomposition/Pause Presser le bouton RD/P pour refaire le dernier numéro composé. Presser le bouton RD/P en entreposant un numéro de téléphone insèrera une pause de quatre (4) secondes. -
Page 124: Impulsion/Tonalité
ON toutes les fois que le téléphone raccroche. Pendant un appel, le bouton BOOST Clarity Power peut alterner le Clarity Power à ON ou OFF selon les besoins de l’utilisateur. OFF – Quand le bouton BOOST ON/OFF est fixé... -
Page 125: Fonctionnement Du Téléphone
RÉGLAGE DES FONCTIONS téléphone vous offrira un montant limité de temps pour continuer le fonctionnement de votre télé- phone advenant une panne de courant. FONCTIONNEMENT DU TÉLÉPHONE Installer les piles de secours 1. Déconnecter le fil de téléphone et enlever le support de montage bureau/mur du socle du téléphone 2. -
Page 126: Faire Un Appel
RÉGLAGE DES FONCTIONS 5. Brancher le connecteur des piles de secours au terminal au bas du socle du téléphone 6. Installer le support de montage bureau/mur au socle de téléphone Après l’installation des quatre (4) piles alkalines AA se référer au tableau ci-dessous: État du Alimentation électrique courant LED... -
Page 127: Recomposition Du Dernier Numéro
OFF, lever le combiné. Le combiné sera en mode attente. Presser la touche TALK pour recevoir un appel. Référer à BOOST Clarity Power et Contrôle du vol- ume pour information sur l’ajustement du contrôle du volume aux page 121. -
Page 128: Tonalité Temporaire
Fonctionnement des canaux Le C4210 cherche et sélectionne automatiquement le plus clair des 40 canaux quand il est en utilisation. Si de l’interférence apparaît sur la ligne, presser cette touche fera passer à un autre canal. -
Page 129: Code De Sécurité
RÉGLAGE DES FONCTIONS Code de sécurité Le code de sécurité empêche les conversations de votre téléphone d’être accessibles d’un téléphone sur une ligne différente. Une fois le bloc-piles du combiné pleinement chargé, le combiné sélection- nera automatiquement le code à partir de 65,000 combinaisons différentes. - Page 130 RÉGLAGE DES FONCTIONS montrera PHONEBOOK pendant 1 seconde et ensuite affichera le premier dossier disponible. 3. Presser la touche PROG pour ajouter un nouveau dossier de téléphone. 4. Si l’annuaire est plein, l’écran indiquera PHON BOOK FULL pendant 1 seconde avec aussi un message d’erreur.
-
Page 131: Changer Un Numéro En Mémoire
RÉGLAGE DES FONCTIONS 1. Trouver le dossier de l’annuaire que vous désirez appeler. 2. Presser la touche TALK ou ENTER pour composer le numéro affiché. Effacer un numéro entreposé 1. L’appareil doit être en mode attente et l’écran montre un dossier de l’annuaire. 2. -
Page 132: Ajouter Le Numéro D'urgence
RÉGLAGE DES FONCTIONS fichera PHONEBOOK pendant 1 seconde et ensuite affiche le prochain dossier disponible. 3. Presser la touche HAUT( ) ou BAS ( ) pour ▲ ▼ aller au dossier à être changé, e.g.ABC, 567 4. Presser la touché # pour changer le dossier téléphonique. -
Page 133: Composer Le Numéro D'urgence
RÉGLAGE DES FONCTIONS aller au dossier à être entreposé à la touche URGENCE. 4. Presser et tenir la touche URGENCE pendant 2 secondes. 5. Le numéro de téléphone est copié à la touche URGENCE. Le ACL indiquera MEM STORING pendant une (1) seconde et le combiné donnera un message de succès. -
Page 134: Fonctionnement De L'affichage
(IVMA) (VMWI) NOTE: C’est un service qui est pourvu par votre compagnie de téléphone locale. Si le C4210 trouve qu’il y a des messages vocaux à être récupérés, il allumera l’indicateur de message en attente (la touche ENTER). Pour récupérer le message vocal, presser la touche ENTER pendant que l’indicateur est allumé. - Page 135 RÉGLAGE DES FONCTIONS chiffres restants. Recevoir l’affichage de l’appel en attente Quand vous êtes sur un appel en cours, vous en- tendrez un bip et l’écran montrera l’information de l’appelant de l’appel en attente entrant. Si vous accédez à l’appel en attente, l’information sur l’appelant disparaîtra et l’écran heure/jour apparaîtra.
- Page 136 RÉGLAGE DES FONCTIONS pour dérouler l’information de la liste d’appelants à partir du plus ancien dossier. Si le numéro de l’appelant a plus de douze (12) chif- fres, l’ACL basculera le message affiché entre les 12 premiers chiffres et les chiffres restants. Si la liste d’appelants est vide, l’écran montrera - NO CALLS -.
- Page 137 RÉGLAGE DES FONCTIONS pour effacer toutes erreurs. Presser DEL/CH pour reculer le curseur d’un caractère. Ensuite presser n’importe quelle touche numérique pour remplacer le caractère. 7. Presser ENTER pour confirmer le nom. 8. L’écran affichera NUMBER STORED d’abord. Ensuite il montre le nom et le numéro juste sauvegardés.
- Page 138 RÉGLAGE DES FONCTIONS 10 chiffres sans un préfixe 1: Si le code régional du numéro de l’appelant est dif- férent de celui entreposé, les numéros composés peuvent être de 10 chiffres sans un préfixe 1. 10 chiffres avec un préfixe 1: Si le code régional du numéro de l’appelant est différent du code régional entreposé, les numéros composés peuvent être 1 + 10 chiffres.
-
Page 139: Effacer L'information De L'appelant
RÉGLAGE DES FONCTIONS Exemple 2: Le code du service interurbain entreposé: 1. Code régional entreposé: 770. Le numéro de l’appel entrant entreposé 413-456- 7890. 1. Presser la touche ENTER montrera 413-456- 7890 clignotant. 2. Presser la touche TALK ou ENTER de nouveau composera 4134567890. - Page 140 • Il retournera en attente automatiquement après 30 secondes s’il n’y a aucune action. Le C4210 a été conçu pour donner des années de service fiable avec un minimum de soins. Pour assurer un rendement optimal, suivre ces directives dans l’entretien de votre appareil: 1.
-
Page 141: Entretien Et Soins
ENTRETIEN ET SOINS • S’assurer que les piles du combiné sont complètement chargées. • Vérifier que le téléphone est dans le bon mode de composition, tonalité (touche) ou impulsion (à cadran). • S’assurer que vous êtes dans la partie utilisable de la portée de votre socle. -
Page 142: Dépannage
DÉPANNAGE Bruit, statique, interférence ou autres appels entendus lors de l’utilisation du combiné: • Essayer de changer de canaux. • S’assurer que l’antenne du combiné est dans une position verticale. • S’assurer que vous êtes dans la partie utilisable de la portée de votre socle. - Page 143 DÉPANNAGE Difficulté à placer ou recevoir des appels: • Approcher plus près du socle et essayer de nouveau. • Si approcher ne fonctionne pas, vous pouvez avoir perdu le code de sécurité. • Réinitialiser le code en replaçant le combiné sur son socle pendant 5 à...
- Page 144 CONFORMITÉ RÉGLEMENTAIRE Partie 68 des réglementaires FCC (conseil fédéral de l’audiovisuel aux États-Unis) a) Cet équipement est conforme à la partie 68 des réglementaires FCC et les exigences adoptés par le ACTA. Il y a une étiquette sous l’appareil qui con- tient, entre autres, un identificateur de produit en format US:AAAEQ##TXXXX.
- Page 145 Si vous faites l’expérience de problèmes avec cet appareillage téléphonique, pour toute informations concernant les réparations ou les garanties, veuillez contacter Clarity au 1-800-552-3368. Si cet appareil- lage cause des dommages au réseau téléphonique, la compagnie de téléphone pourrait vous demander de débrancher votre équipement jusqu’à...
- Page 146 CONFORMITÉ RÉGLEMENTAIRE j) Cet équipement téléphonique est compatible avec les prothèses auditives. Téléphones à monnaie/carte de crédit Pour respecter les tariffs, la compagnie téléphonique doit être averti avant le branchement. Dans certains États, la commission de l’entreprise de services pub- lics, la commission du service public ou la commis- sion corporative avant le branchement.
- Page 147 CONFORMITÉ RÉGLEMENTAIRE 1. Quand sa peut être fait en toute sécurité, réorienté l’antenne récepteur de la télévision ou de la radio. 2. Si possible, éloignez le téléphone sans fil du téléviseur, la radio ou autre source de réception 3. Branchez l’équipement téléphonique dans une prise ou un circuit autre que celle de la télévision, de la radio, ou d’autre récepteur.
- Page 148 (Le terme “IC:” devant le numéro de certification signifie uniquement que les spécifications de Indust- rie Canada ont été rencontrées.) Le responsable pour conformité règlementaire: Clarity, Une Division de Plantronics, Inc. 4289 Bonny Oaks Drive, Bureau 106 Chattanooga,TN 37406 Tél. : 1-800-552-3368...
-
Page 149: Garantie Et Service
Clarity ou un centre de service autorisé par Clarity, n’est pas couvert sous cette garantie. Les compagnie de téléphone fabriquent de différent types d’équipement et Clarity... - Page 150 Information concernant les Garanties Pour obtenir de l’information concernant le service de Garantie, veuillez expedier l’unité port-prépayé a l’une des installations compétentes ci-bas mentionnés. Aux États-Unis Centre de Service Clarity 4289 Bonny Oaks Drive, Bureau 106 Chattanooga,Tennessee 37406...
- Page 151 GARANTIE ET SERVICE Tél: (423) 622-7793 ou (800) 426-3738 Fax: (423) 622-7646 ou (800) 325-8871 Au Canada Centre de Service Plantronics 8112 Trans-Canada Ville Saint-Laurent, Que. H4S 1M5 Tél: (800) 540-8363 (514) 956-8363 Fax: (514) 956-1825 Veuillez vous servir de l’emballage original, ou emballez bien le (les) unité(s) dans un carton rigide avec suffisamment d’emballage pour prevenir les dommages.
- Page 152 4289 Bonny Oaks Drive, Suite 106 Chattanooga,TN 37406 1-800-552-3368 www.clarityproducts.com Made in China ©2005 Clarity, a Division of Plantronics, Inc.All rights reserved. Clarity, Clarity Professional, C4210, Digital Clarity Power and DCP are trademarks or registered trademarks of Plantronics, Inc. PM010406_RevC...
Need help?
Do you have a question about the C4210 and is the answer not in the manual?
Questions and answers