Table of Contents
Advertisement
Advertisement
Table of Contents

Related Manuals for Sharp DV-NC100


Summary of Contents for Sharp DV-NC100
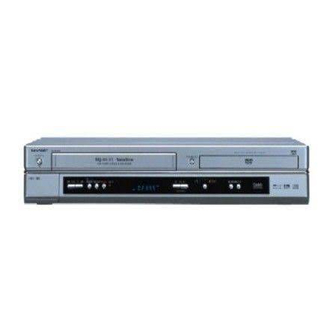
- Page 1 VCR/DVD COMBINATION MODEL DV-NC100 ( RU ) OPERATION MANUAL Please read this Operation Manual carefully before using your VCR/DVD COMBINATION. DV-NC100 OPERATE OPEN/CLOSE STOP/ OUTPUT PULL OPEN EJECT PLAY TIMER STOP PLAY (TRACKING) The region number for this VCR/DVD is 5.
-
Page 2: Safety Information
SAFETY INFORMATION Power Cord Protection NOTE: To avoid any malfunctions of the VCR/DVD, and to protect This VCR/DVD can be used only where the power supply against electric shock, fire or personal injury, please observe is AC 220V-240V, 50Hz. It cannot be used elsewhere. the following. -
Page 3: Safety Information
VCR/DVD. impair the image quality. At the worst, neither video nor audio Auto Head Cleaning will be played back. Contact your authorised Sharp supplier for details. • Automatically cleans video heads as you insert or remove a cassette, so you can see a clear picture. -
Page 4: Features
FEATURES ¡ Search Chapter search / Title search / Track search / Time search ¡ Dolby Digital sound ¡ Repeat This VCR/DVD can handle Dolby Digital surround sound Chapter / Title / Track / Group / All / A-B having 5.1 channels when connected to a Dolby Digital ¡... -
Page 5: Table Of Contents
INTRODUCTION Supplied Accessories • Remote control • Round coaxial cable • Two R-6 batteries • Audio cable • Operation Manual • Video cable • SCART output adaptor Manufactured under license from Dolby Laboratories. “DTS” and “DTS Digital Out” are trademarks of Digital “Dolby”... -
Page 6: About The Discs
Read carefully the information located at the bottom of your VCR/DVD and enter below the Serial No.Retain this information for future reference. Model No.: VCR/DVD COMBINATION: DV-NC100(RU) Serial No.: __________________________ The following discs cannot be played back on this VCR/DVD: ¡... -
Page 7: Functional Overview
FUNCTIONAL OVERVIEW FRONT PANEL DV-NC100 OPERATE OPEN/CLOSE STOP/ OUTPUT PULL OPEN EJECT PLAY TIMER STOP PLAY (TRACKING) 1. OPERATE 12. Remote Sensor To turn the unit ON or OFF. 13. TIMER indicator The indicator is on when this unit is turned on. -
Page 8: Remote Control
FUNCTIONAL OVERVIEW REMOTE CONTROL OPERATE OPEN/CLOSE 1. DISPLAY Button SETUP DISPLAY EJECT • Press to display the current playback mode.(DVD) SUBTITLE ANGLE AUDIO MARKER • Press to display the current time, tape counter and MODE ZOOM channel number.(VCR) 2. OPERATE Button TITLE MENU Press to turn the power on and off. -
Page 9: Display
FUNCTIONAL OVERVIEW Display Lights up when the Lights up when the A-B repeat function is on. Lights up timer recording or an when a tape OTR recording has is inserted. been set. Lights up when the Lights up when repeat function is on. the ALL repeat function is on. -
Page 10: Setting Up Your Vcr/Dvd Combination
SETTING UP YOUR VCR/DVD COMBINATION CAUTION: • Be sure to turn off the VCR/DVD and equipment to be connected before connecting. • Read through the operation manual for the equipment to be connected. • Be sure to keep the VCR/DVD connection cables separate from the TV antenna cable when you install the VCR/DVD, because it may cause electrical interference when you are watching television programmes. -
Page 11: Connecting To Audio Equipment
SETTING UP YOUR VCR/DVD COMBINATION Connecting to Audio Equipment Connecting the VCR/DVD to audio equipment provides normal stereo sound, plus powerful stereo sound enhanced by Dolby Digital 5.1 channel surround sound, DTS and MPEG Audio. Playing 2 channel audio C C Analogue audio connection AERIAL DIGITAL ANALOG... -
Page 12: Playing Dolby Digital (5.1 Channel), Dts Or Mpeg Audio
SETTING UP YOUR VCR/DVD COMBINATION Playing Dolby Digital (5.1 channel), DTS or MPEG audio Connecting an amplifier with a Dolby Digital, DTS, or MPEG Audio digital surround processor to your VCR/DVD’s coaxial dig- ital jack provides richer and more powerful audio play. C C Digital connection to a processor or amplifier with a coaxial digital input jack You can make this connection using a coaxial digital cable. -
Page 13: Setting The Clock
VCR/DVD SET UP • Enter a channel numbers as a two-digit number for the Setting the Clock quickest results. For example, to select channel 6, press 0 This VCR/DVD incorporates a 24-hour clock. The clock must and 6. If you only press 6, channel 6 will be selected after a be set for the Timer Recording function to operate correctly. -
Page 14: To Skip A Preset Channel
VCR/DVD SET UP To Skip a Preset Channel Channel Reprogramming The channels you can no longer receive or seldom watch You can replace two channels. can be set to be skipped when you access channels with Press VCR, then MENU. CH (o o /p p ). -
Page 15: Recording
VCR OPERATION Recording • Reception of stereo broadcasts: Viewing and Recording the Same Programme Display on Mode AUDIO OUTPUT the TV screen Insert a cassette tape with its erase-prevention tab in place. (If necessary, rewind or fast forward the tape to the L Audio point at which you want to begin recording.) Stereo... -
Page 16: Auto Repeat Playback
Monday through Press B until the desired mode (NORMAL, SOFT, or Friday. While the month digit is flashing, press K or L SHARP) is indicated on the TV screen. repeatedly to select MO-FR. Press MENU to exit. -
Page 17: Auto Return
VCR OPERATION To correct timer programmes Index Search If you want to correct an automatic timer after you finished • The index mark will be made automatically when setting programme, REC/OTR is pressed. It will also be marked at the starting Repeat steps in the “Timer Recording”... -
Page 18: Copying A Video Tape
VCR OPERATION Copying a Video Tape Video Cassette Tape You can make copies of videotapes made by friends or rela- This VCR/DVD will operate with any cassette that bears the tives for your own enjoyment. VHS mark. For best results, we recommend the use of high- WARNING: Unauthorised recordings of copyrighted quality tapes. -
Page 19: Playing A Disc
PLAYING A DISC Basic Playback General Features DVDs or Video CDs may contain menus to navigate the disc DVD-RW and access special features. Enter an appropriate number or VR mode JPEG use Arrow ( / s / B) to highlight your selection in the Getting started DVD main menu and press ENTER to confirm. -
Page 20: Title Menu
PLAYING A DISC Resume Title Menu DVD-RW without PBC function VR mode Press TITLE. During playback, press STOP. • The title menu will appear. • Resume message will appear on the TV screen. If the feature is not available, symbol may appear on Press PLAY, playback will resume from the point at the TV screen. -
Page 21: Fast Forward / Reverse Search
PLAYING A DISC Track Search Fast Forward / Reverse Search DVD-RW JPEG VR mode without PBC function There are three ways to begin playback on an Audio CD, During playback, press FWD g or REV h repeatedly Video CD, MP3 or JPEG disc at a specific Track. to select the required forward or reverse speed. -
Page 22: Repeat
PLAYING A DISC Repeat Programme (CD) • REPEAT are available only during playback. You may determine the order in which tracks will play. Press MODE (playback must first be stopped). To activate the repeat function, press REPEAT during playback. • The PROGRAM screen •... -
Page 23: Mp3/Jpeg Playback
PLAYING A DISC Kodak Picture CD MP3/JPEG Playback The VCR/DVD can also run JPEG files stored on Kodak JPEG Picture CDs. The Picture CD is a service to convert pho- tographs taken by a conventional film camera into digital data When a CD with MP3 or JPEG files is inserted in the and write the data on a CD. -
Page 24: Slide Show Mode
PLAYING A DISC Slide Show Mode Audio Language JPEG DVD-RW VR mode You can switch to the slide show mode during playback. The VCR/DVD allows you to select a language during DVD Press MODE during playback. disc (if multi language available) playback. •... -
Page 25: Subtitle Language
PLAYING A DISC Subtitle Language Changing the On-Screen Display DVD-RW DVD-RW VR mode VR mode You can check information about the current disc by pressing The VCR/DVD allows you to select a language for subtitle DISPLAY on the remote control. during DVD disc (if available) playback. -
Page 26: Marker Setup Screen
PLAYING A DISC Marker Setup Screen Virtual Surround DVD-RW DVD-RW without PBC function VR mode VR mode Use markers to memorise your favourite places on a disc. You can enjoy surround sound effect over two speakers. Press MARKER during playback. Press MODE repeatedly until the •... -
Page 27: Dvd Setup
DVD SETUP Audio Setting Parental Control Choose appropriate settings for best sound reproduction Parental Control prevents disc being viewed that exceed the dependent on your externally connected equipment. These set limit, unless a password is used. This feature allows you to prevent discs with unsuitable settings only affect DVD playback. -
Page 28: Display Setting
DVD SETUP Display Setting Language Setting You can change certain aspects of the DVD display screens, Language options are not available with some discs. on-screen messages and the display panel on the front of the Press SETUP in STOP mode. VCR/DVD. -
Page 29: Language Code List
DVD SETUP Language Code List Language Code Language Code Language Code Language Code Galician 5358 Maltese 5966 Swahili 6569 Abkhazian 4748 Georgian 5747 Maori 5955 Swedish [SWE] 6568 Afar 4747 German [GER] 5051 Marathi 5964 Afrikaans 4752 Greek [GRE] 5158 Moldavian 5961 Tagalog... -
Page 30: Troubleshooting Guide
TROUBLESHOOTING GUIDE If the VCR/DVD does not perform properly when operated as instructed in this Operation Manual, check the VCR/DVD, con- sulting the following checklist. Problem Solution No power –Check if the AC power cord is properly connected. No picture –Check if the TV is switched on. -
Page 31: Specifications
SPECIFICATIONS PRODUCT TYPE WOW AND FLUTTER DVD Player with Video Cassette recorder Below the measurement limitation (+/-0.001% W PEAK) (JEITA) NUMBER OF VIDEO HEADS CONNECTIONS Front panel: VIDEO SIGNAL STANDARD Video input RCA connector [ 1 PAL/MESECAM colour system Audio input RCA connector [ 2 AUDIO RECORDING SYSTEM Rear panel:... - Page 32 SHARP CORPORATION 1VMN20137 H9744RD ★★★★★ 9HS1VMN20137...
Need help?
Do you have a question about the DV-NC100 and is the answer not in the manual?
Questions and answers