Casio XJ-H1750 Function Manual
Data projectors usb function guide
Hide thumbs
Also See for XJ-H1750:
- User manual (64 pages) ,
- Function manual (48 pages) ,
- Setup manual (26 pages)
Table of Contents
Advertisement
Quick Links
DATA PROJECTOR
XJ-H1650/XJ-H1750/XJ-H2650
XJ-ST145/XJ-ST155
Data Projector
USB Function Guide
Be sure to read the precautions in the Quick Start Guide that comes with the Data Projector.
Be sure to keep all user documentation handy for future reference.
To obtain the latest version of this manual visit the website at the URL below.
http://world.casio.com/manual/projector/
Microsoft, Windows, Windows Vista and PowerPoint are registered trademarks or trademarks of
Microsoft Corporation in the United States and other countries.
ArcSoft and the ArcSoft logo are trademarks or registered trademarks of ArcSoft, Inc. in the
United States and other countries.
Macintosh, Mac OS and QuickTime are trademarks or registered trademarks of Apple, Inc. in the
United States and other countries.
Other company and product names may be registered product names or trademarks of their
respective owners.
The contents of this manual are subject to change without notice.
Copying of this manual, either in part or its entirety, is forbidden. You are allowed to use this
manual for your own personal use. Any other use is forbidden without the permission of CASIO
COMPUTER CO., LTD.
CASIO COMPUTER CO., LTD. shall not be held liable for any lost profits or claims from third
parties arising out of the use of this product, the software described in this manual, or this
manual.
CASIO COMPUTER CO., LTD. shall not be held liable for any loss or lost profits due to loss of
data due to malfunction or maintenance of this product, or any other reason.
The sample screens shown in this manual are for illustrative purposes only, and may differ
somewhat from the screens actually produced by the product.
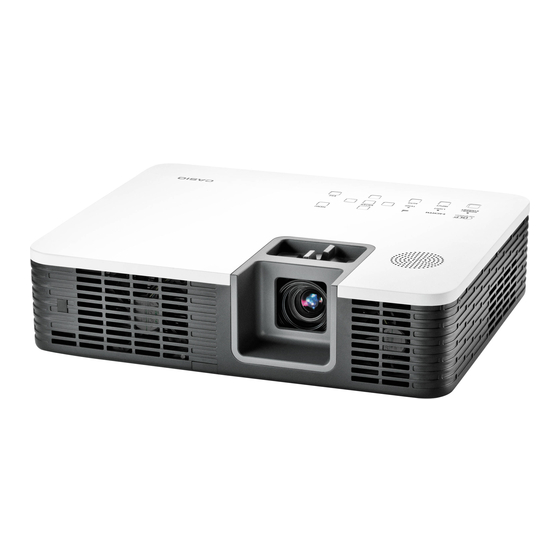
Unless specifically stated otherwise, all illustrations in this manual show the XJ-H1650.
1
E
Advertisement
Table of Contents

Related Manuals for Casio XJ-H1750


Summary of Contents for Casio XJ-H1750
- Page 1 CASIO COMPUTER CO., LTD. shall not be held liable for any loss or lost profits due to loss of data due to malfunction or maintenance of this product, or any other reason.
-
Page 2: Table Of Contents
Connecting a USB Device to the Data Projector ..7 Installing the Software............ 8 Minimum System Requirements.................. 8 Installing EZ-Converter FA................... 9 Installing ArcSoft MediaConverter 3 for CASIO Projector ......... 10 Installing Multi Projection Camera Update Software..........11 Projecting the Contents of Files on a Memory Device.............. 12 Using EZ-Converter FA to Convert PowerPoint Files to ECA or PtG Files ......................12... - Page 3 Performing a Presentation Using the YC-400/YC-430 Document Camera ............41 YC Camera Application Function and Operation Overview ....41 Connecting the Document Camera to the Data Projector......... 41 YC Camera Application Operations .............44 YC Camera Application Projection Operations ............44 Configuring YC Camera Application Setup Menu Settings ........48 Projecting the Screen Image of a Graphing Calculator............
-
Page 4: About This Manual
Use of a memory device (page 5) requires separate purchase of commercially available USB memory or other memory. Use of a CASIO Multi Projection Camera or graphic scientific calculator requires separate purchase of the required device by you. Note that these products may not be available in some geographic areas. -
Page 5: About The Data Projector's Usb Functions
About the Data Projector’s USB Functions The USB port built into the Data Projector lets you connect an external USB device and use it as an input source for image projection. USB Memory Device or Memory Card After you connect a memory device to the Data Projector’s USB port, you can playback (project) the following types of files. - Page 6 Document Camera (CASIO YC-400/YC-430) You can connect a CASIO Document Camera to the Data Projector’s USB port and project the images of documents placed on the document stage of the YC-400/YC-430. YC-400/YC-430 For more information, see “Performing a Presentation Using the YC-400/YC-430 Document Camera”...
-
Page 7: Connecting A Usb Device To The Data Projector
Connecting a USB Device to the Data Projector What happens when you connect a USB device while the Data Projector is turned on depends on the current configuration of the Data Projector’s plug-and-play setting. Plug-and-play is enabled under the Data Projector’s initial default settings. For more details about the plug-and-play setting, see “Setup Menu Contents”... -
Page 8: Installing The Software
EZ-Converter FA Software for converting a PowerPoint file to an ECA file or PtG file that can be played back on the projector. ArcSoft MediaConverter 3 for CASIO Projector Software for converting movie files. Multi Projection Camera Update Software Software for updating the firmware of the YC-400 Multi Projection Camera. -
Page 9: Installing Ez-Converter Fa
Installing EZ-Converter FA To download the software from the CASIO website and install it Visit the CASIO website (page 8) and download “EZ-Converter FA” to your computer. Double-click the file you downloaded. Follow the instructions that appear on your computer screen. -
Page 10: Installing Arcsoft Mediaconverter 3 For Casio Projector
Installing ArcSoft MediaConverter 3 for CASIO Projector To download the software from the CASIO website and install it Visit the CASIO website (page 8) and download “ArcSoft MediaConverter 3 for CASIO Projector” to your computer. Double-click the file you downloaded. -
Page 11: Installing Multi Projection Camera Update Software
1.1 or higher. For information about how to check the firmware version of a camera, refer to the documentation below. “YC-400 Firmware Update Software ver.1.1”, which can be downloaded from the CASIO website (page 8) “YC-Update_Guide_English.pdf”, which can be found in the “English” folder inside the “User’s Guide”... -
Page 12: Projecting The Contents Of Files On A Memory Device
How to use EZ-Converter FA computer software to convert PowerPoint files to files that can be played back with the Data Projector’s Viewer function. How to use ArcSoft MediaConverter 3 for CASIO Projector computer software to convert movie files to files that can be played back with the Data Projector’s Viewer function. -
Page 13: Starting Up And Exiting Ez-Converter Fa
Perform either of the following operations to start up EZ-Converter FA on the computer. Double-click the icon on your Windows desktop. On your computer’s Windows Start menu, select [All Programs] - [CASIO] - [EZ-Converter FA]. Important! If your computer is running Windows Vista or Windows 7, starting up EZ-Converter FA may cause the “User Account Control”... -
Page 14: Converting A Powerpoint File To An Eca File Or Ptg File
Converting a PowerPoint File to an ECA File or PtG File Important! Before performing any of the operations here, you will need to have a file created using Microsoft Office PowerPoint 2003, 2007 or 2010 on hand. Conversion of a PowerPoint file to an ECA file or PtG file requires playback of the original file from beginning to end. - Page 15 Select the PowerPoint file you want to convert from and then click the [Open] button. This will display a dialog box like the one shown below for specifying the file settings. Configure the settings as required on the dialog box. The following describes the meanings and settings of each of the items that appear on the dialog box.
- Page 16 The following shows the resolution settings that should be used for each Data Projector model. Model Resolution XJ-H1650, XJ-H1750, XJ-ST145, XJ-ST155 1024 × 768, 800 × 600 XJ-H2650 1280 × 800, 1280 × 768, 1024 × 768 *1 If you cannot select the 1024 × 768 resolution, select 800 × 600.
-
Page 17: Using Arcsoft Mediaconverter 3 For Casio Projector
Using ArcSoft MediaConverter 3 for CASIO Projector ArcSoft MediaConverter 3 for CASIO Projector is computer software that converts an MP4, MOV AVI, or WMV format file to a Motion JPEG format AVI file that can be played by the projector’s Viewer function. - Page 18 To convert a movie file to a format that can be played by Viewer Double-click the icon on your computer desktop. This starts up ArcSoft MediaConverter 3 for CASIO Projector and displays a window like the one shown below. CASIO Projector device icon Drop the original movie file into the ArcSoft MediaConverter 3 for CASIO Projector window or onto the CASIO Projector device icon.
-
Page 19: Using Viewer To Project The Contents Of A File On A Memory Device
The Data Projector does not support connection of all commercially available USB memory devices, memory cards, and digital cameras. For details about specific supported memory devices, contact your original retailer or your nearest authorized CASIO dealer. To connect USB memory to the Data Projector... - Page 20 To connect a memory card to the Data Projector Load the memory card into a USB card reader’s card slot. For details about how to load a memory card into the USB card reader, see the user documentation that comes with the reader. Connect the USB card reader to the Data Projector’s USB port.
-
Page 21: Starting Projection With Viewer
Starting Projection with Viewer If the Data Projector is already turned on when you perform the procedure under “Connecting a Memory Device to the Data Projector” (page 19) to connect USB memory to the Data Projector, the main Viewer window shown below will be projected. Menu Item Function Refer to:... - Page 22 Drive Menu Entering the Presentation Mode, Slide Mode, or Movie Mode while there are multiple memory devices connected to the Data Projector (multiple USB memory devices connected via a USB hub, multiple memory cards loaded in the memory card reader connected to the Data Projector, etc.) will cause a menu like the one shown below to appear on the projection screen.
-
Page 23: Projecting An Eca File Or Ptg File
Projecting an ECA File or PtG File Use the Viewer Presentation Mode to project ECA or PtG files. To project an ECA file or PtG file Connect the memory device where the ECA file or PtG file you want to project is stored to the Data Projector. - Page 24 Operations during ECA File or PtG File Projection The operations described below can be performed while an ECA file or PtG file is playing. To do this: Perform this operation: Go to the previous page Press the [ ] key. Go to the next page Press the [ ] key.
- Page 25 Page Menu Operations Pressing the [O] key while an ECA file or PtG file is being played will project a page menu like the one shown below. The operations described below can be performed while the page menu is being projected. To do this: Perform this operation: Re-start file playback from a...
-
Page 26: Projecting An Image File
Projecting an Image File Use the Viewer Slide Mode to project image files. You can also group image files and project them in a specific sequence as a slideshow. To project an image file Connect the memory device where the image file you want to project is stored to the Data Projector. -
Page 27: Projecting A Slideshow
Projecting a Slideshow The Data Projector’s Slide Mode lets you group multiple image files and project them in sequence as a slideshow. You can select either manual playback or auto playback for slideshow image display. The initial default setting is manual playback. To prepare image files for slideshow play Note the following points when preparing your slideshow on your computer. -
Page 28: Projecting A Movie File
Movie files of some formats can be converted to a format that is supported by Viewer playback. To convert a movie, use ArcSoft MediaConverter 3 for CASIO Projector, which you can download from the CASIO website (page 8). For information about installing the software, see “Installing the Software”... - Page 29 To project a movie file Connect the memory device where the movie file you want to project is stored to the Data Projector. This will project the main Viewer window. If the main Viewer window does not appear, press the [INPUT] key and select “USB” as the input source. Use the cursor keys to move the highlighting to “Movie”...
- Page 30 Operations during Movie File Projection The operations described below can be performed while a movie file is playing or paused. To do this: Perform this operation: Pause and resume movie playback Press the [ENTER] key. A pause icon ( ) is displayed in the upper left corner of the projection screen while movie projection is paused.
-
Page 31: File Menu Operations
Perform the operations described below as required. To do this: Press this key: Quit a fast forward or fast reverse operation and resume normal playback [ENTER] Stop playback and return to the file menu [ESC] File Menu Operations This section explains operations you can perform while the file list is displayed in the Presentation, Slide, or Movie Mode. - Page 32 To toggle the file menu between the list view and icon view Press the [FUNC] key and then the [ENTER] key. Note You can specify either the list view or icon view as the default view. For more information, see “Configuring Viewer Settings”...
- Page 33 To view file properties Display the file menu list view. Use the [ ] and [ ] keys to move the highlighting to the file whose properties you want to view. A thumbnail and the properties of the currently highlighted file will appear on the left side of the file menu.
-
Page 34: Configuring Viewer Settings
To return to the main Viewer window Press the [FUNC] key. On the function menu that appears, use the cursor keys to move the highlighting to “Back to Viewer Selection” and then press the [ENTER] key. Configuring Viewer Settings You can use the Viewer setup menu to configure the Viewer function settings described below. The initial default setting for each item is indicated by an asterisk (*). - Page 35 To display the Viewer setup menu Perform either of the following operations. Operation 1 Project the main Viewer window. If you are playing a file in the Presentation, Slide, or Movie Mode, pause playback and return to the file menu. Next, press [FUNC], then [ ], then [ENTER]. Use the cursor keys to move the highlighting to “Viewer Setup”...
- Page 36 To configure Viewer settings Display the Viewer setup menu. Use the [ ] and [ ] keys to move the highlighting to the item whose setting you want to change. Use the [ ] and [ ] keys to display the available settings. After configuring all the settings you want, press the [ESC] key (or press the [FUNC] key and then the [ENTER] key).
-
Page 37: Autorun
Autorun Autorun automatically starts projection of still image files or movie files stored in connected USB memory when the Projector is turned on. Important! The Projector’s Plug and Play setting must be turned on (enabled) in order to use Autorun. For details about how to change the Plug and Play setting, see “Setup Menu Contents”... -
Page 38: Viewer Troubleshooting
Viewer Troubleshooting Refer to the following whenever Viewer operations are not what you expect. Memory Devices Problem Cause and Required Action Viewer does not appear when I The USB memory you are connecting may have a format that cannot be connect USB memory to the Data recognized by the Data Projector. -
Page 39: File Display And Playback
File Display and Playback Problem Cause and Required Action ECA or PtG files converted from Viewer may be in a mode other than the Presentation Mode. To enter the PowerPoint files using Presentation Mode, highlight “Presentation” on the main Viewer window EZ-Converter FA do not appear in (page 21) and then press the [ENTER] key. -
Page 40: Viewer Error Messages
(page 5). Some movie file formats can be converted to a format supported for Data Projector playback using software (ArcSoft MediaConverter 3 for CASIO Projector) that is downloadable from the CASIO website (page 8). There may be an error in the movie file itself. Open the movie file on your... -
Page 41: Performing A Presentation Using The Yc-400/Yc-430 Document Camera
Performing a Presentation Using the YC-400/YC-430 Document Camera This section explains how to connect the CASIO YC-400/YC-430 Multi Projection Camera (document camera) to the Data Projector in order to project the images of documents placed on the document stage of the document camera. The Data Projector’s built-in application named YC Camera is used to project document images. - Page 42 To connect the document camera to the Data Projector and project the image of a document Turn on the Data Projector. Wait until the Data Projector’s POWER/STANDBY indicator is lit green. Connect the document camera to the Data Projector using the USB cable that comes bundled with the document camera.
- Page 43 Place the document whose image you want to project onto the document camera’s document stage. Be sure to place the document in the center of the stage, and do not let any part of the document extend off the edges of the stage. When placing a landscape orientation document onto the document stage, the top of the page should face towards the camera stand.
-
Page 44: Yc Camera Application Operations
YC Camera Application Operations This section explains the various types of projection operations you can perform with the YC Camera application and how to configure YC Camera application settings. Important! The procedures in this section assume that you have already connected the Document Camera to the Data Projector as explained under “Connecting the Document Camera to the Data Projector”... - Page 45 To adjust the document camera’s zoom setting Press the [FUNC] key to display the YC Camera application function menu. Use the [ ] key to move the highlighting to “Camera Zoom/Focus” and then press the [ENTER] key. This causes the YC Camera Zoom/Focus dialog box to appear in the projection area. The “Optical Zoom”...
- Page 46 To adjust the camera position Remove all documents and objects from the document stage. Press the [FUNC] key to display the YC Camera application function menu. Use the [ ] key to move the highlighting to “Adjust Camera Position” and then press the [ENTER] key.
- Page 47 To perform white enhancement on the currently projected image Note White enhancement causes the background of the projected image to be white enhanced, which helps to make the text on a document easier to read. This operation will affect only the image that is currently being projected. The projection image produced the next time you release the shutter will be projected in accordance with the settings on the YC Camera Application Setup Menu (page 48).
-
Page 48: Configuring Yc Camera Application Setup Menu Settings
Configuring YC Camera Application Setup Menu Settings You can use the YC Camera setup menu to configure various YC Camera application operation settings. To configure YC Camera application setup menu settings Press the [MENU] key to display the setup menu. Press the [ ] key to move the highlighting to “USB”... - Page 49 To restore all settings on the YC Camera application setup menu to their initial factory defaults Press the [MENU] key to display the setup menu. Press the [ ] key to move the highlighting to “USB” and then press the [ENTER] key.
- Page 50 YC Camera Application Setup Menu Contents This section provides detailed explanations of all of the items included on the YC Camera application setup menu. The initial default setting for each item is indicated by an asterisk (*). Setting Name Description Operation Mode Specifies whether recording of documents placed on the document stage of the document camera should be performed automatically or manually.
- Page 51 Setting Name Description Skew Correction Specifies whether or not skew correction should be performed automatically on the projected image. On*: Turns on automatic skew correction. Off: Turns off automatic skew correction. Project Document Specifies whether or not the camera’s monitor image should be projected when a document Monitor Image is removed from the document stage.
-
Page 52: Projecting The Screen Image Of A Graphing Calculator
Projecting the Screen Image of a Graphing Calculator You can connect a CASIO graphing calculator to the Data Projector using a USB cable and project the calculator’s screen image with the Data Projector. USB connection of the following CASIO graphing calculators is supported. - Page 53 Important! If an hourglass figure appears in the image projected from the Data Projector when you connect the calculator, perform some operation on the calculator. This should cause the hourglass to disappear and enable normal projection. If the calculator does not operate properly after you connect it to the Data Projector, try disconnecting the USB cable from the calculator and then reconnecting it.
- Page 54 This Software is open source code. Anyone who wishes to view the open source code can do so by downloading it from the CASIO Projector download site. Whenever copying, modifying, or distributing This Software, be sure to do so in accordance with the terms and conditions of the GPL and LGPL.
- Page 55 GNU GENERAL PUBLIC LICENSE Version 2, June 1991 Copyright (C) 1989, 1991 Free Software Foundation, Inc. 51 Franklin Street, Fifth Floor, Boston, MA 02110-1301, USA Everyone is permitted to copy and distribute verbatim copies of this license document, but changing it is not allowed. Preamble The licenses for most software are designed to take away your freedom to share and change it.
- Page 56 TERMS AND CONDITIONS FOR COPYING, DISTRIBUTION AND MODIFICATION 0. This License applies to any program or other work which contains a notice placed by the copyright holder saying it may be distributed under the terms of this General Public License. The “Program”, below, refers to any such program or work, and a “work based on the Program”...
- Page 57 These requirements apply to the modified work as a whole. If identifiable sections of that work are not derived from the Program, and can be reasonably considered independent and separate works in themselves, then this License, and its terms, do not apply to those sections when you distribute them as separate works.
- Page 58 5. You are not required to accept this License, since you have not signed it. However, nothing else grants you permission to modify or distribute the Program or its derivative works. These actions are prohibited by law if you do not accept this License. Therefore, by modifying or distributing the Program (or any work based on the Program), you indicate your acceptance of this License to do so, and all its terms and conditions for copying, distributing or modifying the Program or works based on it.
- Page 59 10.If you wish to incorporate parts of the Program into other free programs whose distribution conditions are different, write to the author to ask for permission. For software which is copyrighted by the Free Software Foundation, write to the Free Software Foundation; we sometimes make exceptions for this.
- Page 60 END OF TERMS AND CONDITIONS How to Apply These Terms to Your New Programs If you develop a new program, and you want it to be of the greatest possible use to the public, the best way to achieve this is to make it free software which everyone can redistribute and change under these terms.
- Page 61 GNU LESSER GENERAL PUBLIC LICENSE Version 2.1, February 1999 Copyright (C) 1991, 1999 Free Software Foundation, Inc. 51 Franklin Street, Fifth Floor, Boston, MA 02110-1301 USA Everyone is permitted to copy and distribute verbatim copies of this license document, but changing it is not allowed. [This is the first released version of the Lesser GPL.
- Page 62 Most GNU software, including some libraries, is covered by the ordinary GNU General Public License. This license, the GNU Lesser General Public License, applies to certain designated libraries, and is quite different from the ordinary General Public License. We use this license for certain libraries in order to permit linking those libraries into non-free programs.
- Page 63 TERMS AND CONDITIONS FOR COPYING, DISTRIBUTION AND MODIFICATION 0. This License Agreement applies to any software library or other program which contains a notice placed by the copyright holder or other authorized party saying it may be distributed under the terms of this Lesser General Public License (also called “this License”).
- Page 64 d) If a facility in the modified Library refers to a function or a table of data to be supplied by an application program that uses the facility, other than as an argument passed when the facility is invoked, then you must make a good faith effort to ensure that, in the event an application does not supply such function or table, the facility still operates, and performs whatever part of its purpose remains meaningful.
- Page 65 However, linking a “work that uses the Library” with the Library creates an executable that is a derivative of the Library (because it contains portions of the Library), rather than a “work that uses the library”. The executable is therefore covered by this License. Section 6 states terms for distribution of such executables.
- Page 66 For an executable, the required form of the “work that uses the Library” must include any data and utility programs needed for reproducing the executable from it. However, as a special exception, the materials to be distributed need not include anything that is normally distributed (in either source or binary form) with the major components (compiler, kernel, and so on) of the operating system on which the executable runs, unless that component itself accompanies the executable.
- Page 67 It is not the purpose of this section to induce you to infringe any patents or other property right claims or to contest validity of any such claims; this section has the sole purpose of protecting the integrity of the free software distribution system which is implemented by public license practices. Many people have made generous contributions to the wide range of software distributed through that system in reliance on consistent application of that system;...
- Page 68 END OF TERMS AND CONDITIONS How to Apply These Terms to Your New Libraries If you develop a new library, and you want it to be of the greatest possible use to the public, we recommend making it free software that everyone can redistribute and change. You can do so by permitting redistribution under these terms (or, alternatively, under the terms of the ordinary General Public License).
- Page 69 MA1202-A...
Need help?
Do you have a question about the XJ-H1750 and is the answer not in the manual?
Questions and answers